Do you want to change dropdown to button swatches for your variable products?
A dropdown list allows the user to select a single option out of a large number of products.
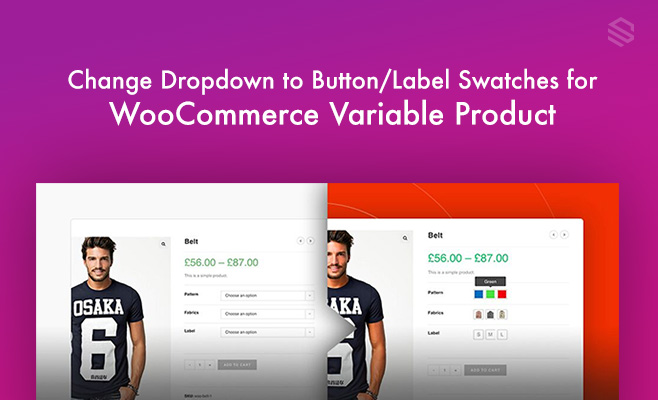
By default, WooCommerce shows variations as dropdown on the product pages.
But when you want to present product variations smartly showing label or button swatches is one of the powerful options you can use.
If you prefer video over text, you can watch the video tutorial below:
When to use Button Variation Swatches
You can use button swatches for showing available color, sizes, quantity, or other variation related details.
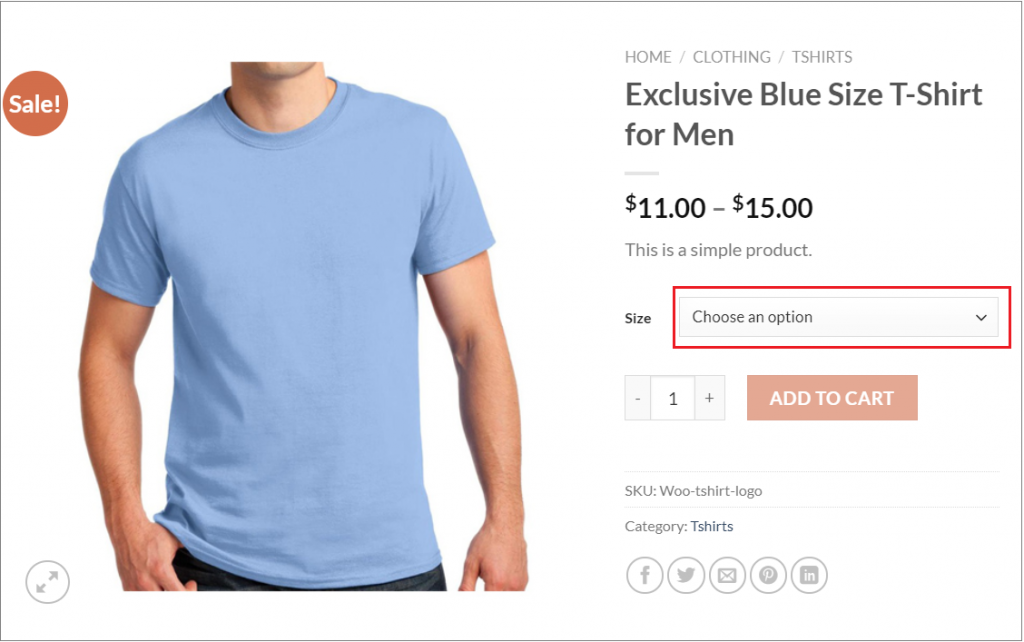
Certain factors, like size or dimension, are difficult to represent visually. Suppose you are selling a T-Shirt having variations (such as small, medium, and large). It’s challenging to show the proper size visually.
You can still make your products attractive by presenting the variants with label/button variation swatches.
That’s how WooCommerce Variation select dropdown for size looks by default –
WooCommerce Variation Swatches plugin helps to convert the variation options dropdown to button swatches. You can easily make your default product variation dropdown into button or label swatches.
You can also convert product variation select dropdown list into color, image, and radio swatches by using the pro version.
Similar topics which you may find helpful:
1. Enable Color Variations in WooCommerce Variable Product
2. Add Image Variation Swatches for Product Attributes.
3. Change Dropdown to Radio Buttons on WooCommerce.
Enable button swatches for WooCommerce
Step 01: Setup Variation Swatches plugin:
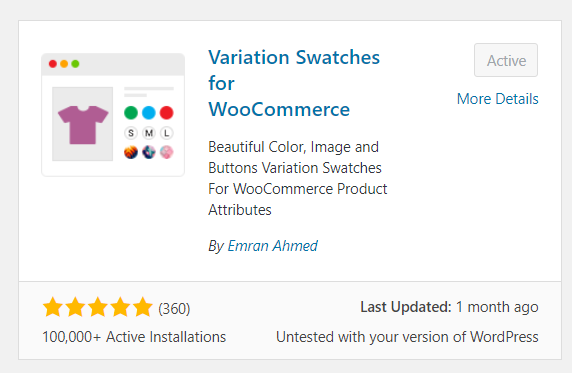
It requires a simple Variation Swatches plugin to enable color, label, and image swatches. You can download the WooCommerce variation swatches plugin or directly install it from your dashboard.
To install directly, follow the below steps:
- Navigate to WordPress Dashboard and Navigate to Plugins.
- After that, click the Add New button.
- Search for Variation Swatches for WooCommerce.
Now install and activate the plugin.
Step 02: Create global attributes and variations:
There is an option to edit existing variations as well.
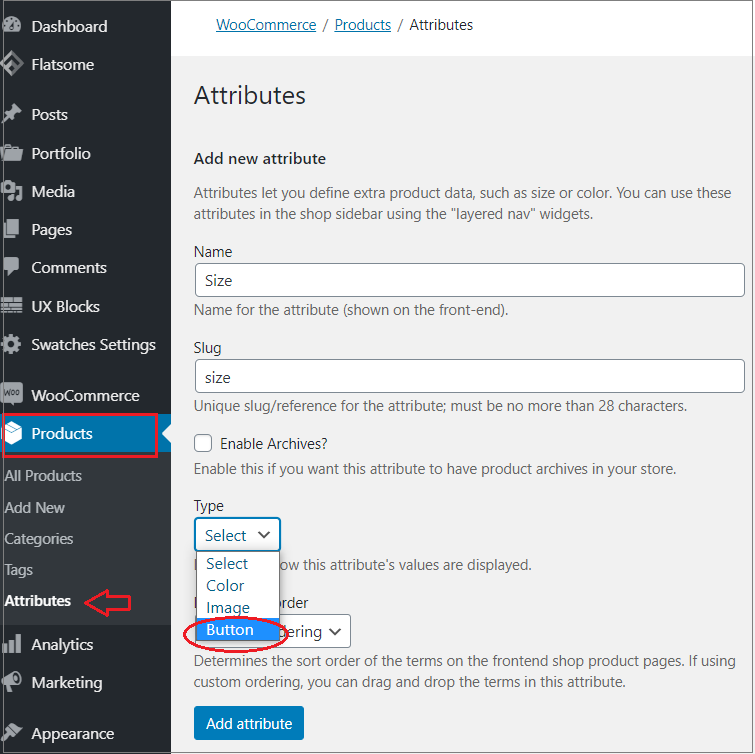
Follow the below steps to add a new attribute:
- Choose ‘Attributes’ in the left menu bar under the ‘Products’ section.
- Add the title of the attribute in the ‘Name’ field.
- The slug field is optional.
- Enter the corresponding attribute type from the Type dropdown.
- Click on the ‘Add attribute’ button to finalize the changes.
Step 03: Create variations for size attributes:
- Select Configure terms links to create variations for button attributes.

- The product Size form appears there.
- Fill in the information and click the ‘Add new Size’ button.
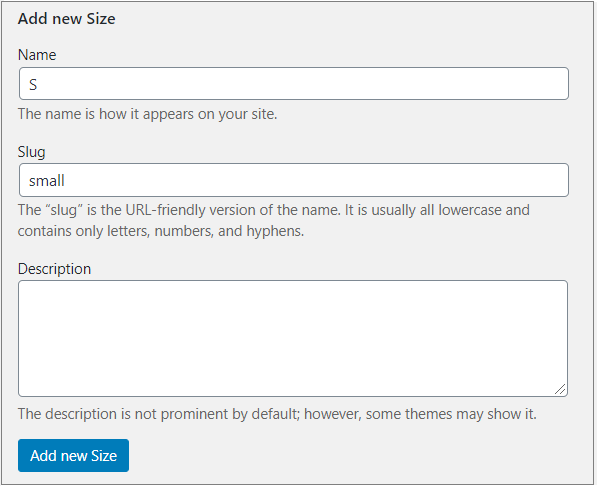
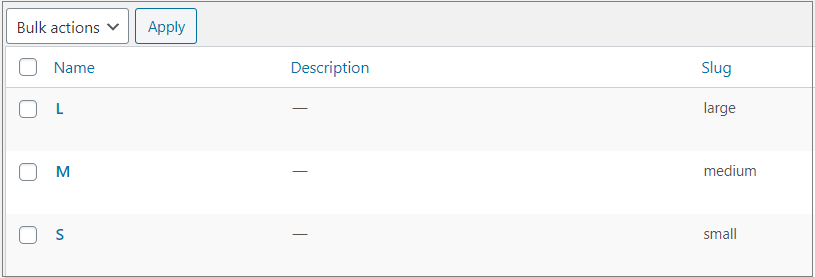
In this tutorial, we will add Small (S), Medium (M), and Large (L) variations.
Step 04: Enable swatches in the variable product page
Now you have to enable swatches on the variable product page.
- Select your desired productsfrom All Products.
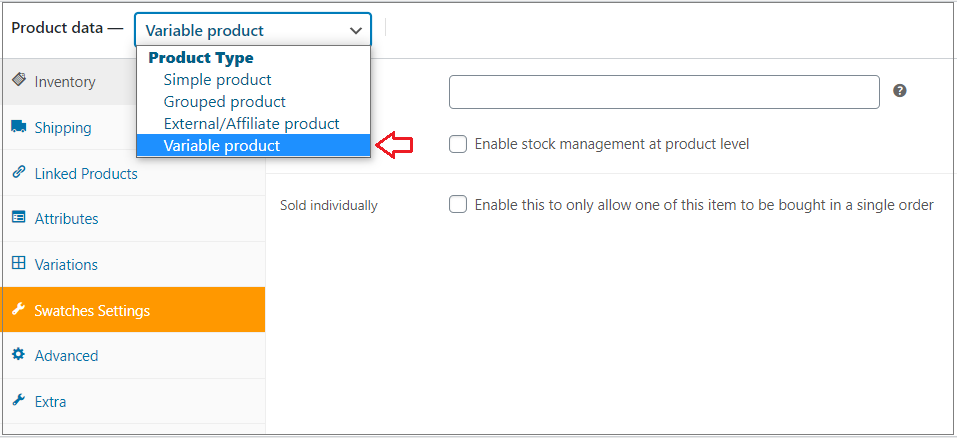
- Head to the ‘Product data’ section.
- Select ‘Variable product’ from the drop-down of the ‘Product data’ section.
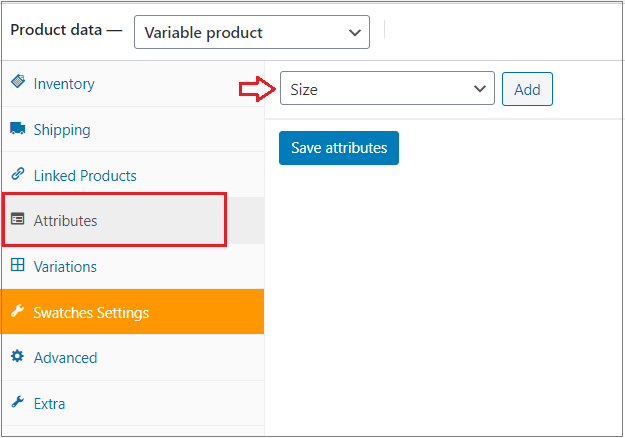
- Head to the ‘Attribute’ tab.
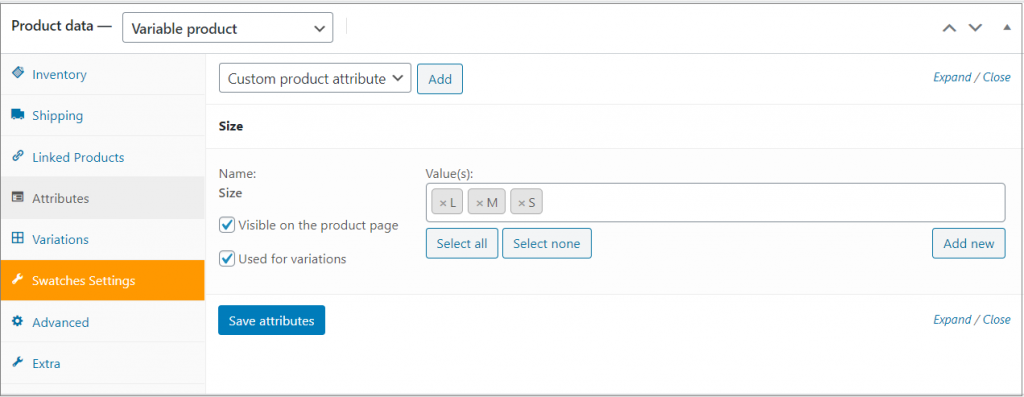
- Select Size attribute from the list.
- All globally created attributes appear here.
- Add Size attribute by clicking on the Add button.
- Click on the Select All button to add all its available variations at once.
- Don’t forget to check both ‘Visible on the product page’ and ‘Used for variations.’
- Then press Save attributes.
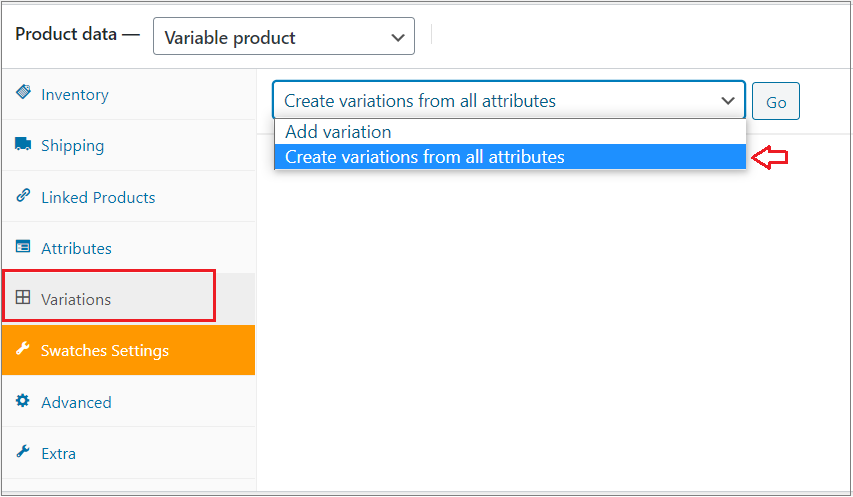
Step 5: Add variations to your product.
- Right below the Attributes, go to the ‘Variations’ section.
- Select ‘Create variations from all attributes’ from the drop-down.
- Press on the Go button.
It’ll add all available variations combinations for ‘Size’ attributes.
Step 6: Customize the rest of the setting
- Expand the variations panel
- This allows you to add different information for each variation.
- There are options to upload an image, add the price, stock status, dimensions, and more.
- But it’s mandatory to set a price for variation.
- Add price and variation image for individual variation.

To finalize the changes, click on Save changes to save the setting.
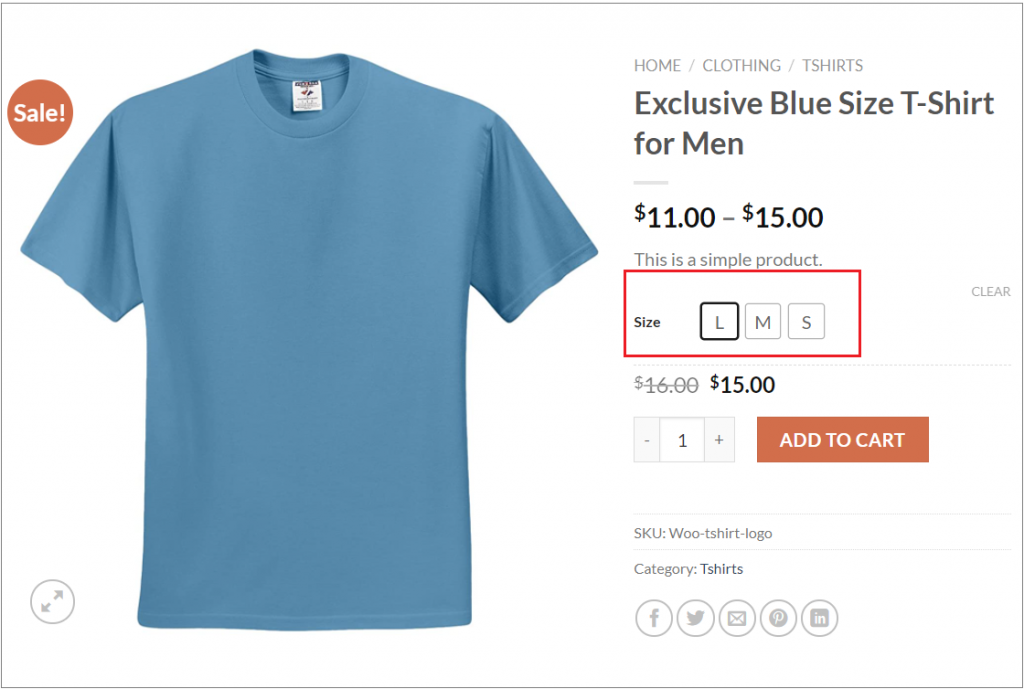
Check the following screenshot. Your default variation select dropdown is displayed into button/label swatches.
I hope, now you can create a significant impact on your WooCommerce store by using label or button swatches.
If you need more tutorials on WooCommerce or Variation Swatches, let me know in the comment section. I’ll write the next tutorial for you.