Custom product attributes are created per product (variable product) and should be used when the attribute is set to only that specific product. It should not be used on any other product in your store.
You may sell a variety of different items that do not share common attributes. For those types of products, you can set custom attributes.
To learn how to create product attributes for your WooCommerce products, read my linked article. The basic concept of WooCommerce variable products is also outlined there.
Once you have created attributes for your WooCommerce products and added specific values of attributes –
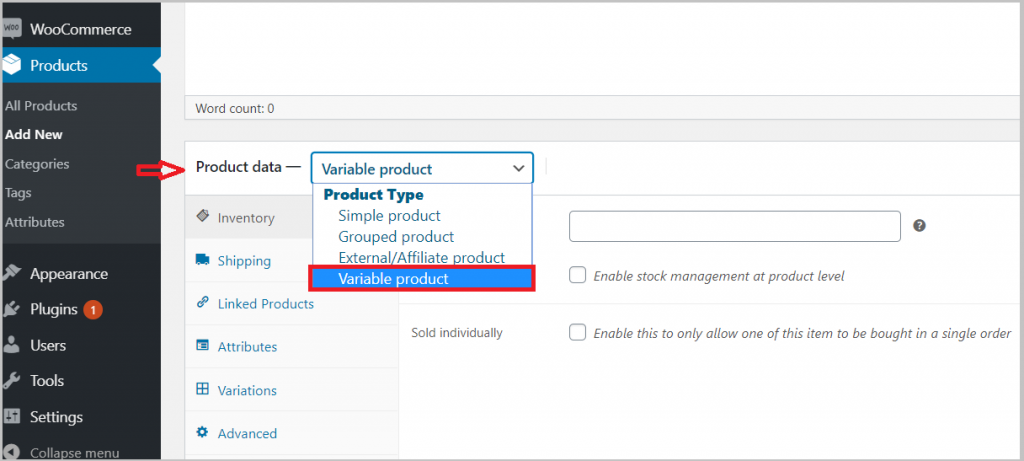
Now select your desired product type:
- Go to ‘Products’ from the left menu bar. You can add either a new item or edit an existing one.
- Select ‘Variable product’ from the drop-down of the ‘Product data’ section.

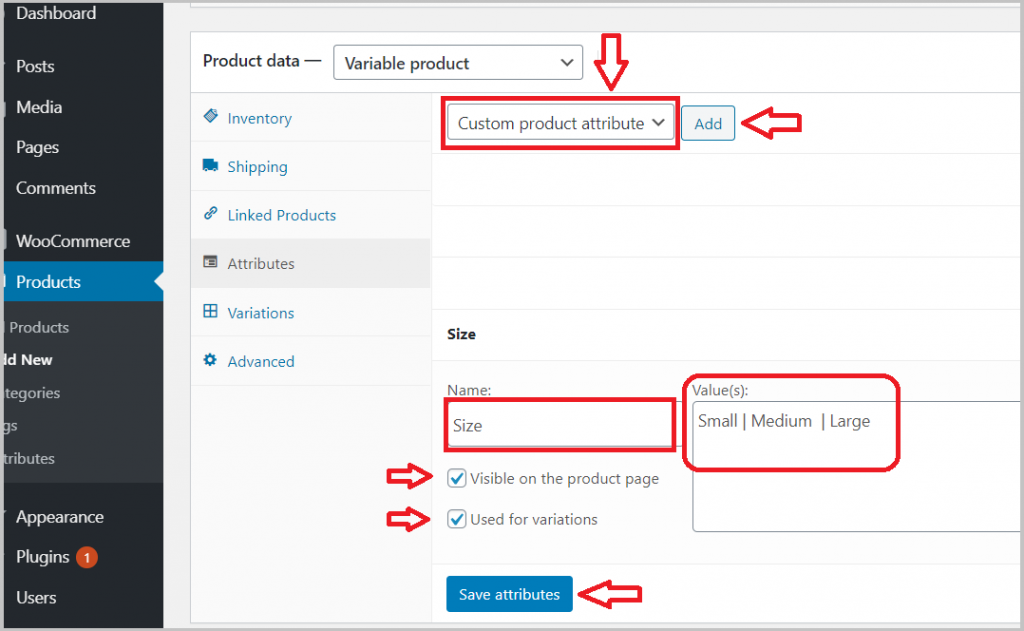
It’s time to add custom product attributes:
- Go to the ‘Attribute’ tab. A list of attributes that you have created for your products is visible here.
- Keep the ‘Custom product attribute’ dropdown selected and click on the ‘Add’ button.
- Enter the name of your attribute in the ‘Name’ field. (for example, size).
- Enter the name of your terms in the ‘Value(s)’ section (for example, small, medium or large).
- Don’t forget to separate each term with this “ | “ symbol.
- Make sure to check both ‘Visible on the product page’ and ‘Used for variations’ for each attribute.
- Then click on ‘Save attributes.

The attributes have been added to your chosen products. Add variations to your selected products and customize the rest of the settings.
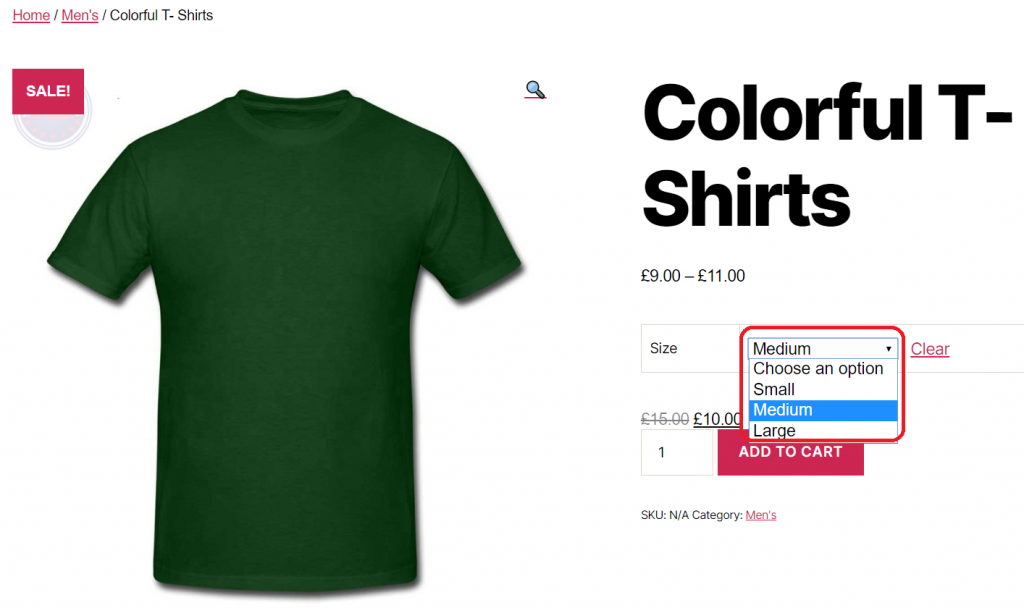
You can see the live result:

This is how your variable product options appear in a dropdown.
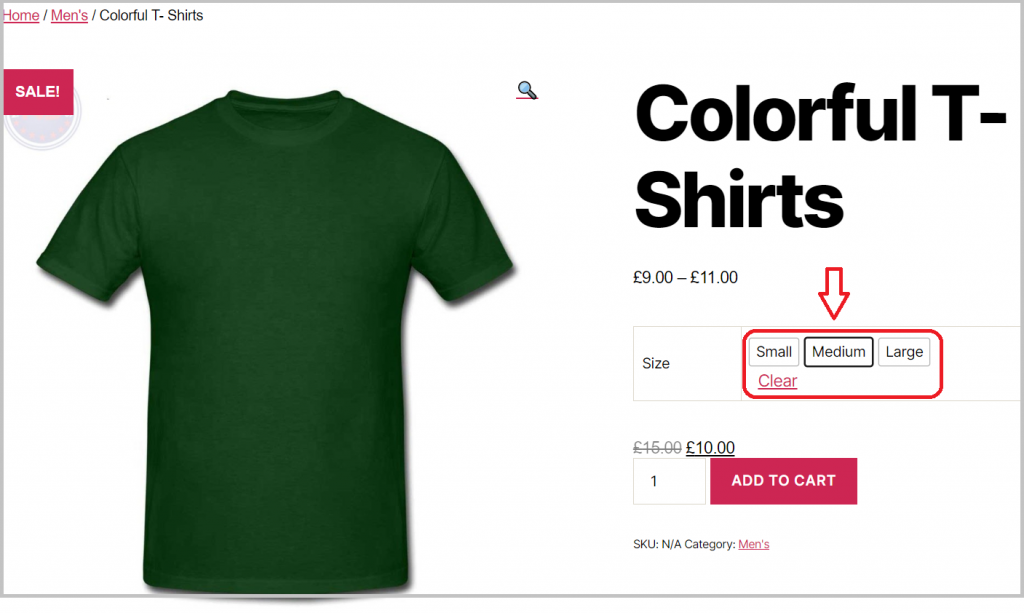
Expand feature with “WooCommerce Variation Swatches Plugin“
See how it turns product attribute select dropdown options into beautiful swatches.

You can download the WooCommerce Variation Swatches Plugin for free, or purchase a license from the main site.
