WordPress is the most popular Content Management System. But it comes with only the basic features to get your website online.
However, the unique part of WordPress is its vast number of plugins that allow you to add more features to your site. There are tons of free and premium plugins that you can choose to fully customize your WP website.
The need for plugins is increasing continuously. If you are using WordPress, you have to deal with plugins at some point.
Hiring experts to get install a plugin might not be an option in all scenarios. That’s why you need to know the step to installing WordPress plugins.
Here, I will discuss 3 different methods of installing WordPress plugins.
Before that, make sure to install WordPress on your computer.
In the following example, we are going to use the WooCommerce plugin. It’s the most popular WordPress plugin to build an eCommerce store.
Install a plugin from the WordPress Plugin Directory (admin dashboard)
The simple and easiest way to install plugins on your WordPress site is to use your WordPress dashboard.
The steps are:
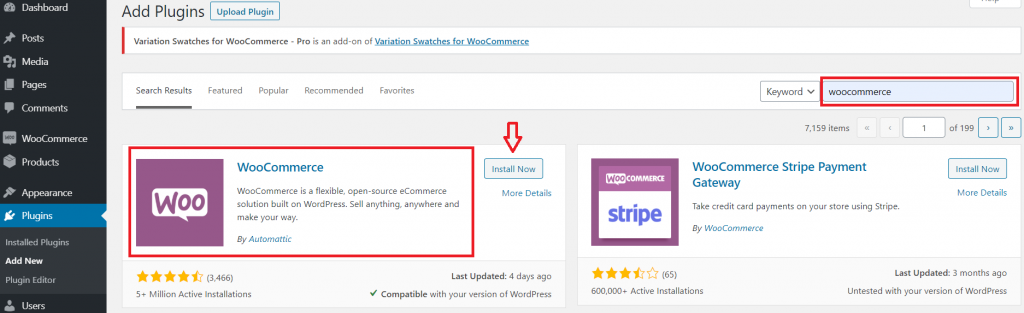
- Go to ‘Plugins’ from the left side admin panel and navigate to ‘Add New’
- You’ll find several tabs that let you switch the list of available plugins.
- Use the top right-hand corner of the search field to find your desired plugin. ( I am showing WooCommerce as an example).
- Simply click on the ‘Install Now’ button.
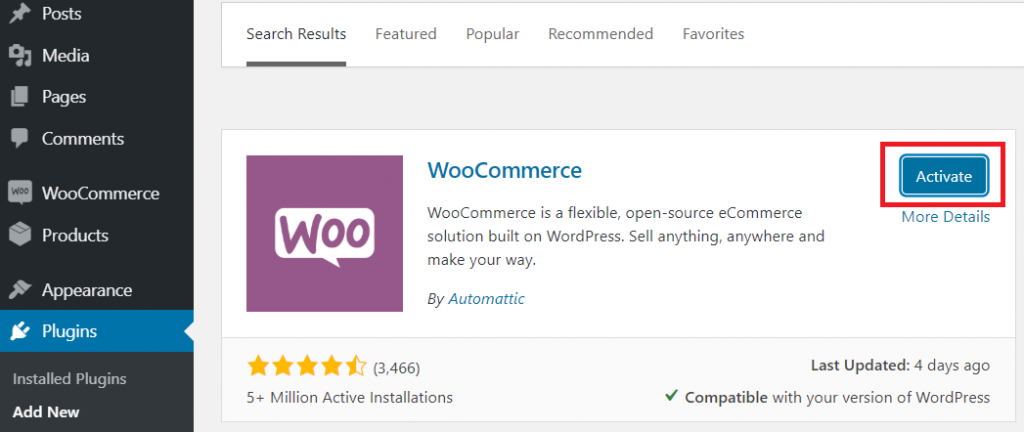
- Once the plugin is installed, the button label will be changed from ‘Install Now’ to ‘Activate’.
- Click on the blue ‘Activate’ button.
- The plugin will be installed, activated and ready to use.
To check and configure the settings of your installed plugins, go to ‘Installed Plugins’ from the ‘Plugins’ section.
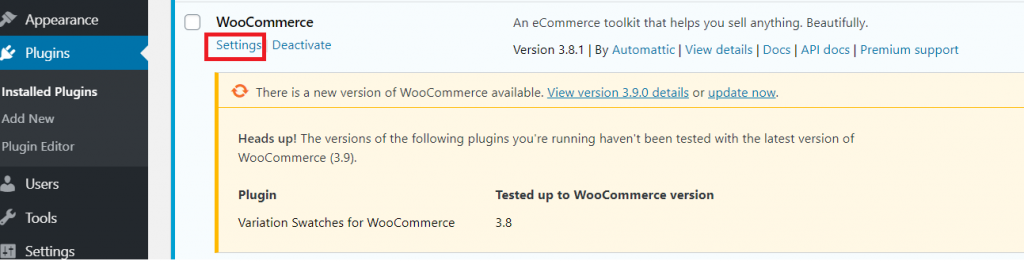
You have successfully installed the WooCommerce plugin. Now, it’ll take the basic WordPress operating system to turn into a fully functioning eCommerce store.
Install a plugin using the upload option (manually)
The best option for installing a premium WordPress plugin is to upload it manually. Premium plugins can’t be installed by using the first method. Moreover, paid plugins are not listed in the WordPress plugin directory.
Before following other steps, you need to purchase your desired plugin from a valid source. I have purchased WooCommerce Variation Swatches and, in the following example, I am going to use this plugin. It is the most popular attribute variation swatches plugin in the WordPress plugin directory.

You may have started using WooCommerce for your online store, and selling physical products like watches, clothes, shoes or anything else. This plugin will help you to turn product variation into color, button, and image as swatches.
Follow these steps to install:
- Download the plugin from the source (.zip file)
- Head to your WordPress dashboard.
- Navigate to the ‘Add New’ page under the ‘Plugins’ section.
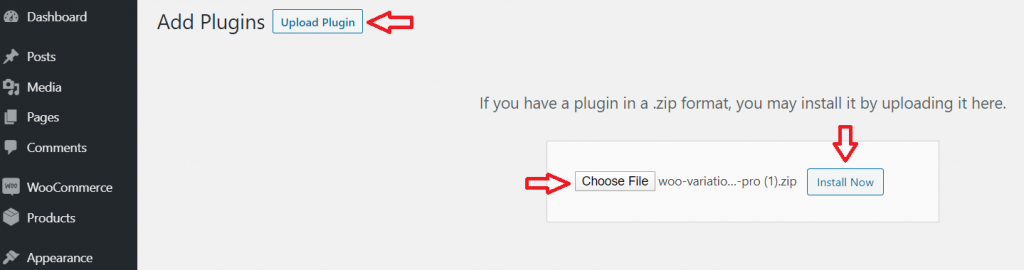
- Click on the ‘Upload Plugin’ button on the top of the page.
- Now select the plugin by clicking on ‘Choose File’.
- Once the file is selected, click on the ‘Install Now’ button.
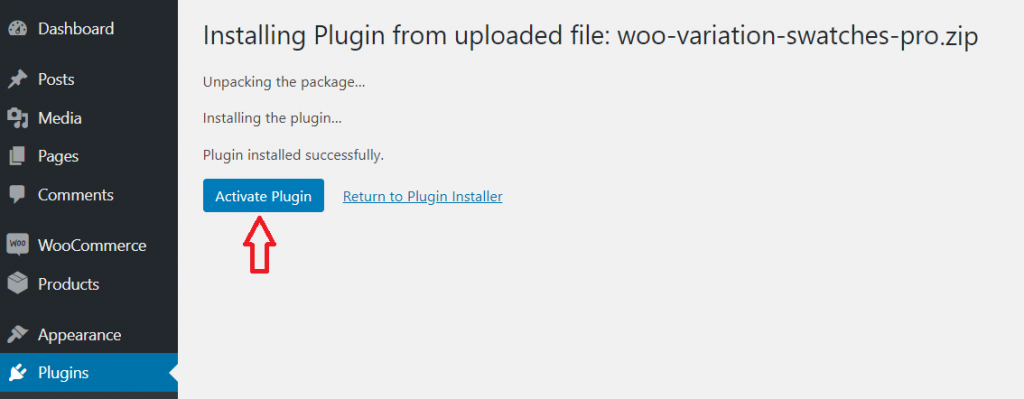
It’ll take some time before the plugin is installed. You’ll see the ‘Activate Plugin’ button when it is done. Press that button.
Install a WordPress plugin manually using FTP
The third way to install WordPress plugins is by using FTP (a File Transfer Protocol). This process is slightly complicated as compared to the other two ways. There are several options for FTP, like FileZilla, FireFTP and etc. Here, I am using FileZilla to show you the process.
Steps to be followed:
- Download the plugins source file and extract the zip file on your computer.
- Establish an FTP connection to your hosting account using login credentials.
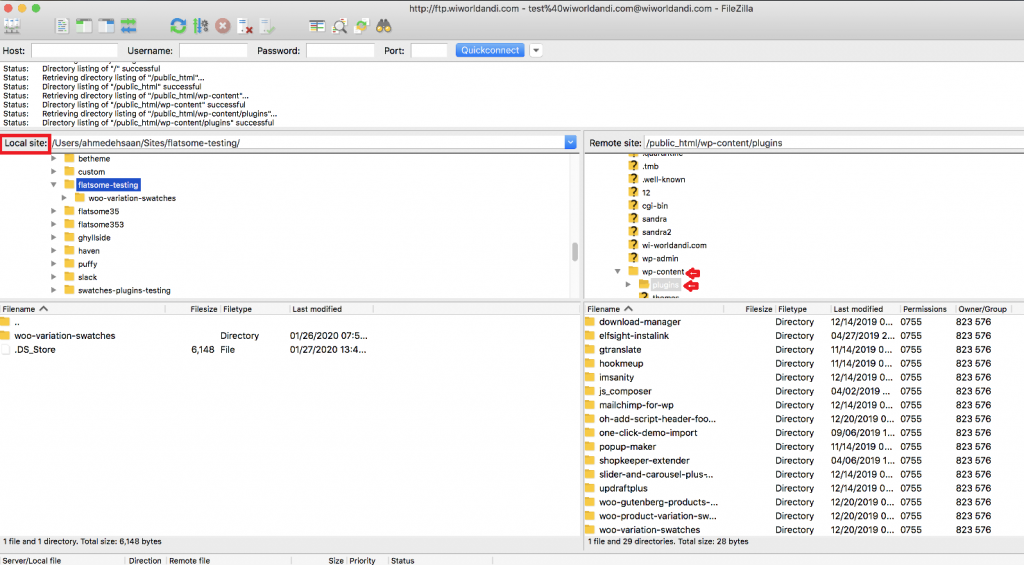
- Navigate and access the path /wp-content/Plugins/
- Open the folder where you store the plugin’s file from the ‘Local Site’ panel.
- Upload the extracted folder from the zip file to your site’s plugin directory.
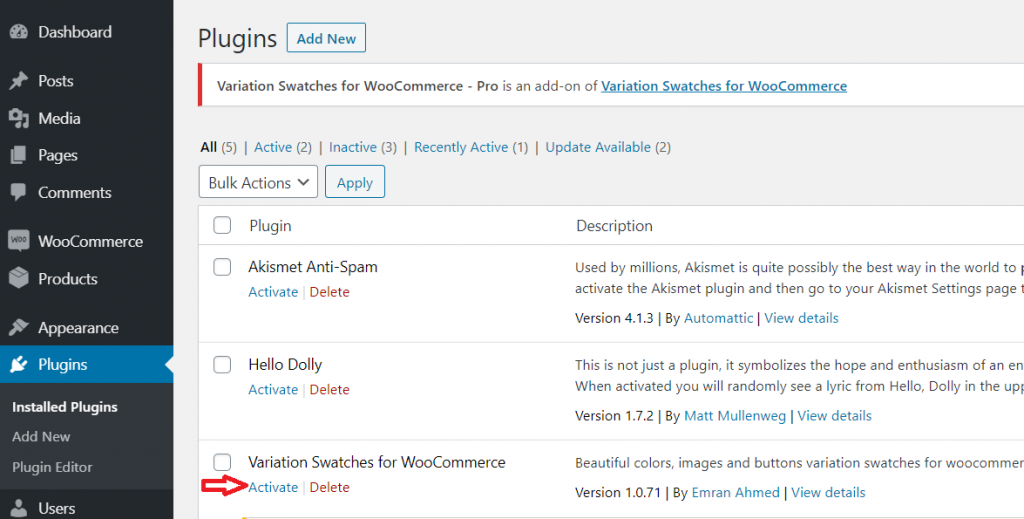
- Once the file is uploaded, visit the WordPress admin dashboard.
- Activate the plugin by clicking on the ‘Activate’ link button.
Once activated, then you may need to configure the plugin settings.
In this article, various methods to install WordPress plugins have been shown. Each of them is different and varies from beginner level to advanced level of difficulty. We hope this guide was helpful to you. So, what are you waiting for?
In addition, you can check out some of the useful WooCommerce plugins for your store that we highly recommend to use. If you still have any queries, feel free to ask in the comment section.
One thought on “How to Install WordPress Plugins – Step by Step Guide”