Table of Contents
1. Installation
AUTOMATIC INSTALL FROM WORDPRESS DASHBOARD
- Login to your the admin panel
- Navigate to Plugins -> Add New
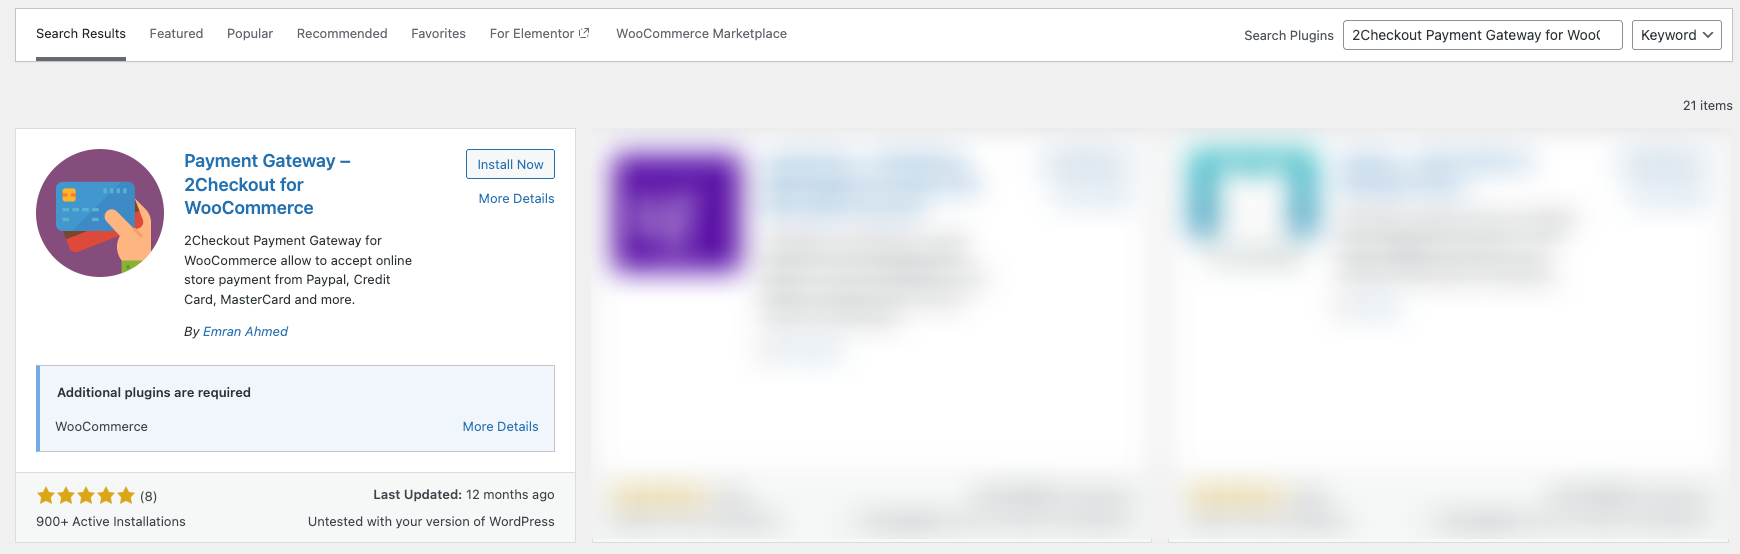
- Search for 2Checkout Payment Gateway for WooCommerce in the search field. Install and Activate WooCommerce 2Checkout Payment Gateway Plugin by Emran Ahmed.
- Click install and activate.
Check following screenshot for guideline.
Enable To 2Checkout From Settings
After activating the plugin, it will be enabled automatically. To verify this, navigate to WooCommerce -> Settings -> Payments. You should see the 2Checkout Payment Gateway listed as active.

How To Create 2Checkout Account
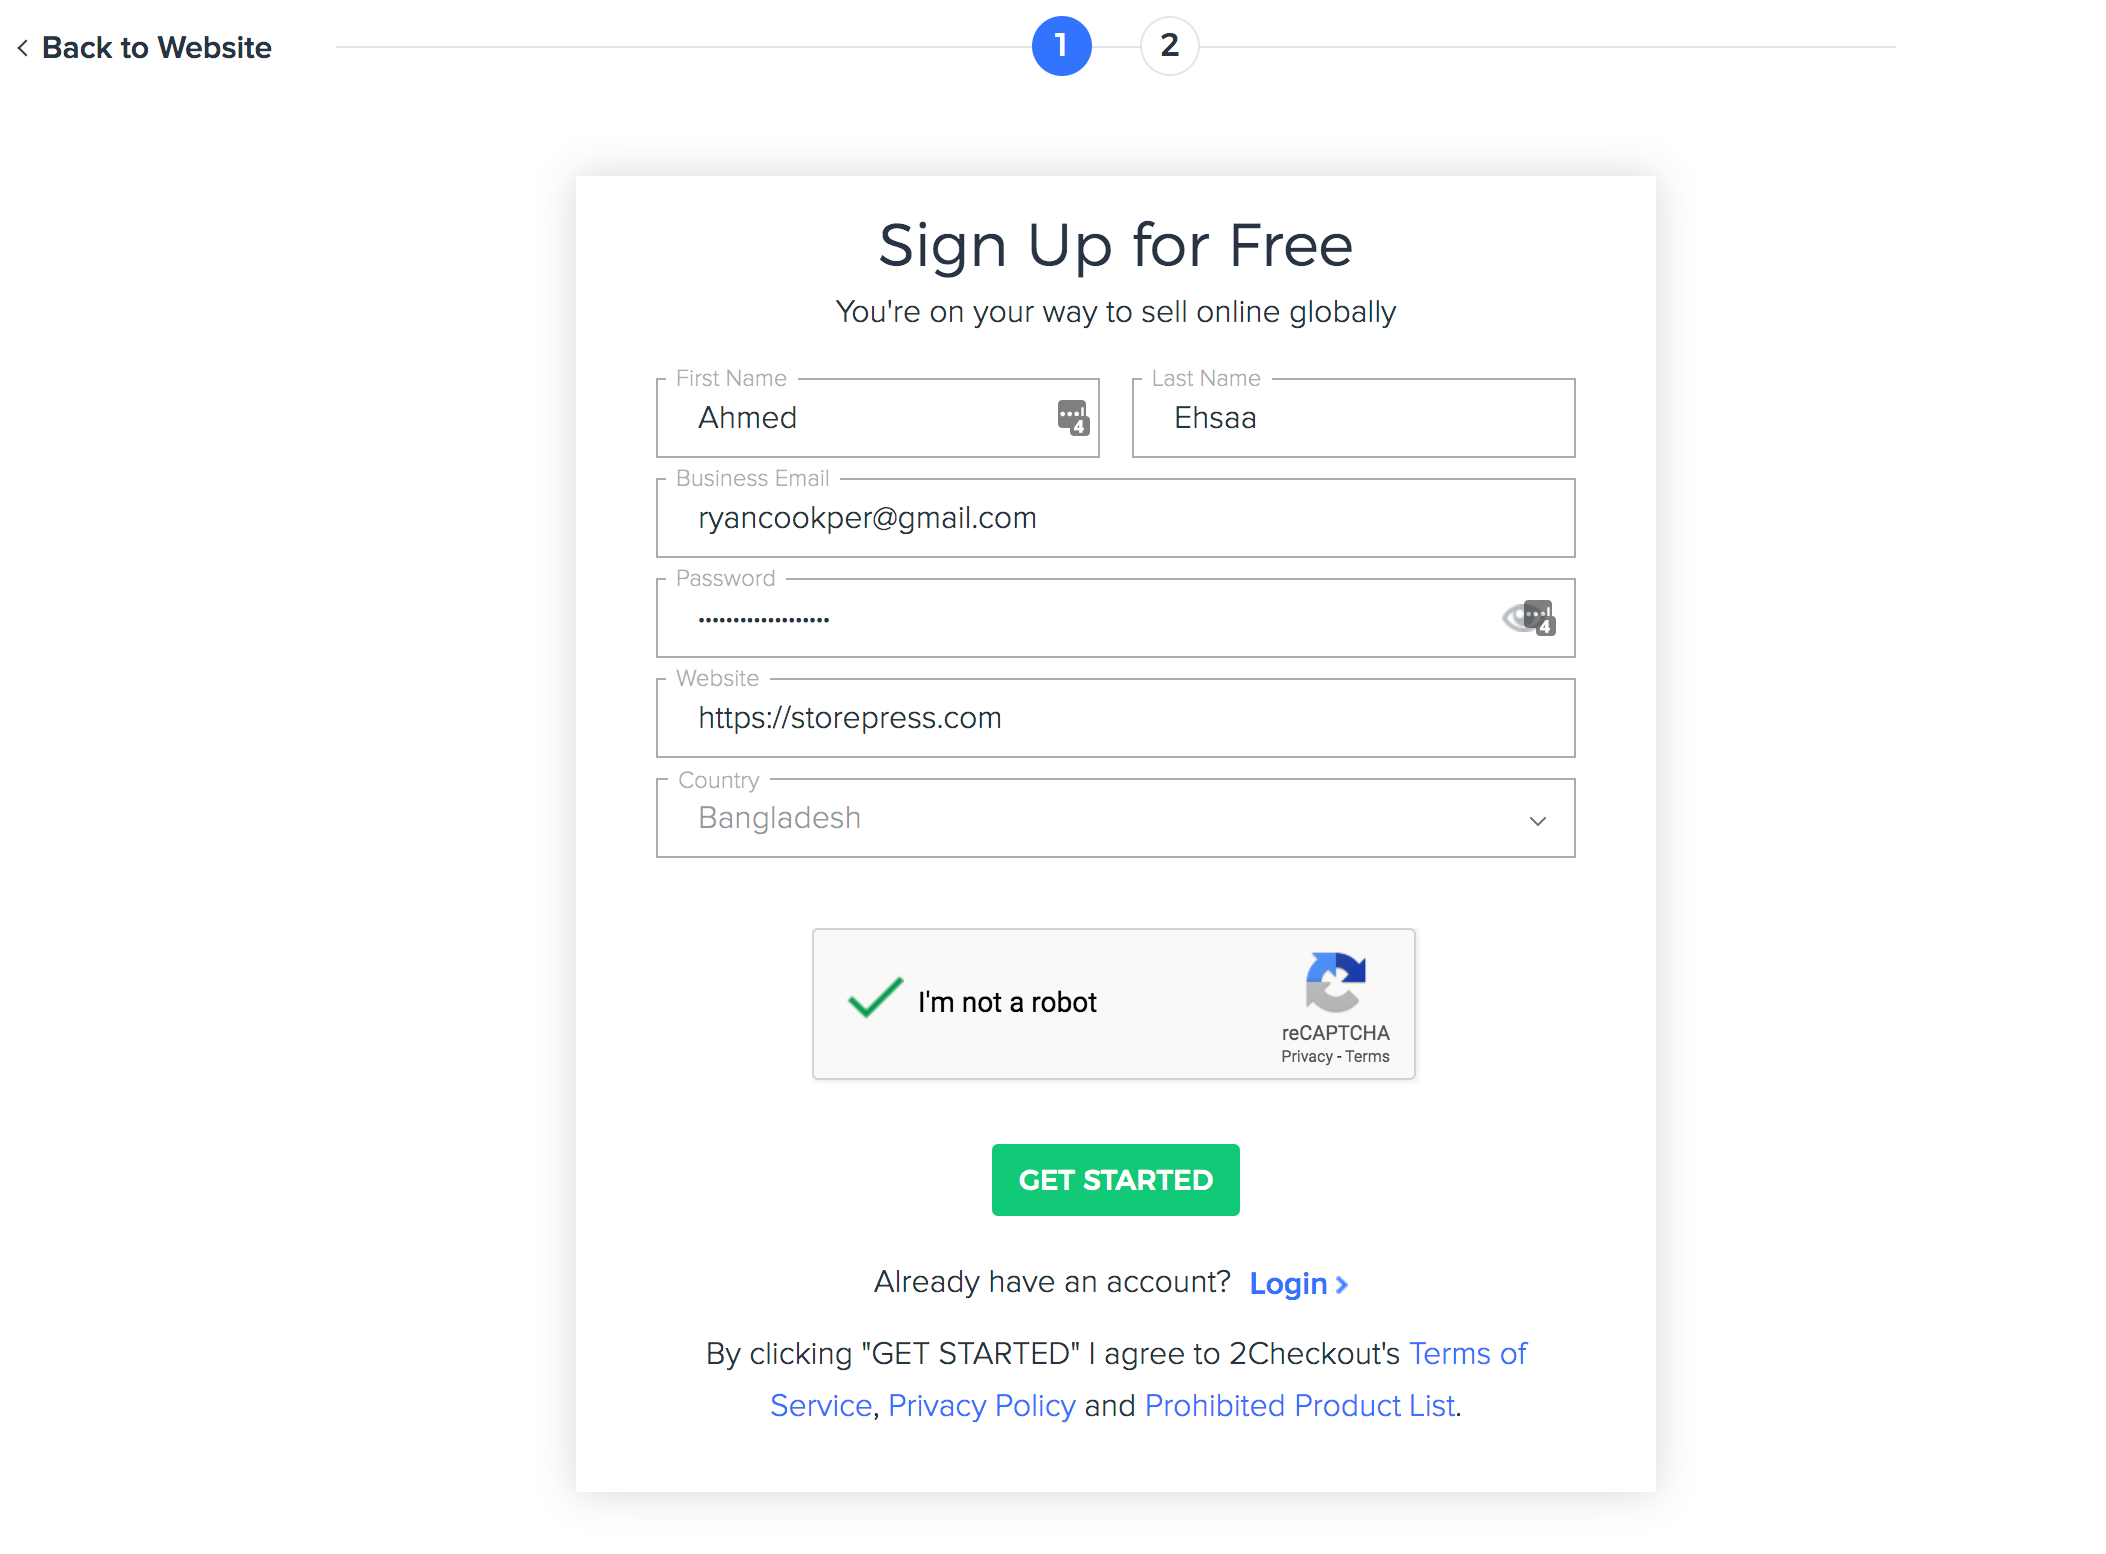
Creating a new 2Checkout account is simple. Visit the registration URL, enter your name, email address, password, website, and country, then click the Get Started button to proceed.
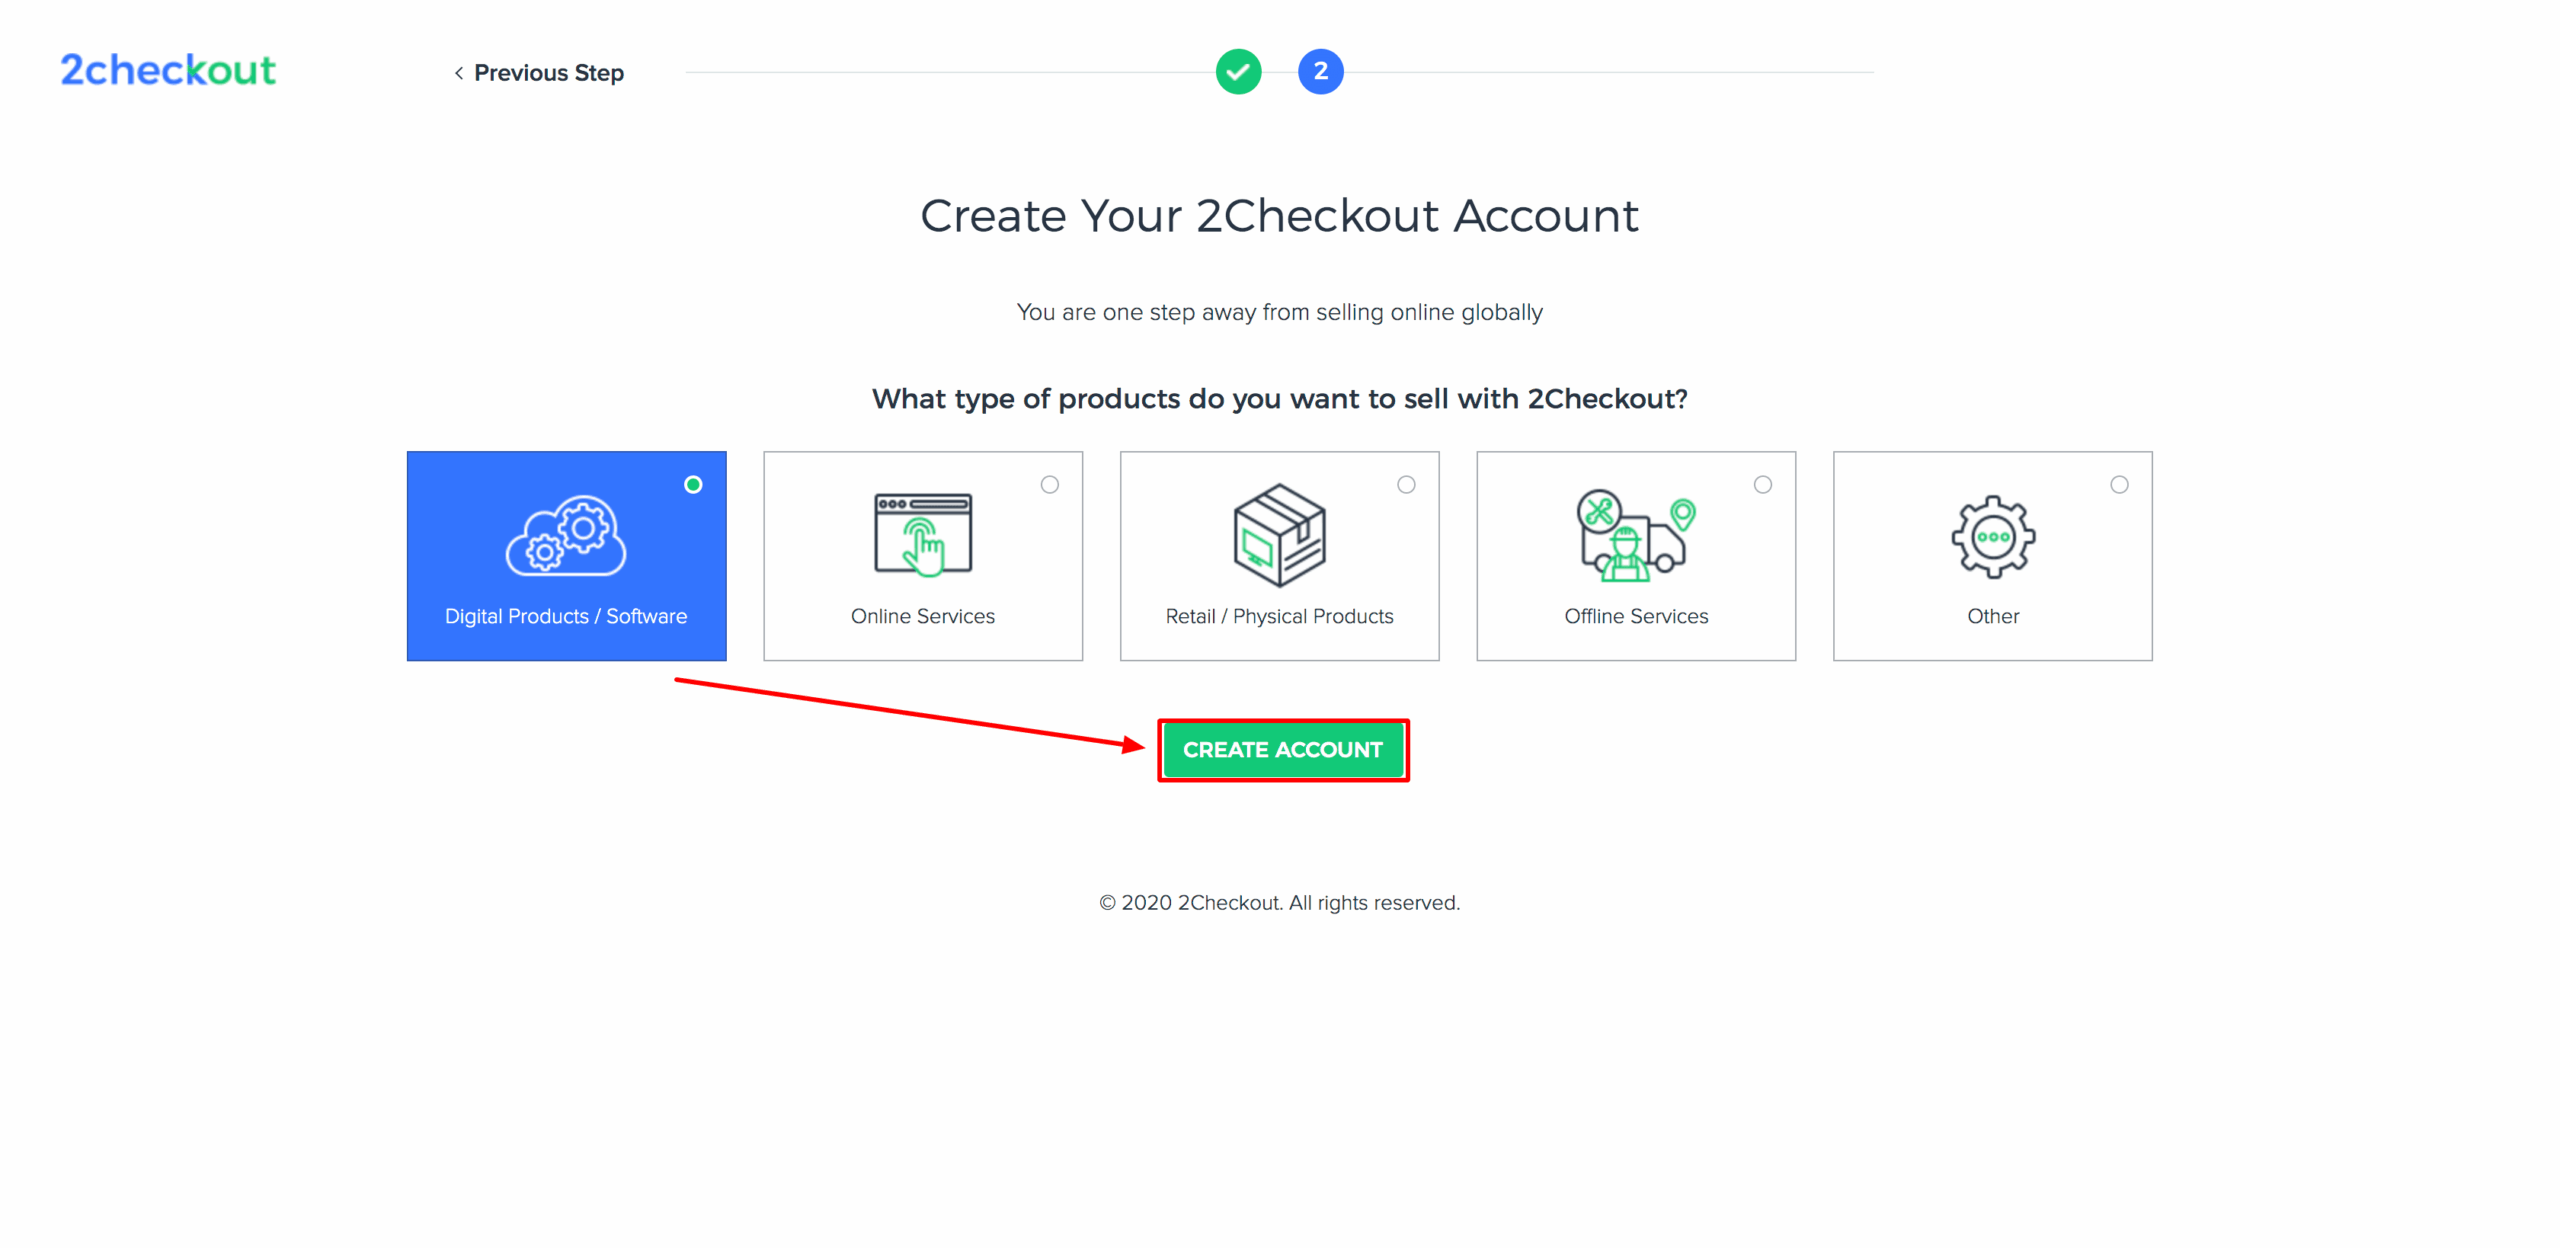
Select your purpose of using 2checkout payment gateway and press CREATE ACCOUNT button.
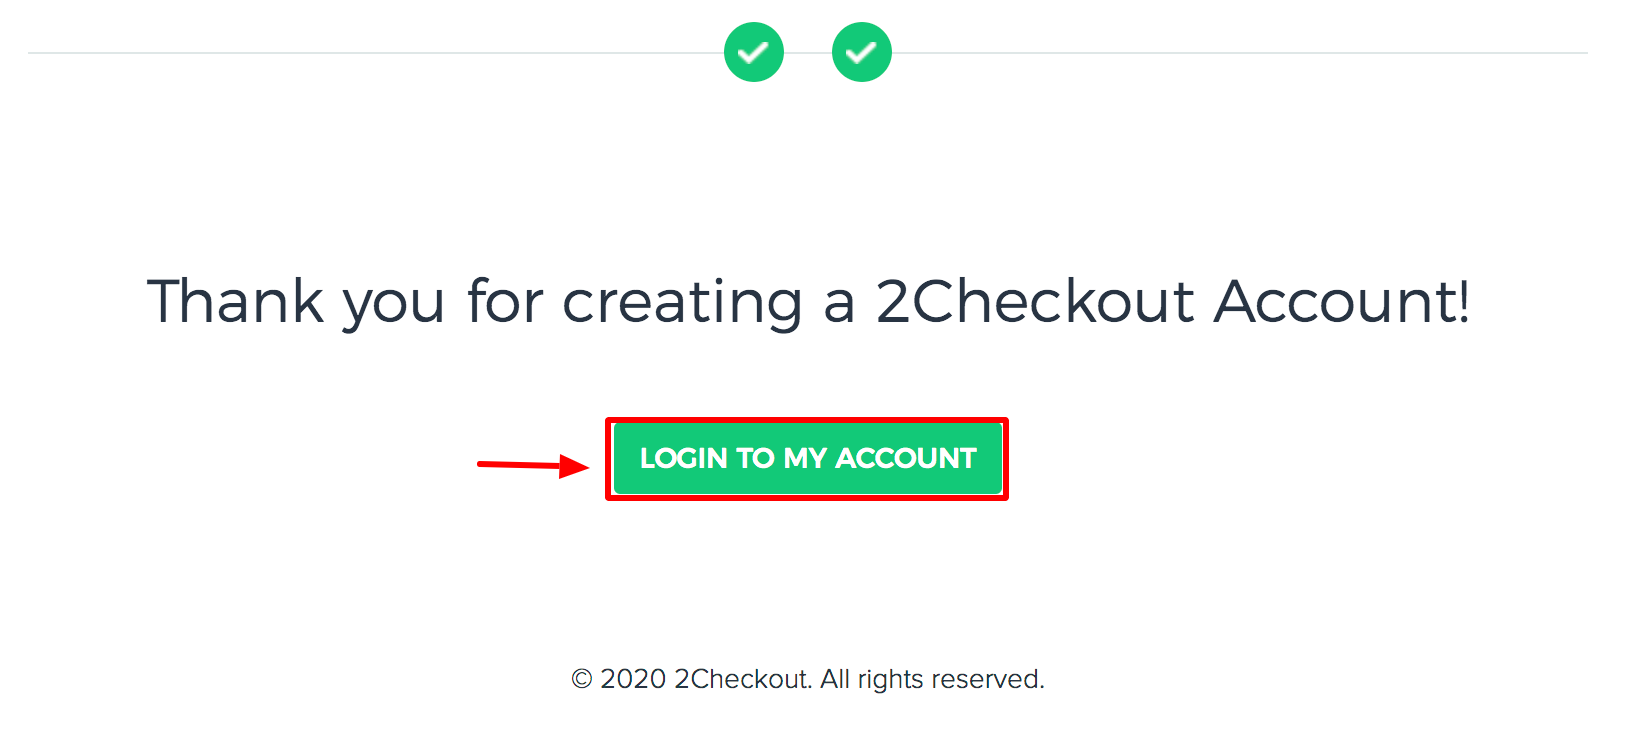
Your 2Checkout account has been created successfully. To access your dashboard, click the Log in to My Account button.
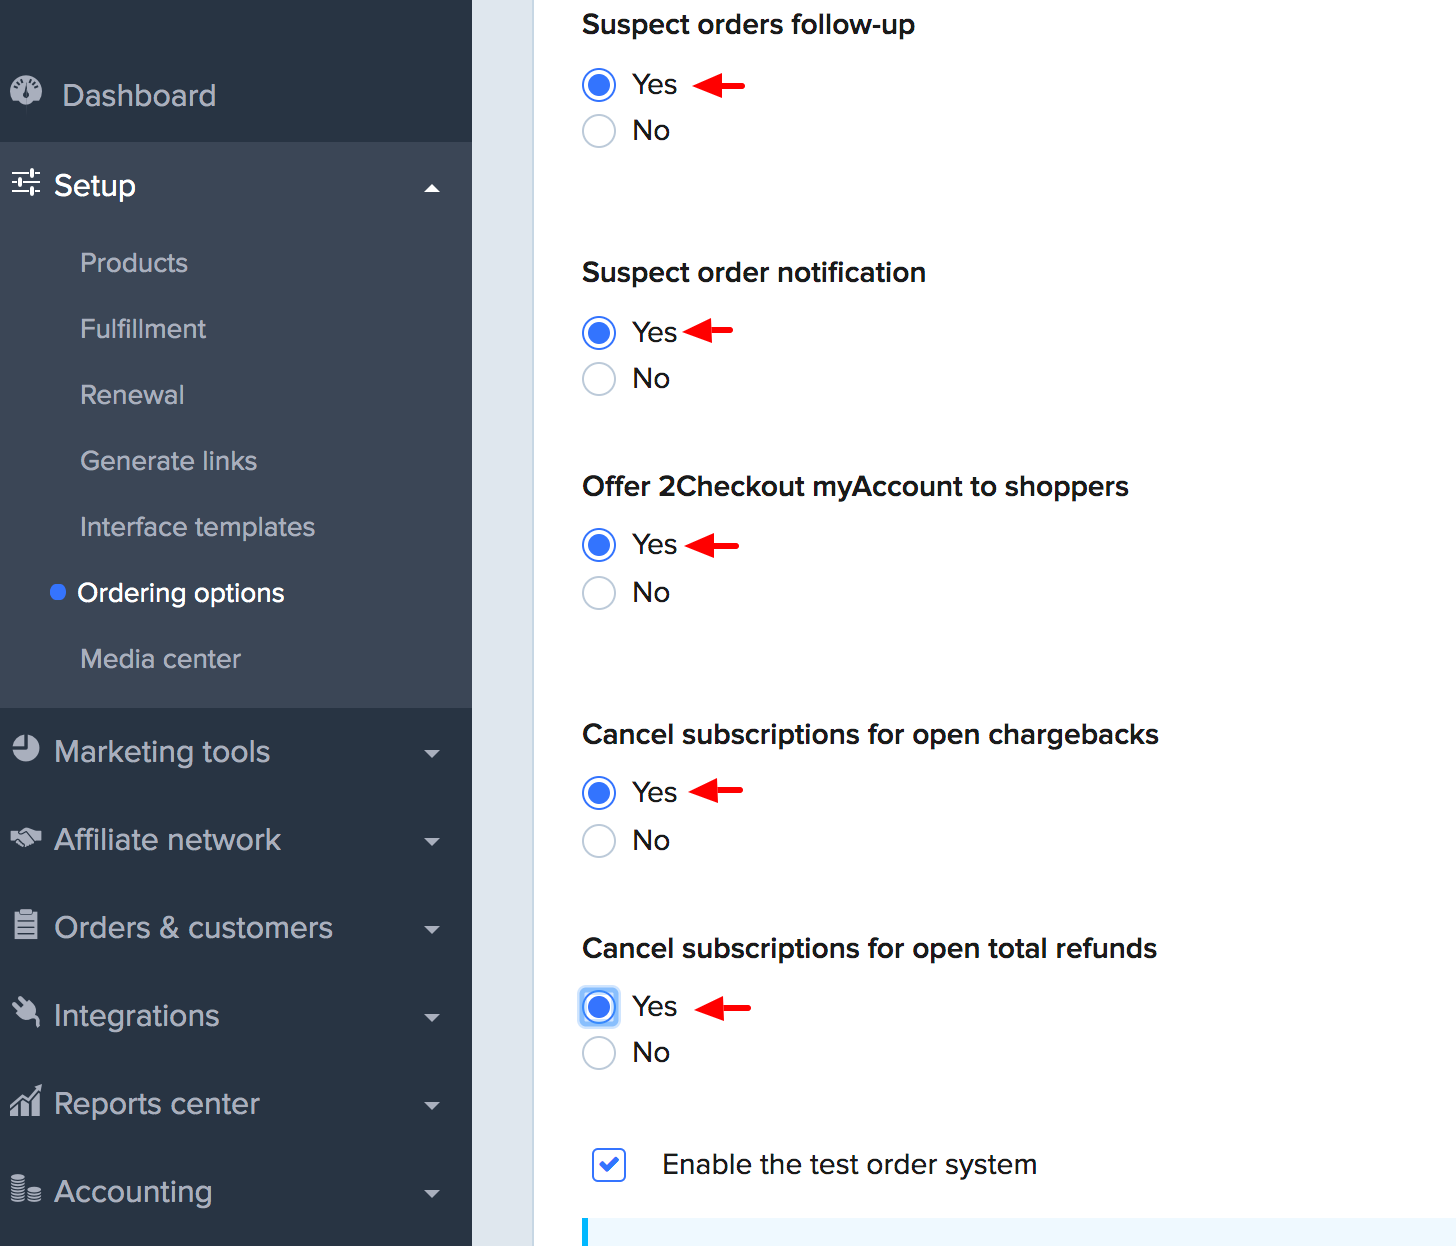
Navigate to Setup >> Ordering Options and select Yes for Suspect orders follow-up, Suspect order notification, Offer 2Checkout myAccount to shoppers, Cancel subscriptions for open chargebacks, cancel subscriptions for open total refunds. When selection is completed press Save Settings button.
Link Your Site Details With 2Checkout
Before connecting your site with 2Checkout, make sure you have logged in 2Checkout first.
Step 1: Navigate to plugin settings page
Go to your site’s backend and navigate to Plugins → Installed Plugins.

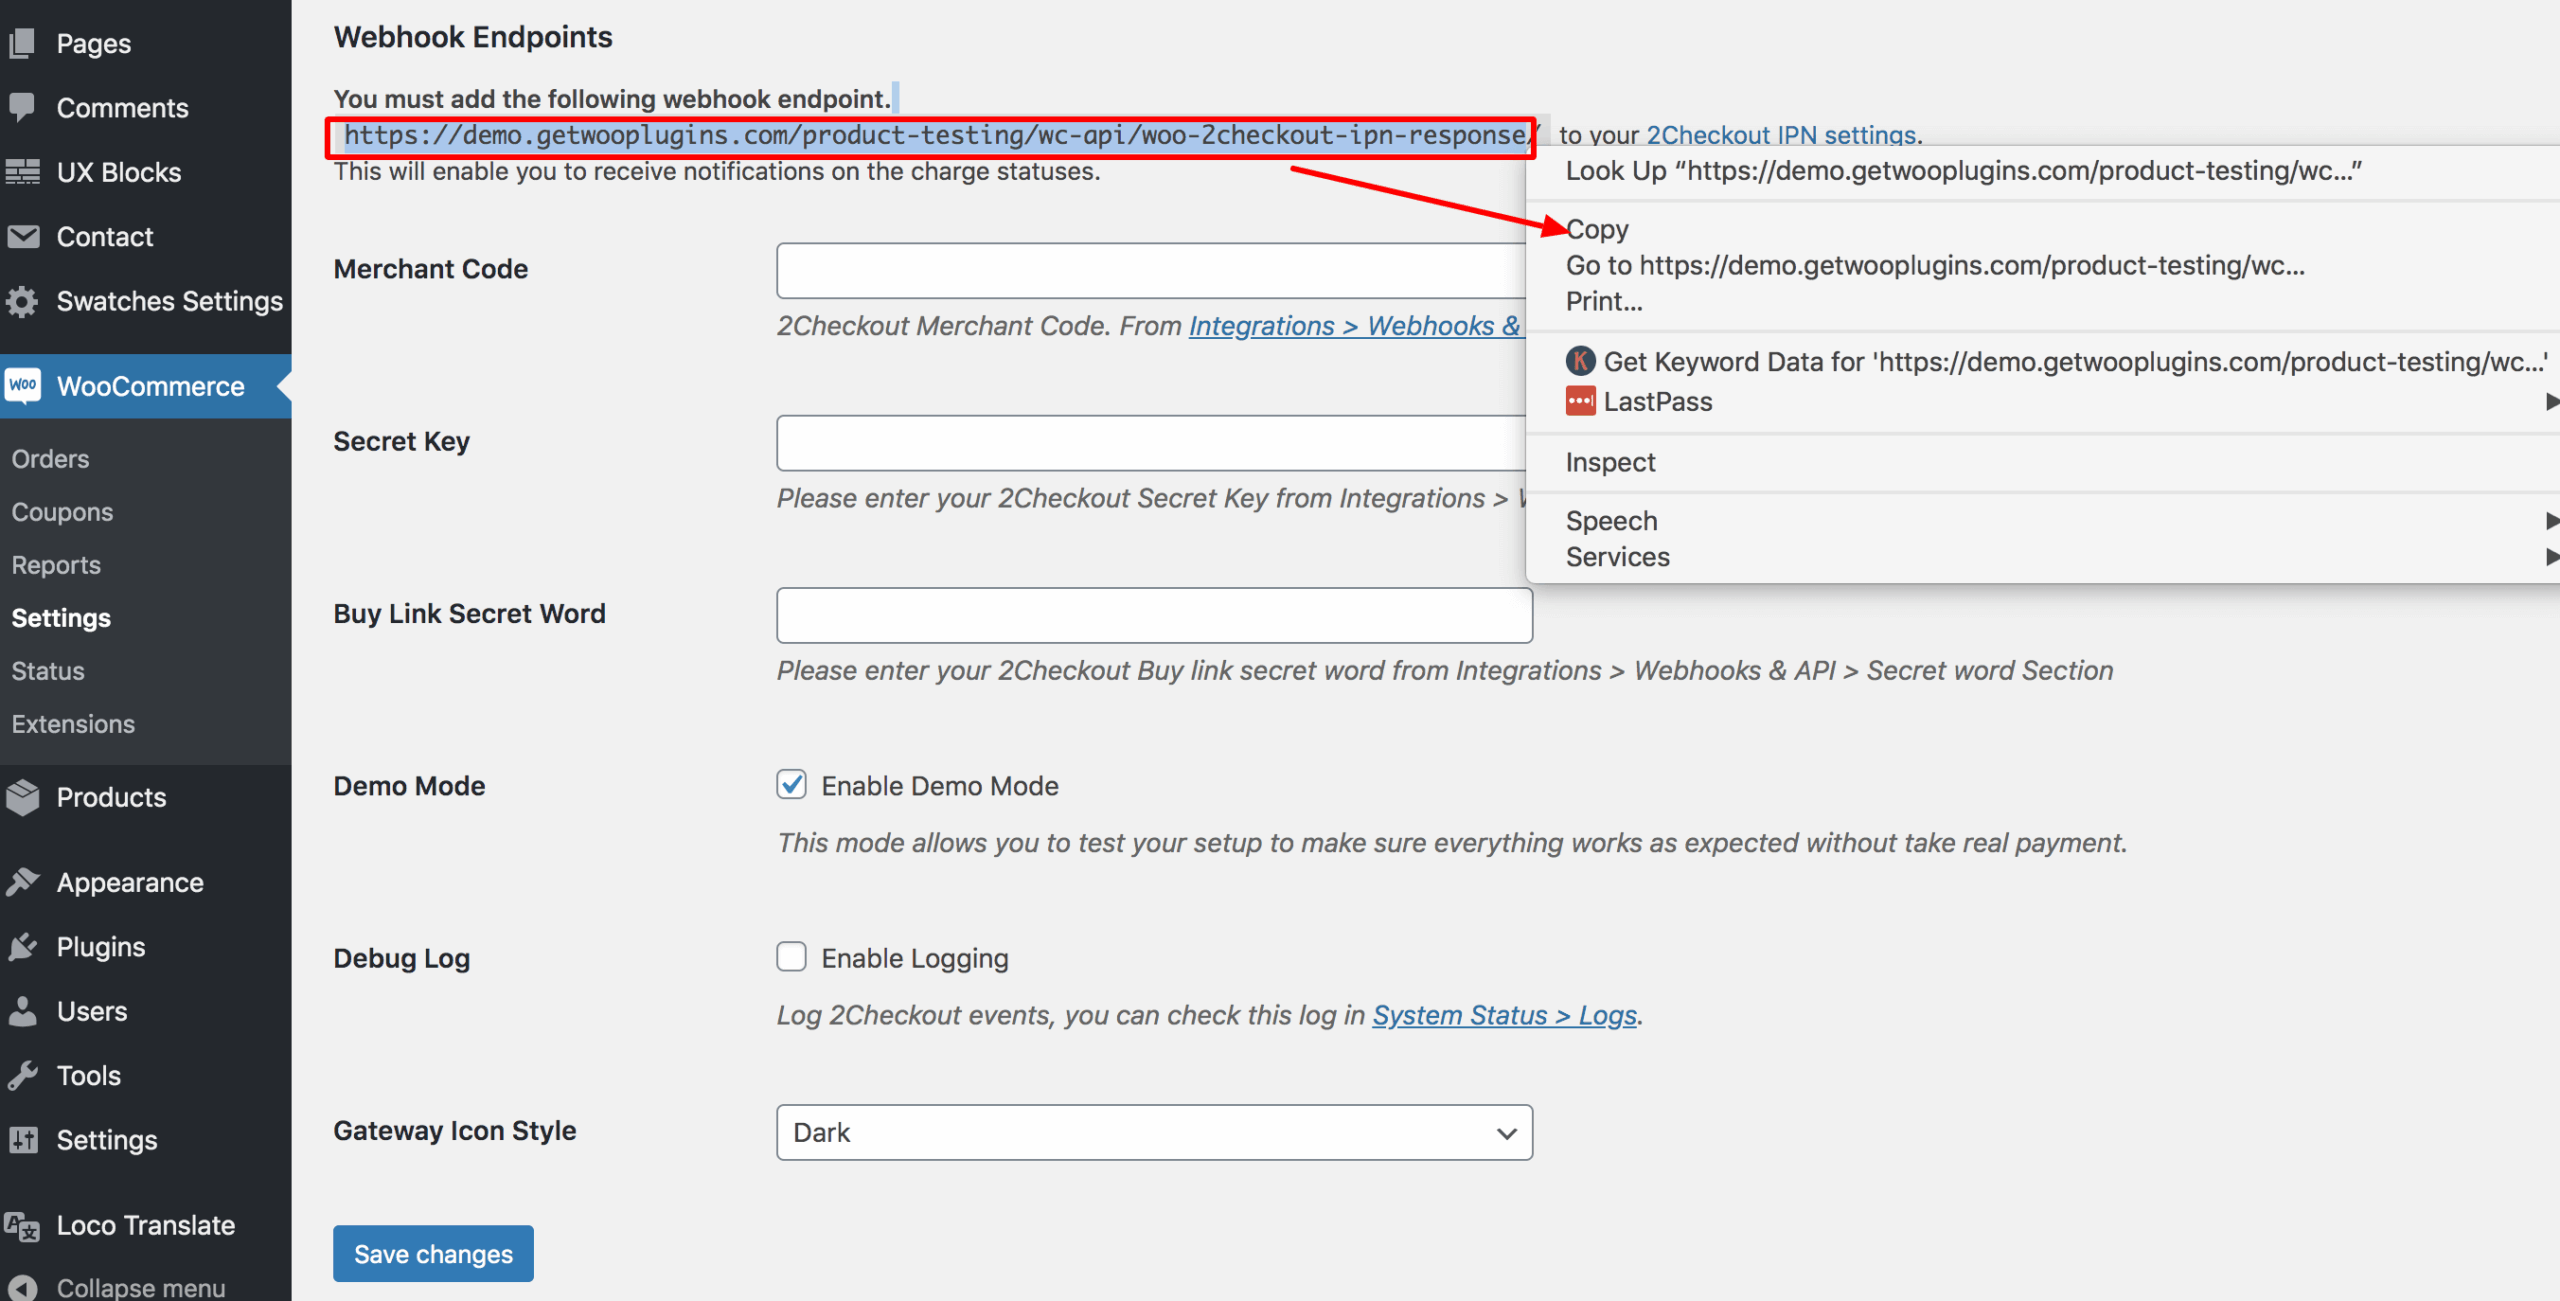
Step 2: Setup IPN URL
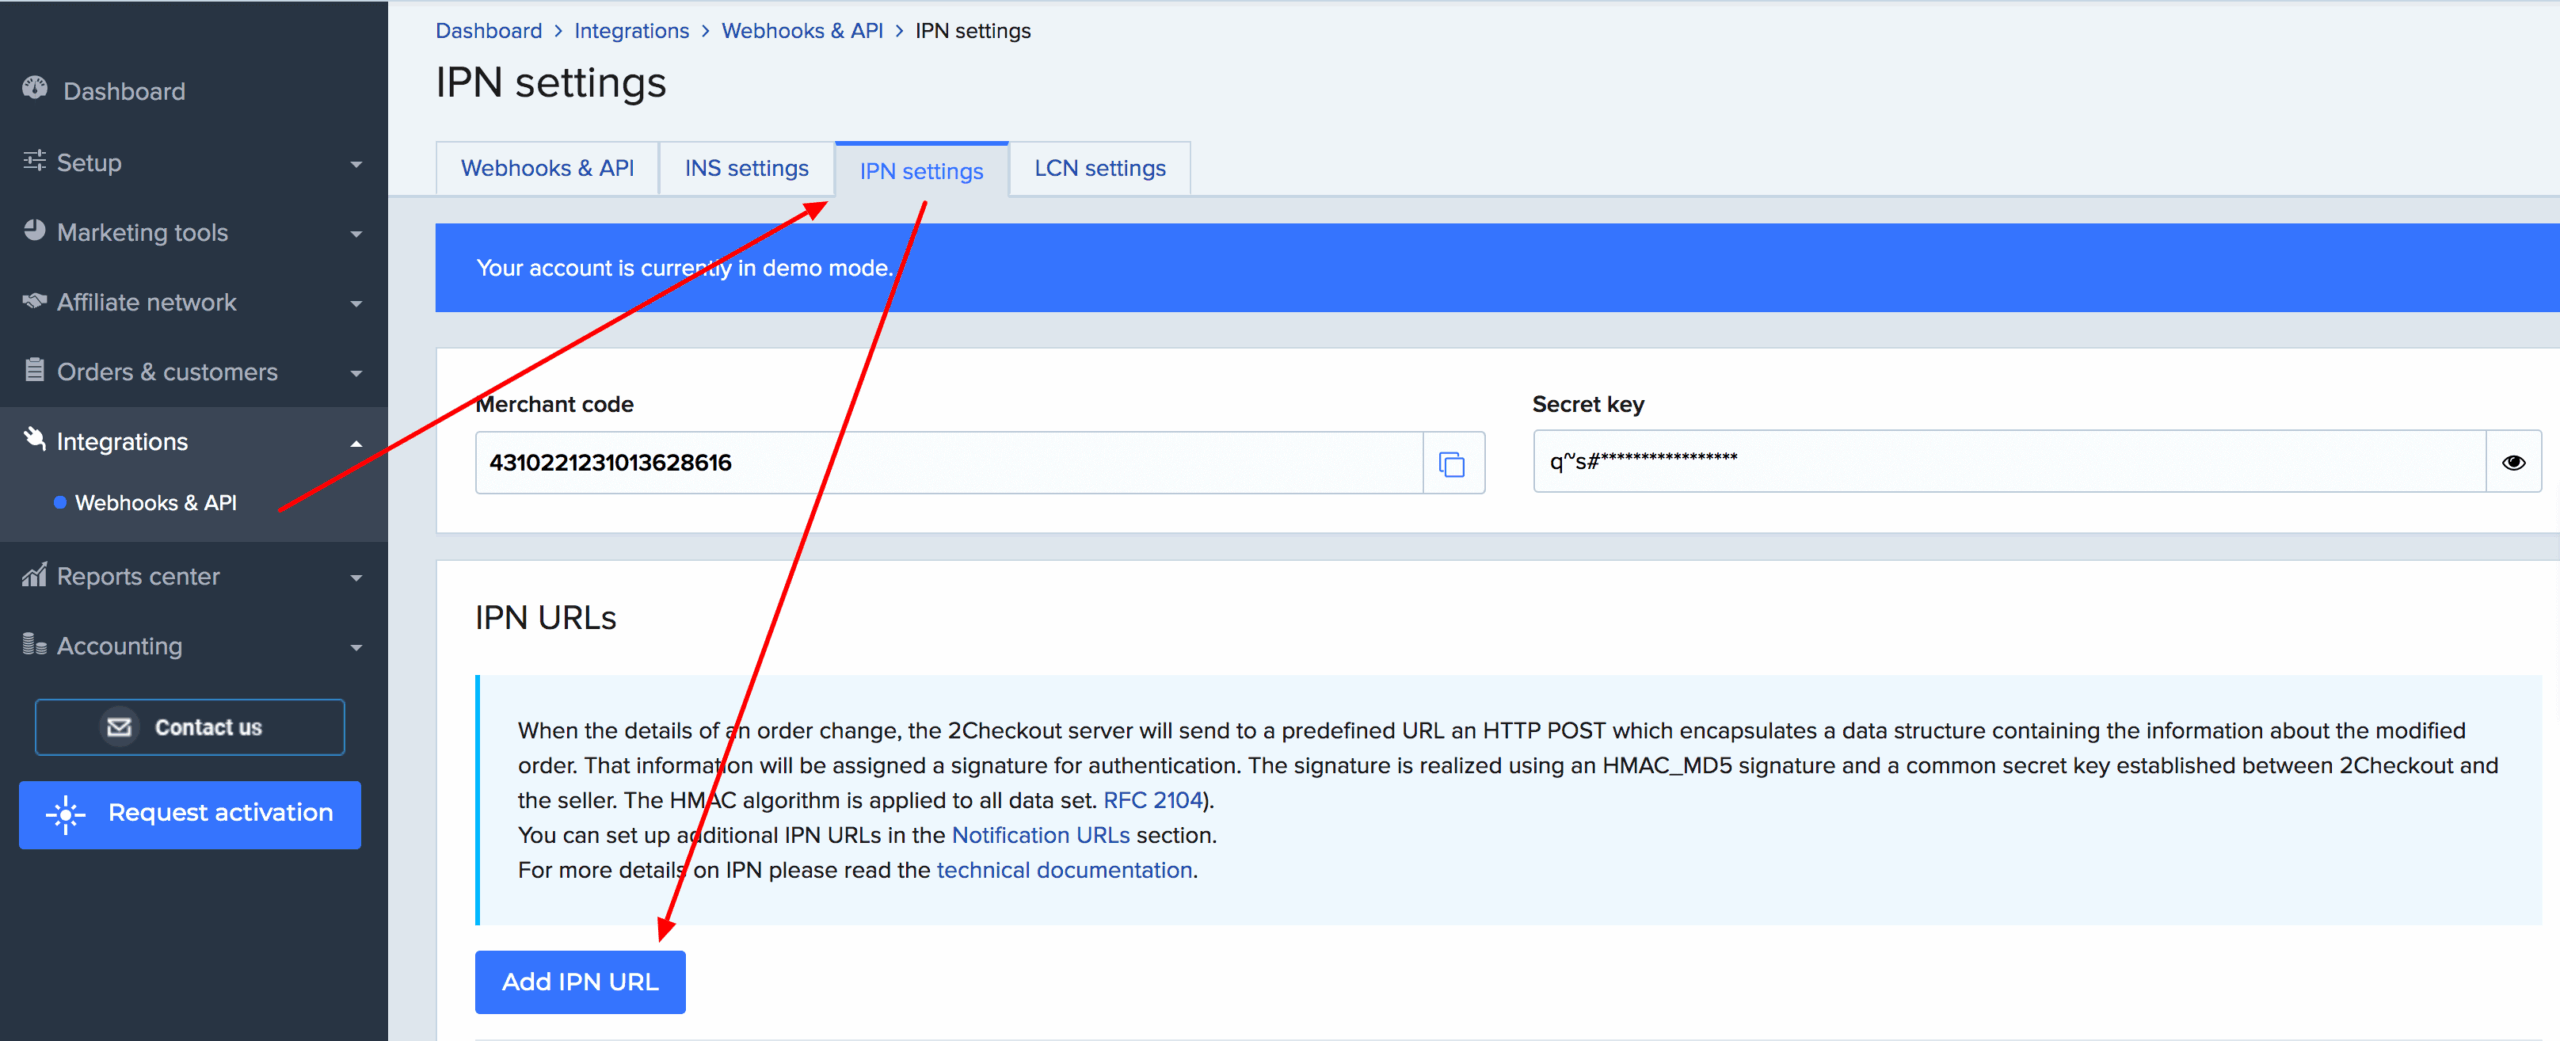
From the settings page, copy the URL as shown in the screenshot below.
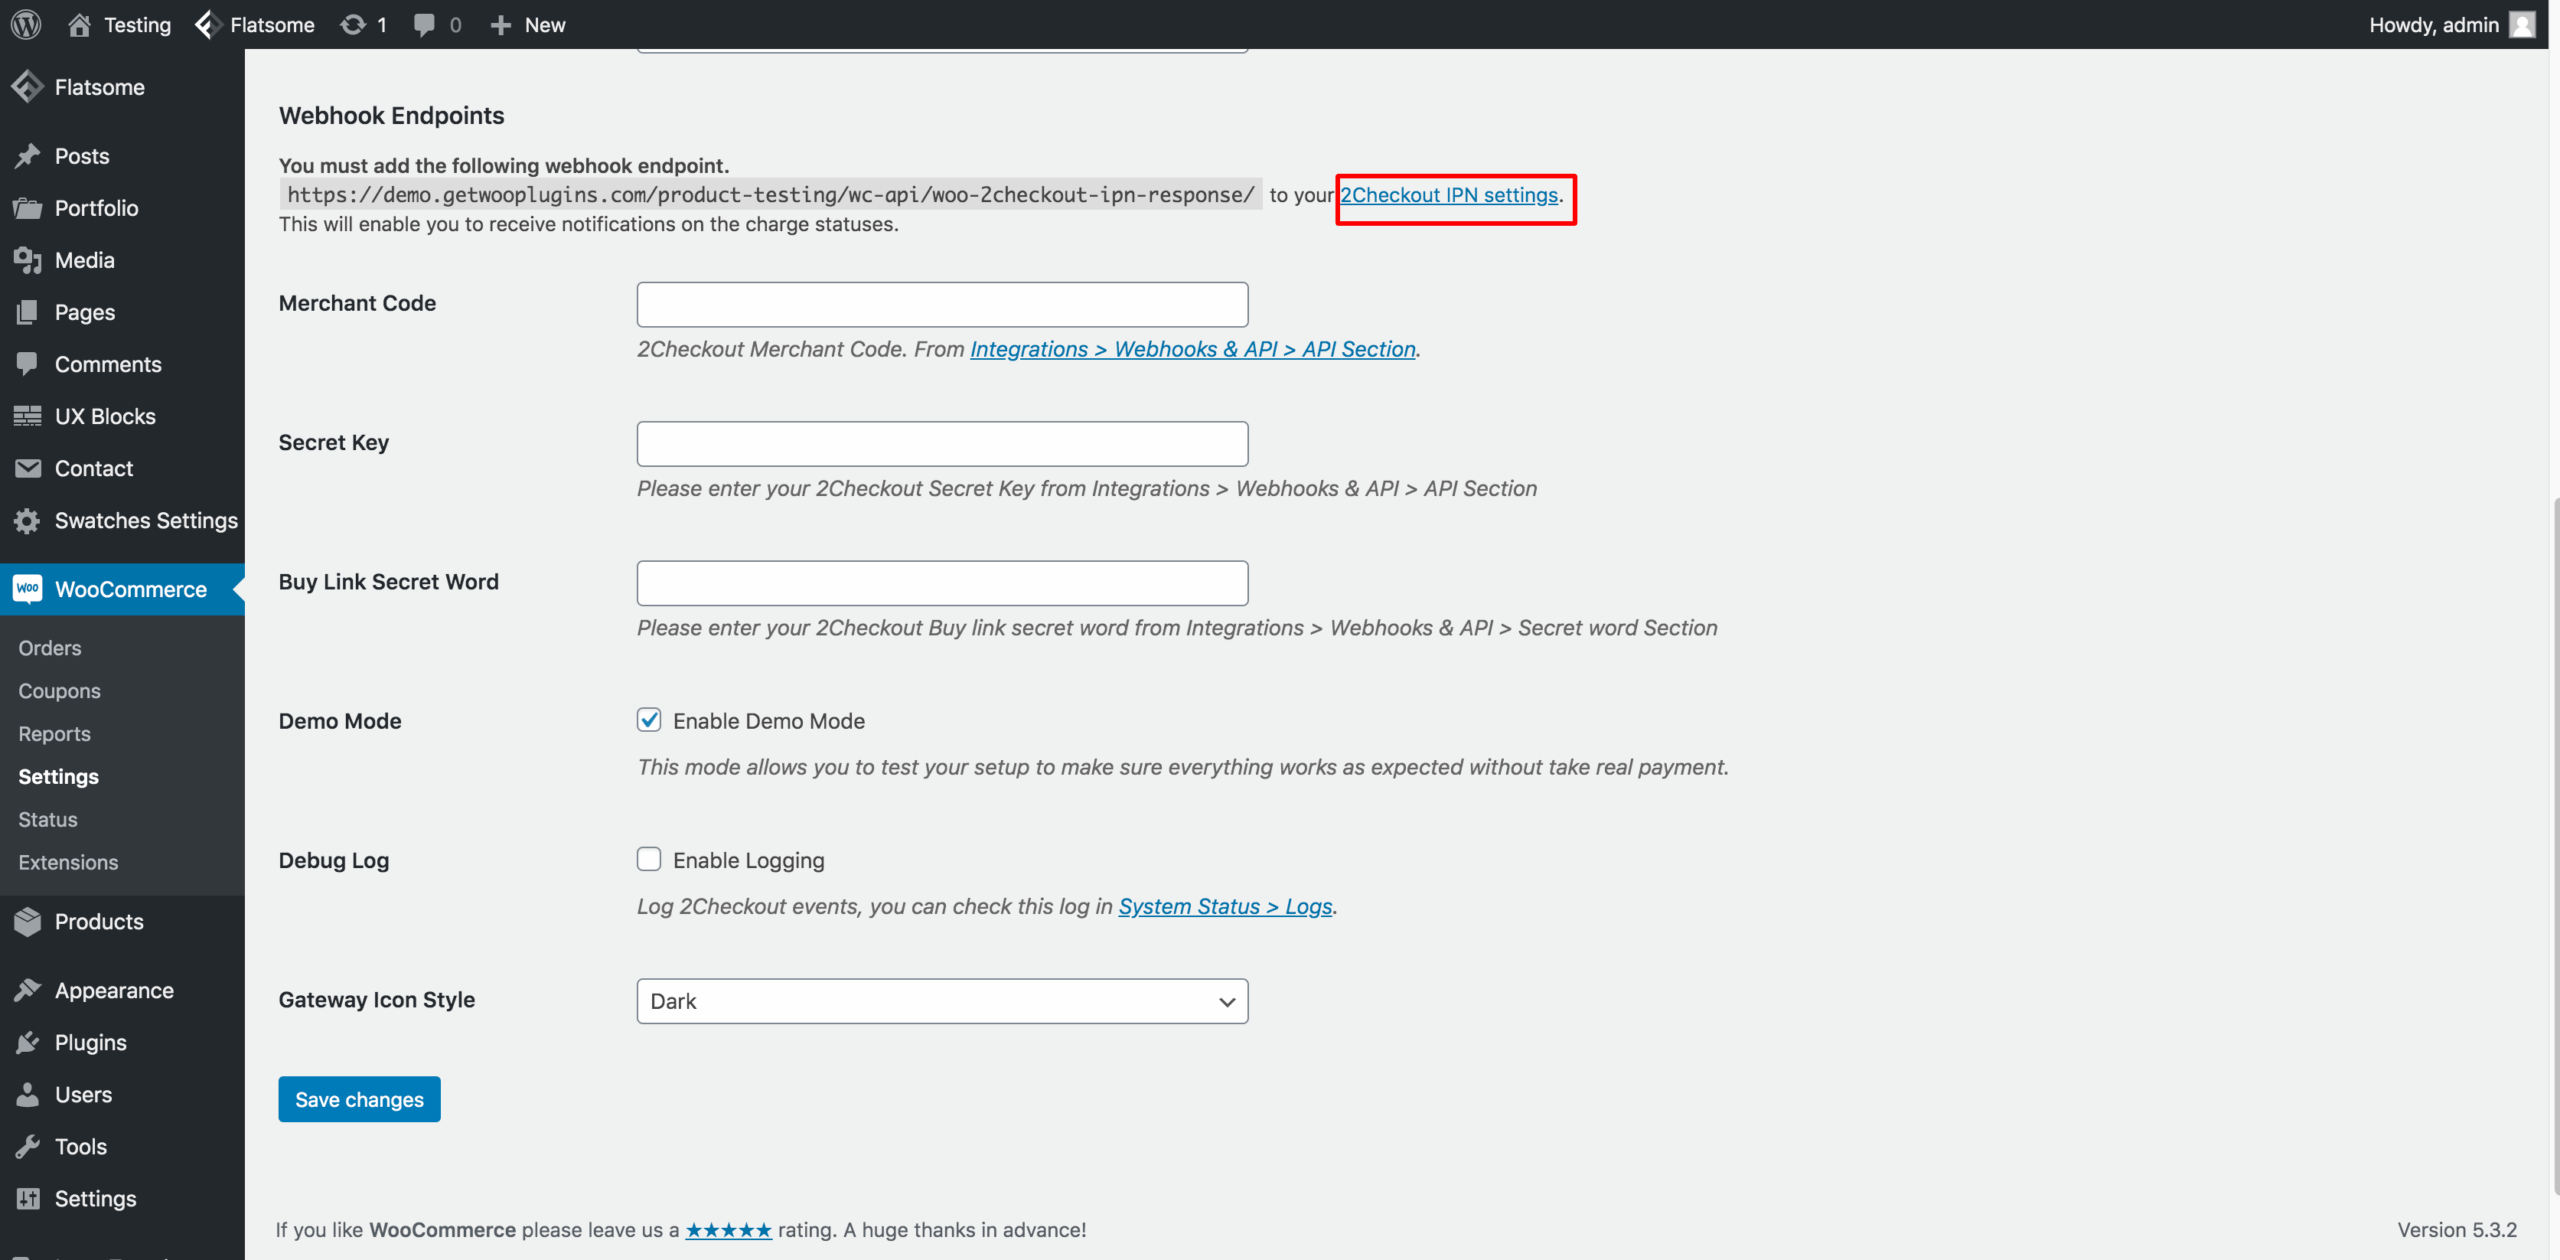
Press on the 2Checkout IPN Settings link from the settings page or you can directly access from here.
Press Add IPN URL button
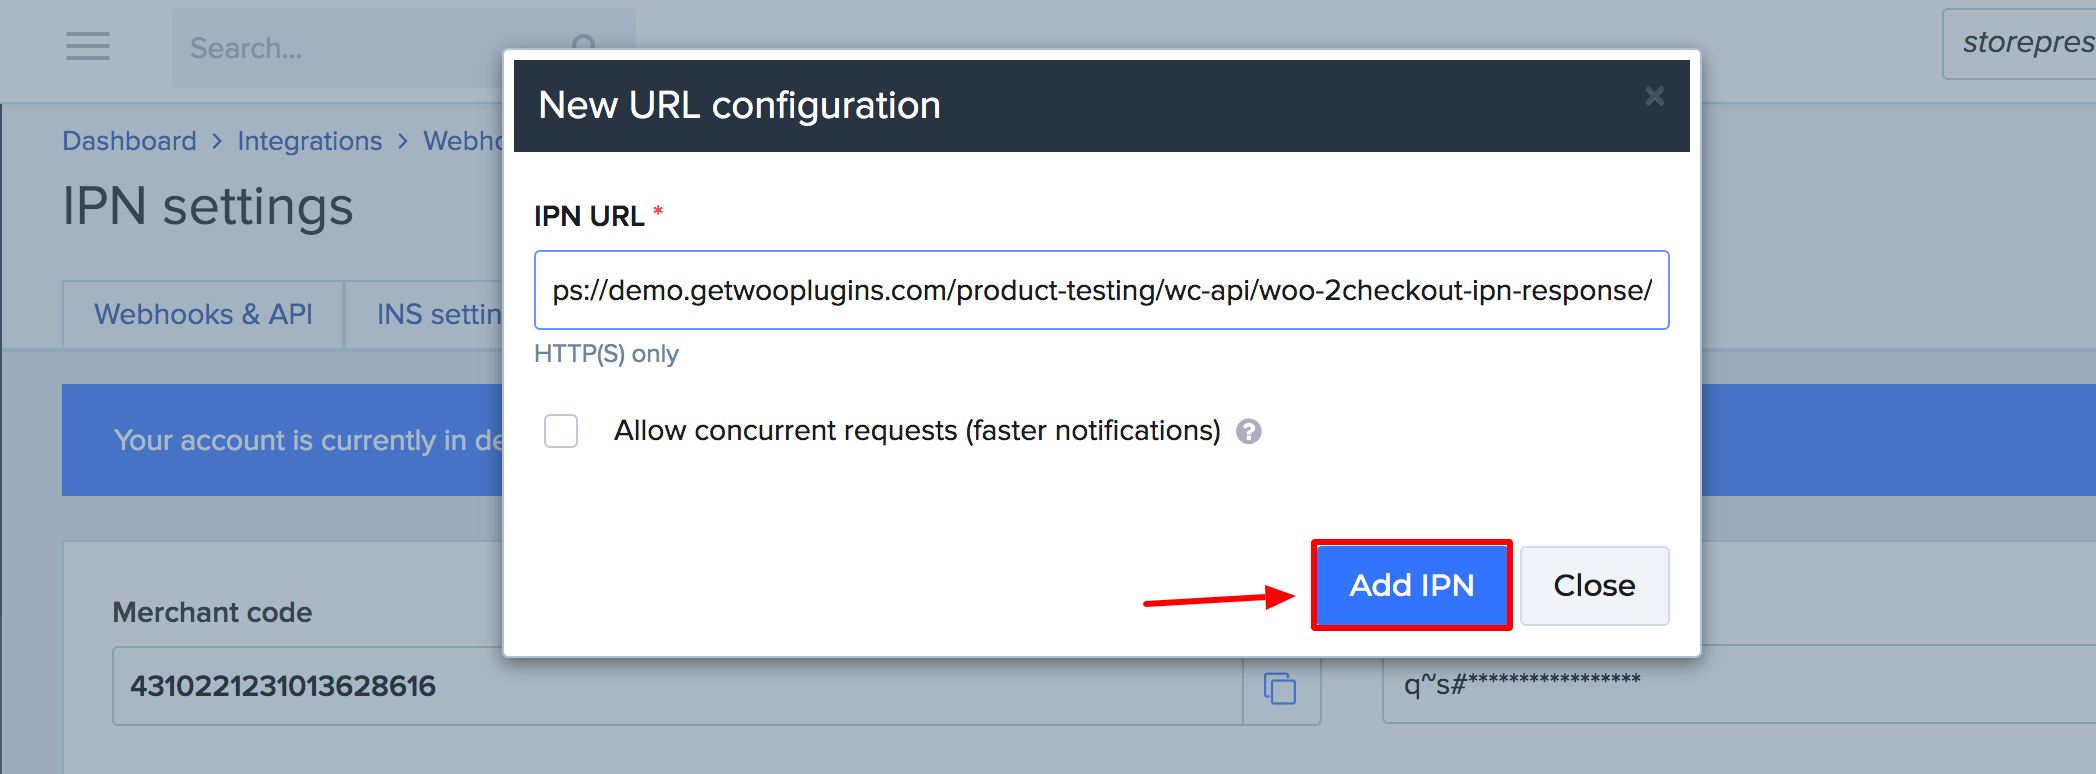
Paste the copied URL in the IPN URL field and click on Add IPN button.
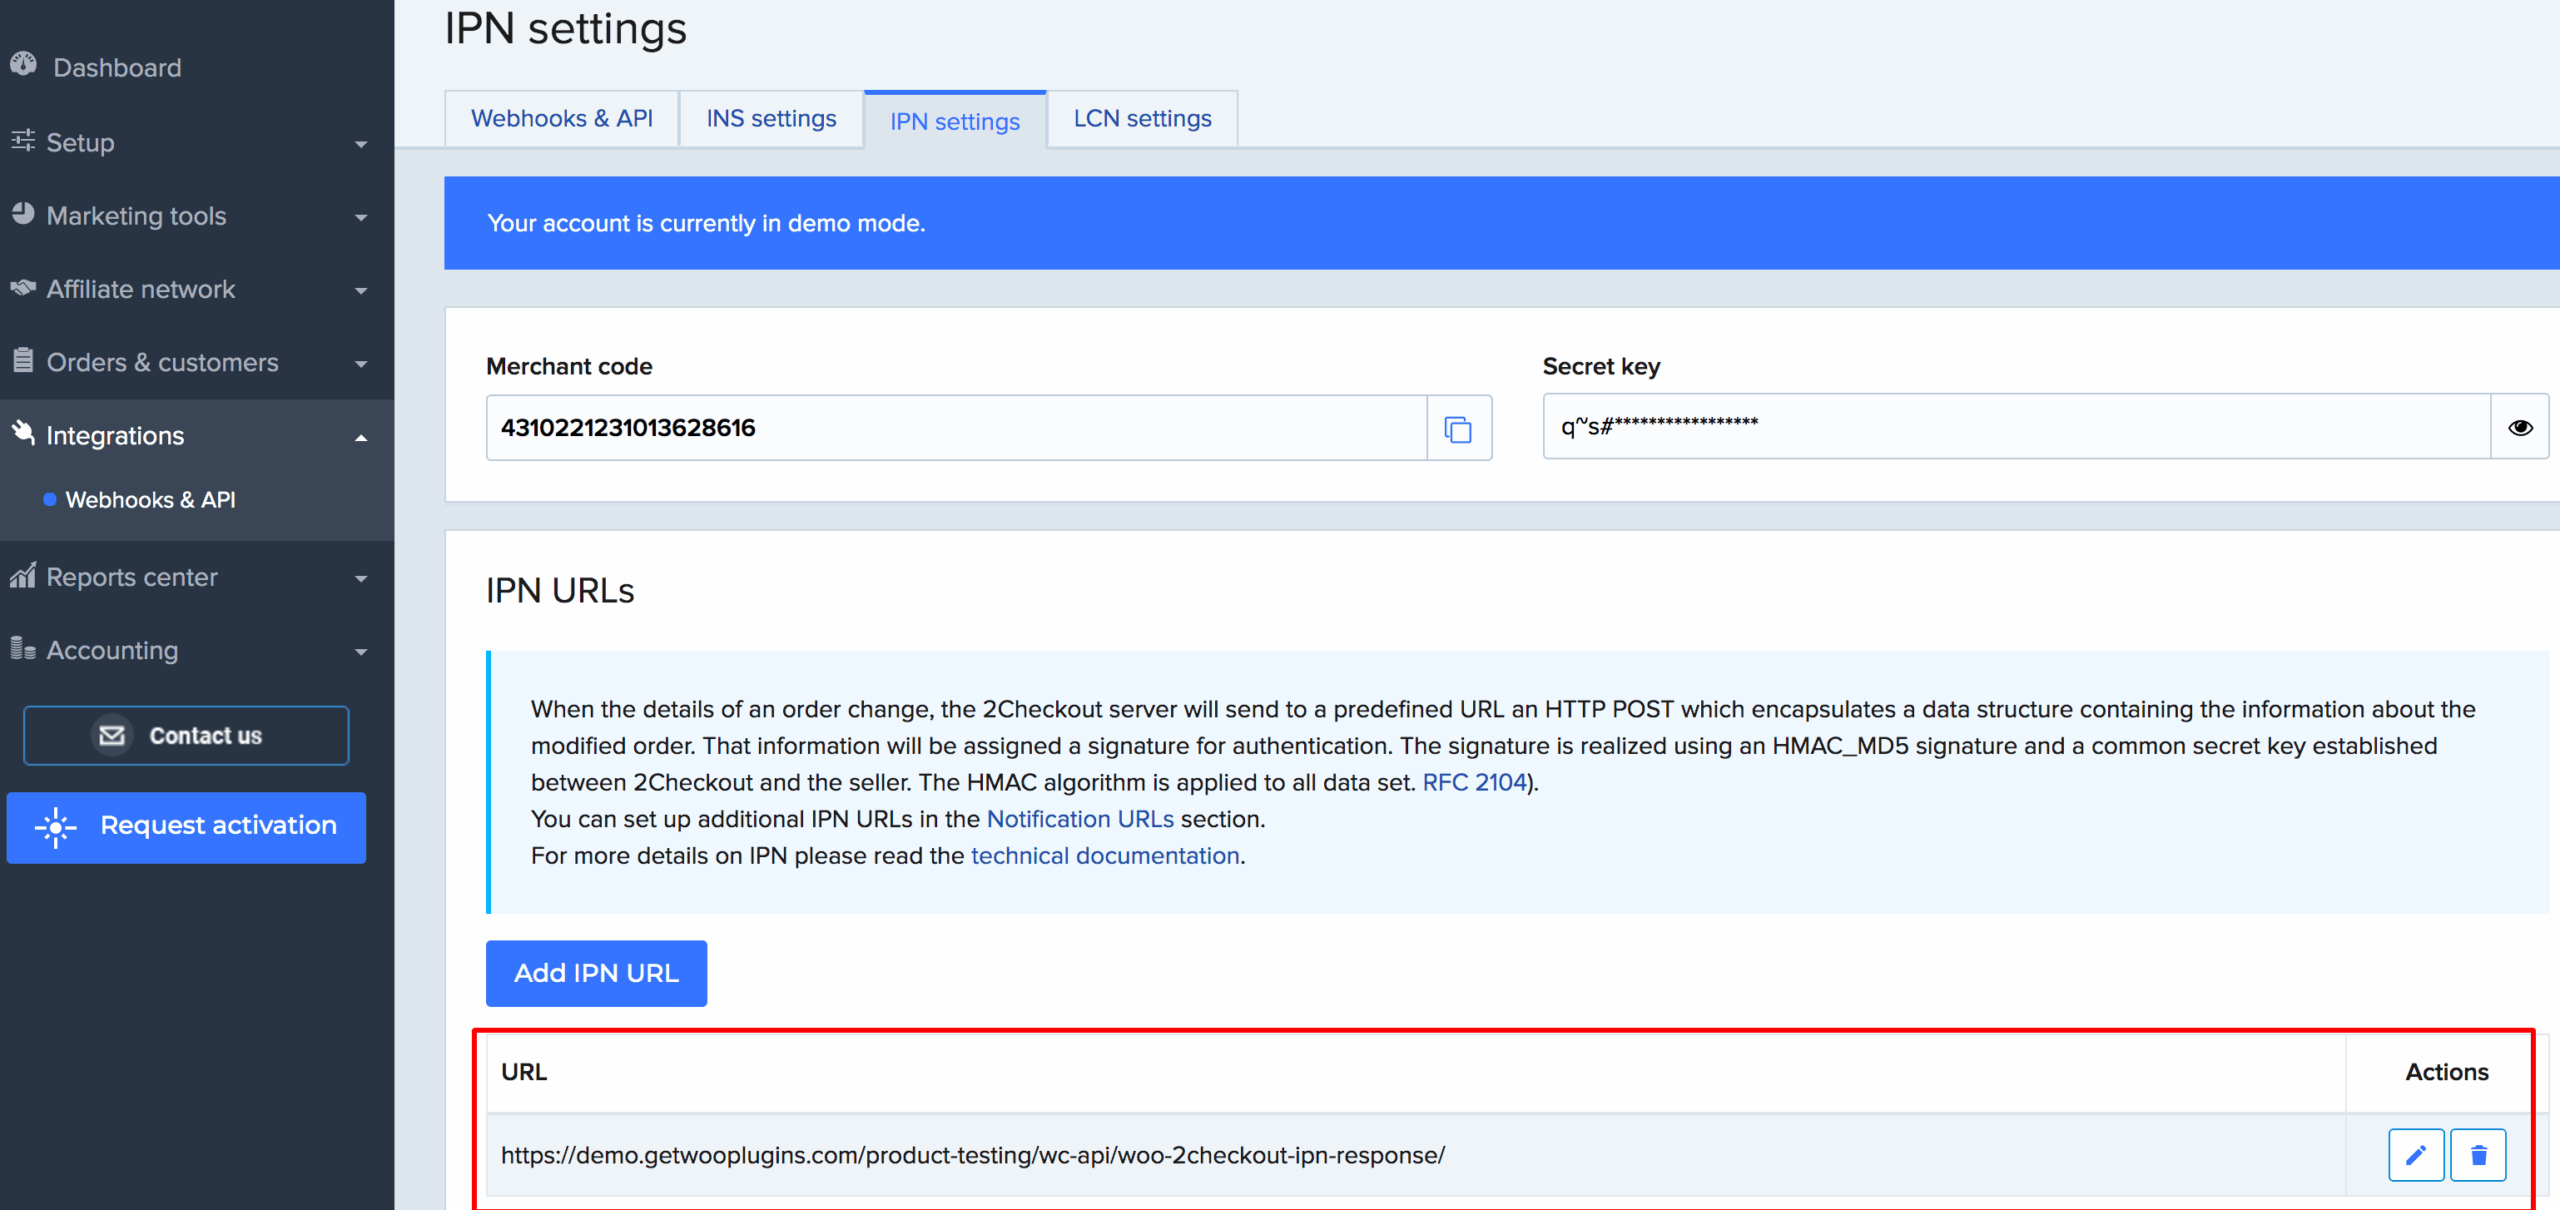
You can notice, your added URL in the lightbox is now appearing in the URL list.
Step 3: Merchant Code
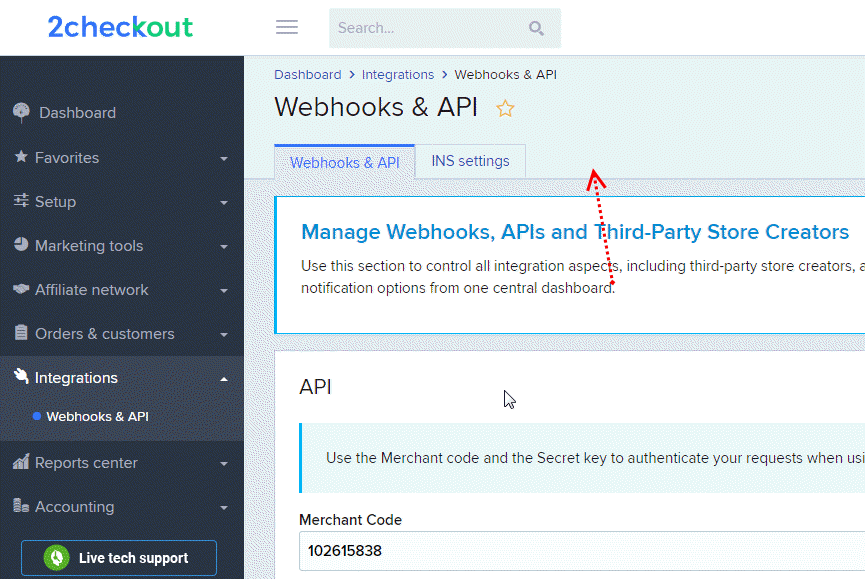
To add the Merchant Code to the highlighted field, navigate to Integrations → Webhooks & API → API section.
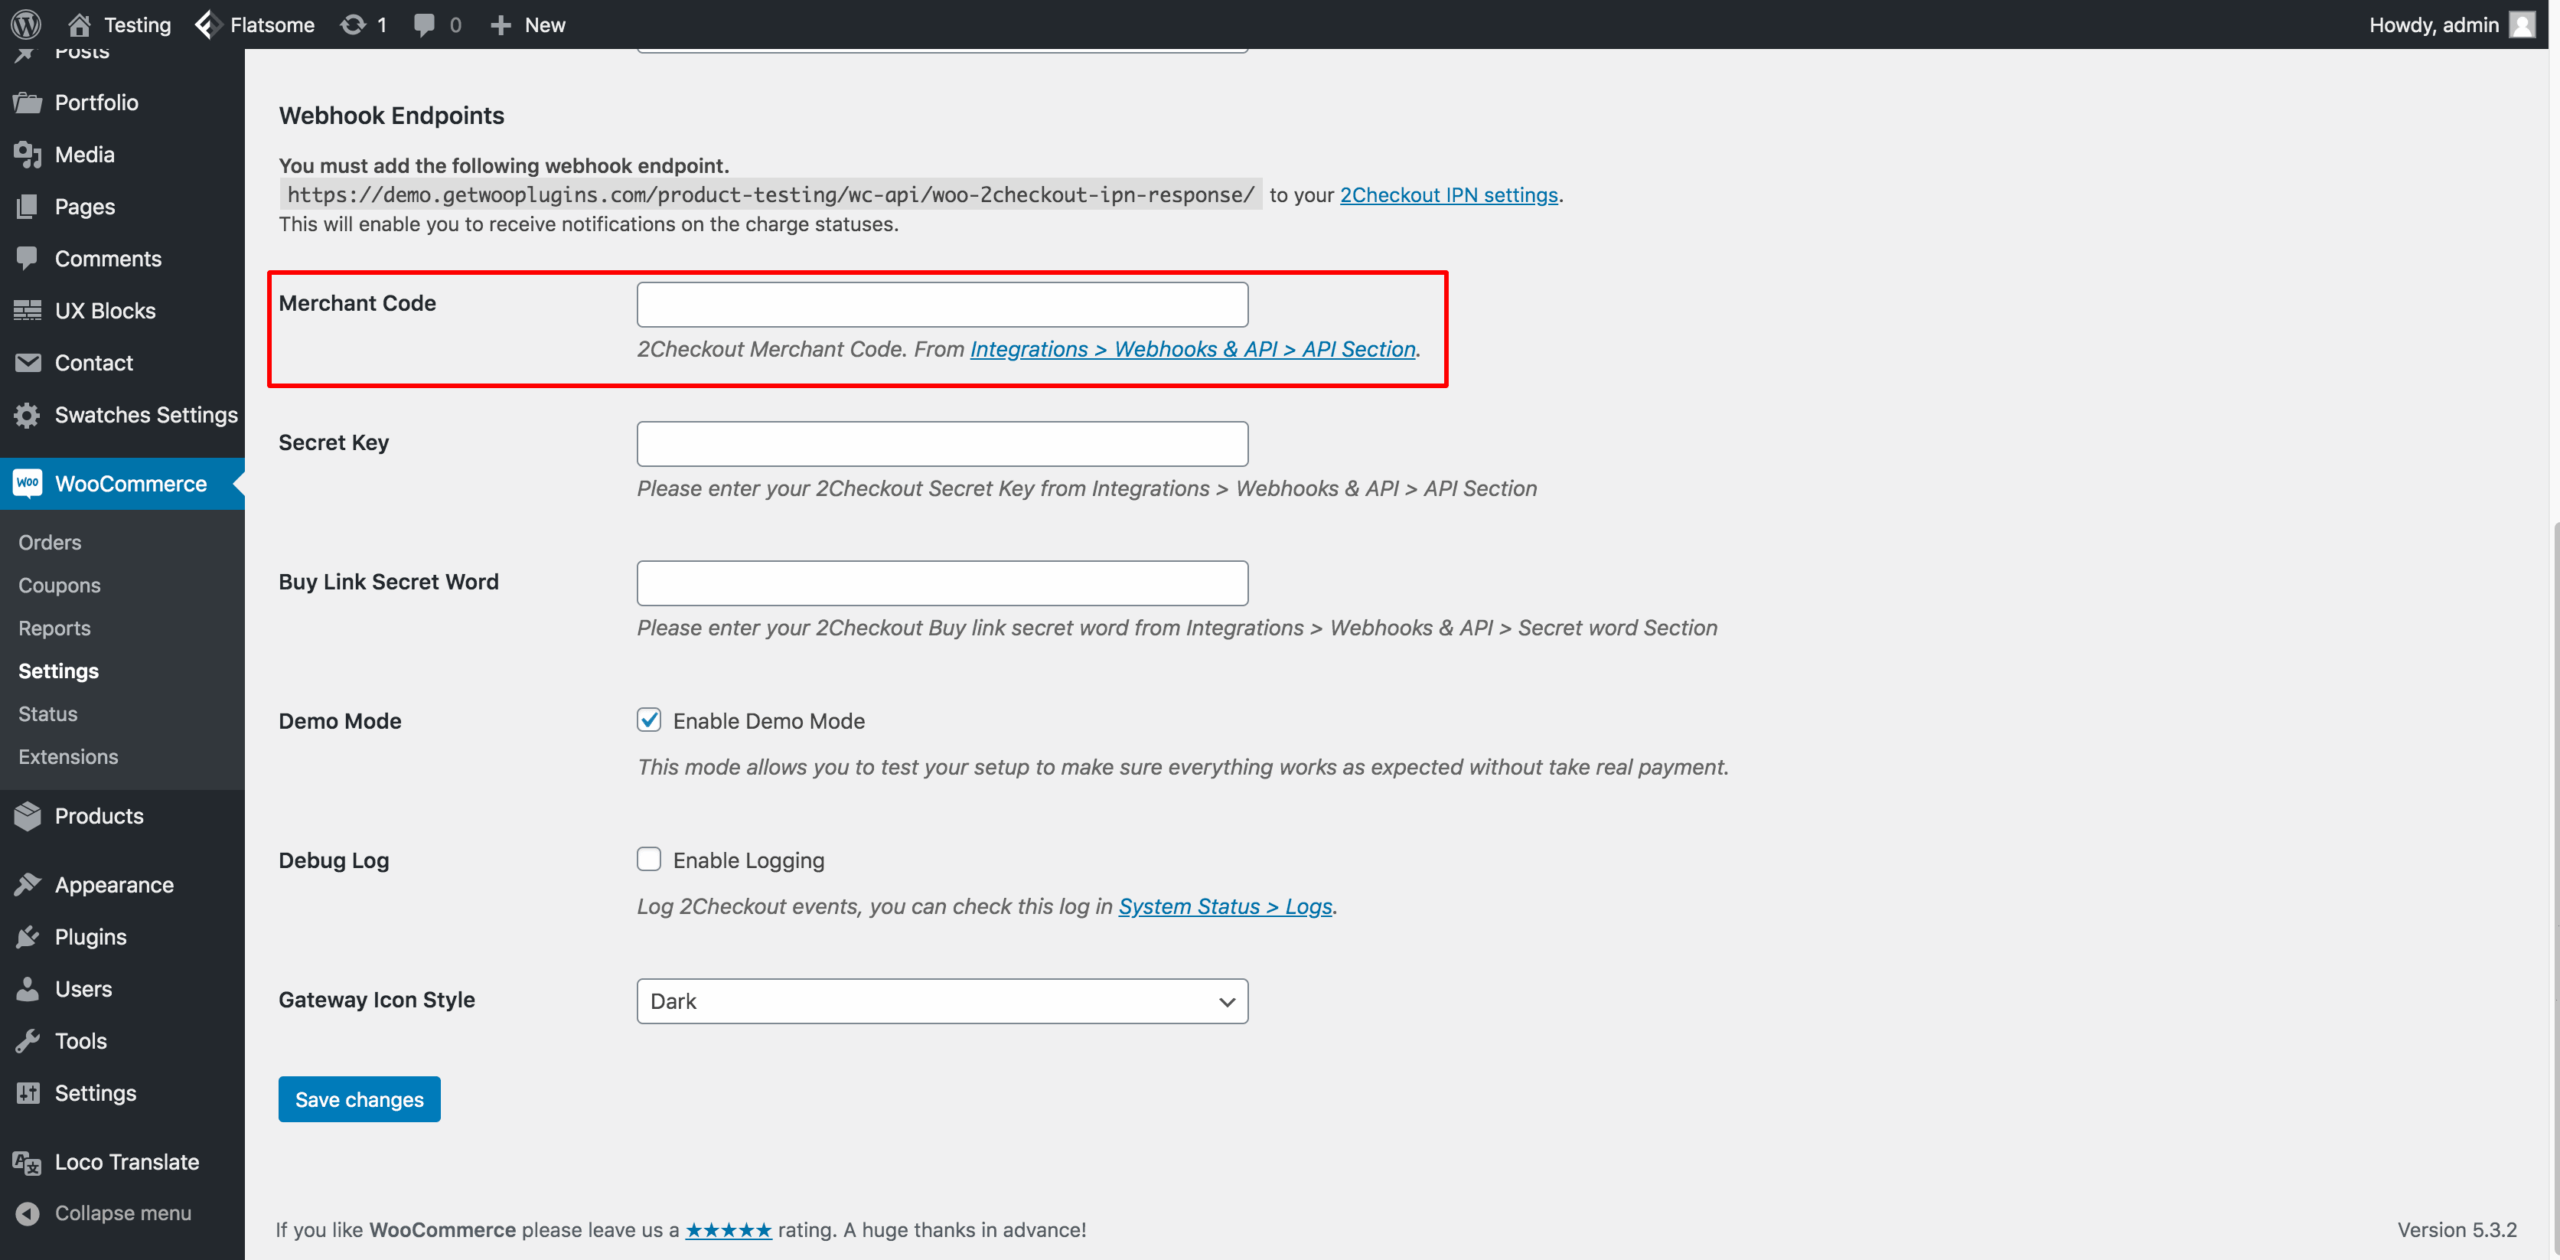
Copy the Marchant code from the indicated field.
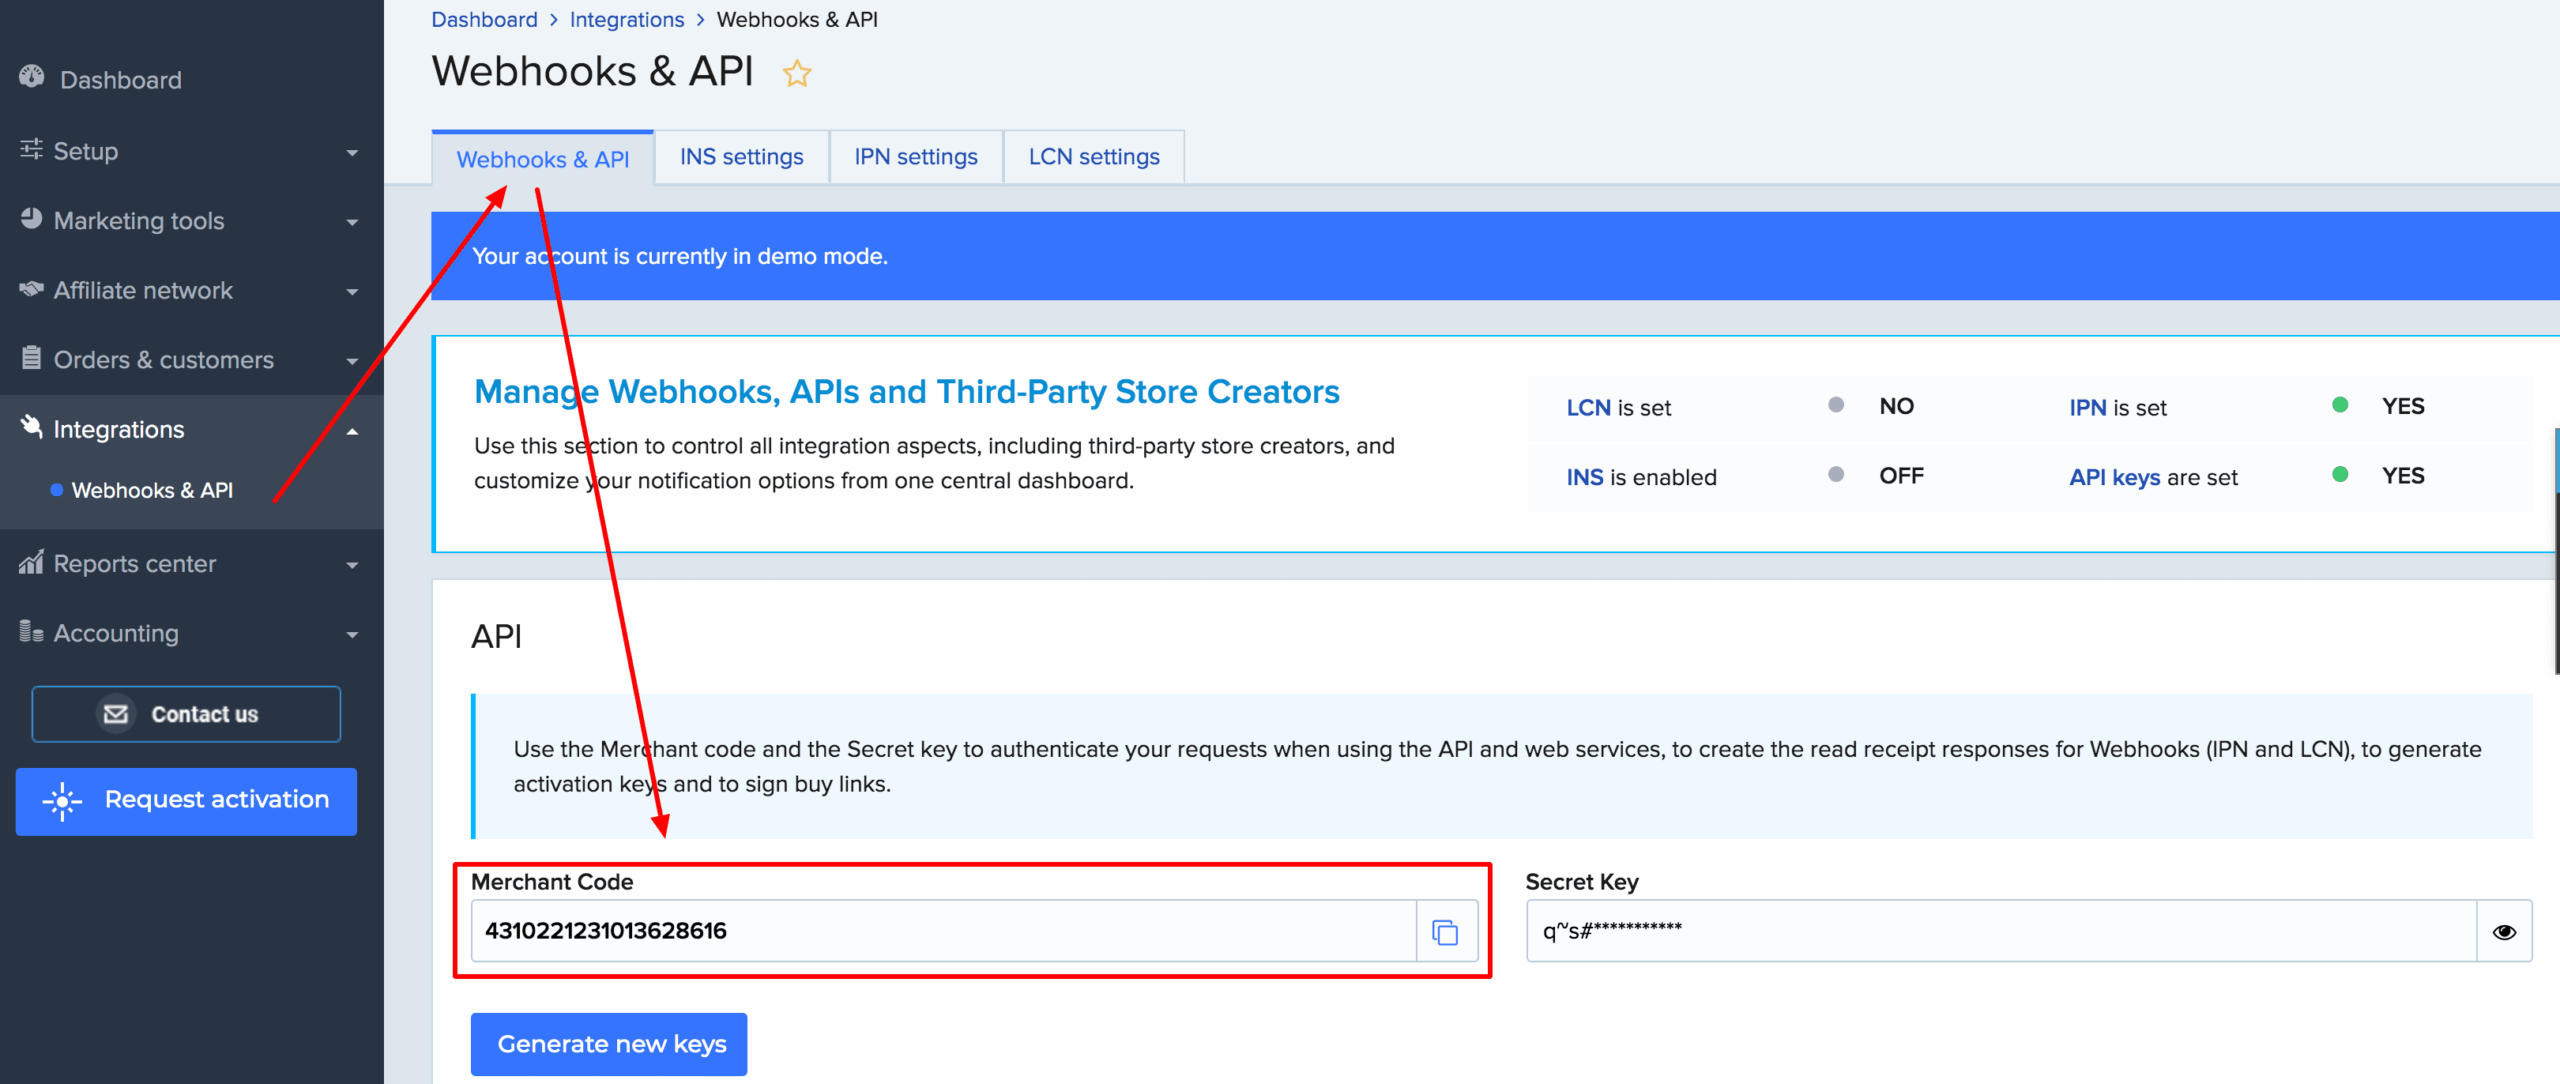
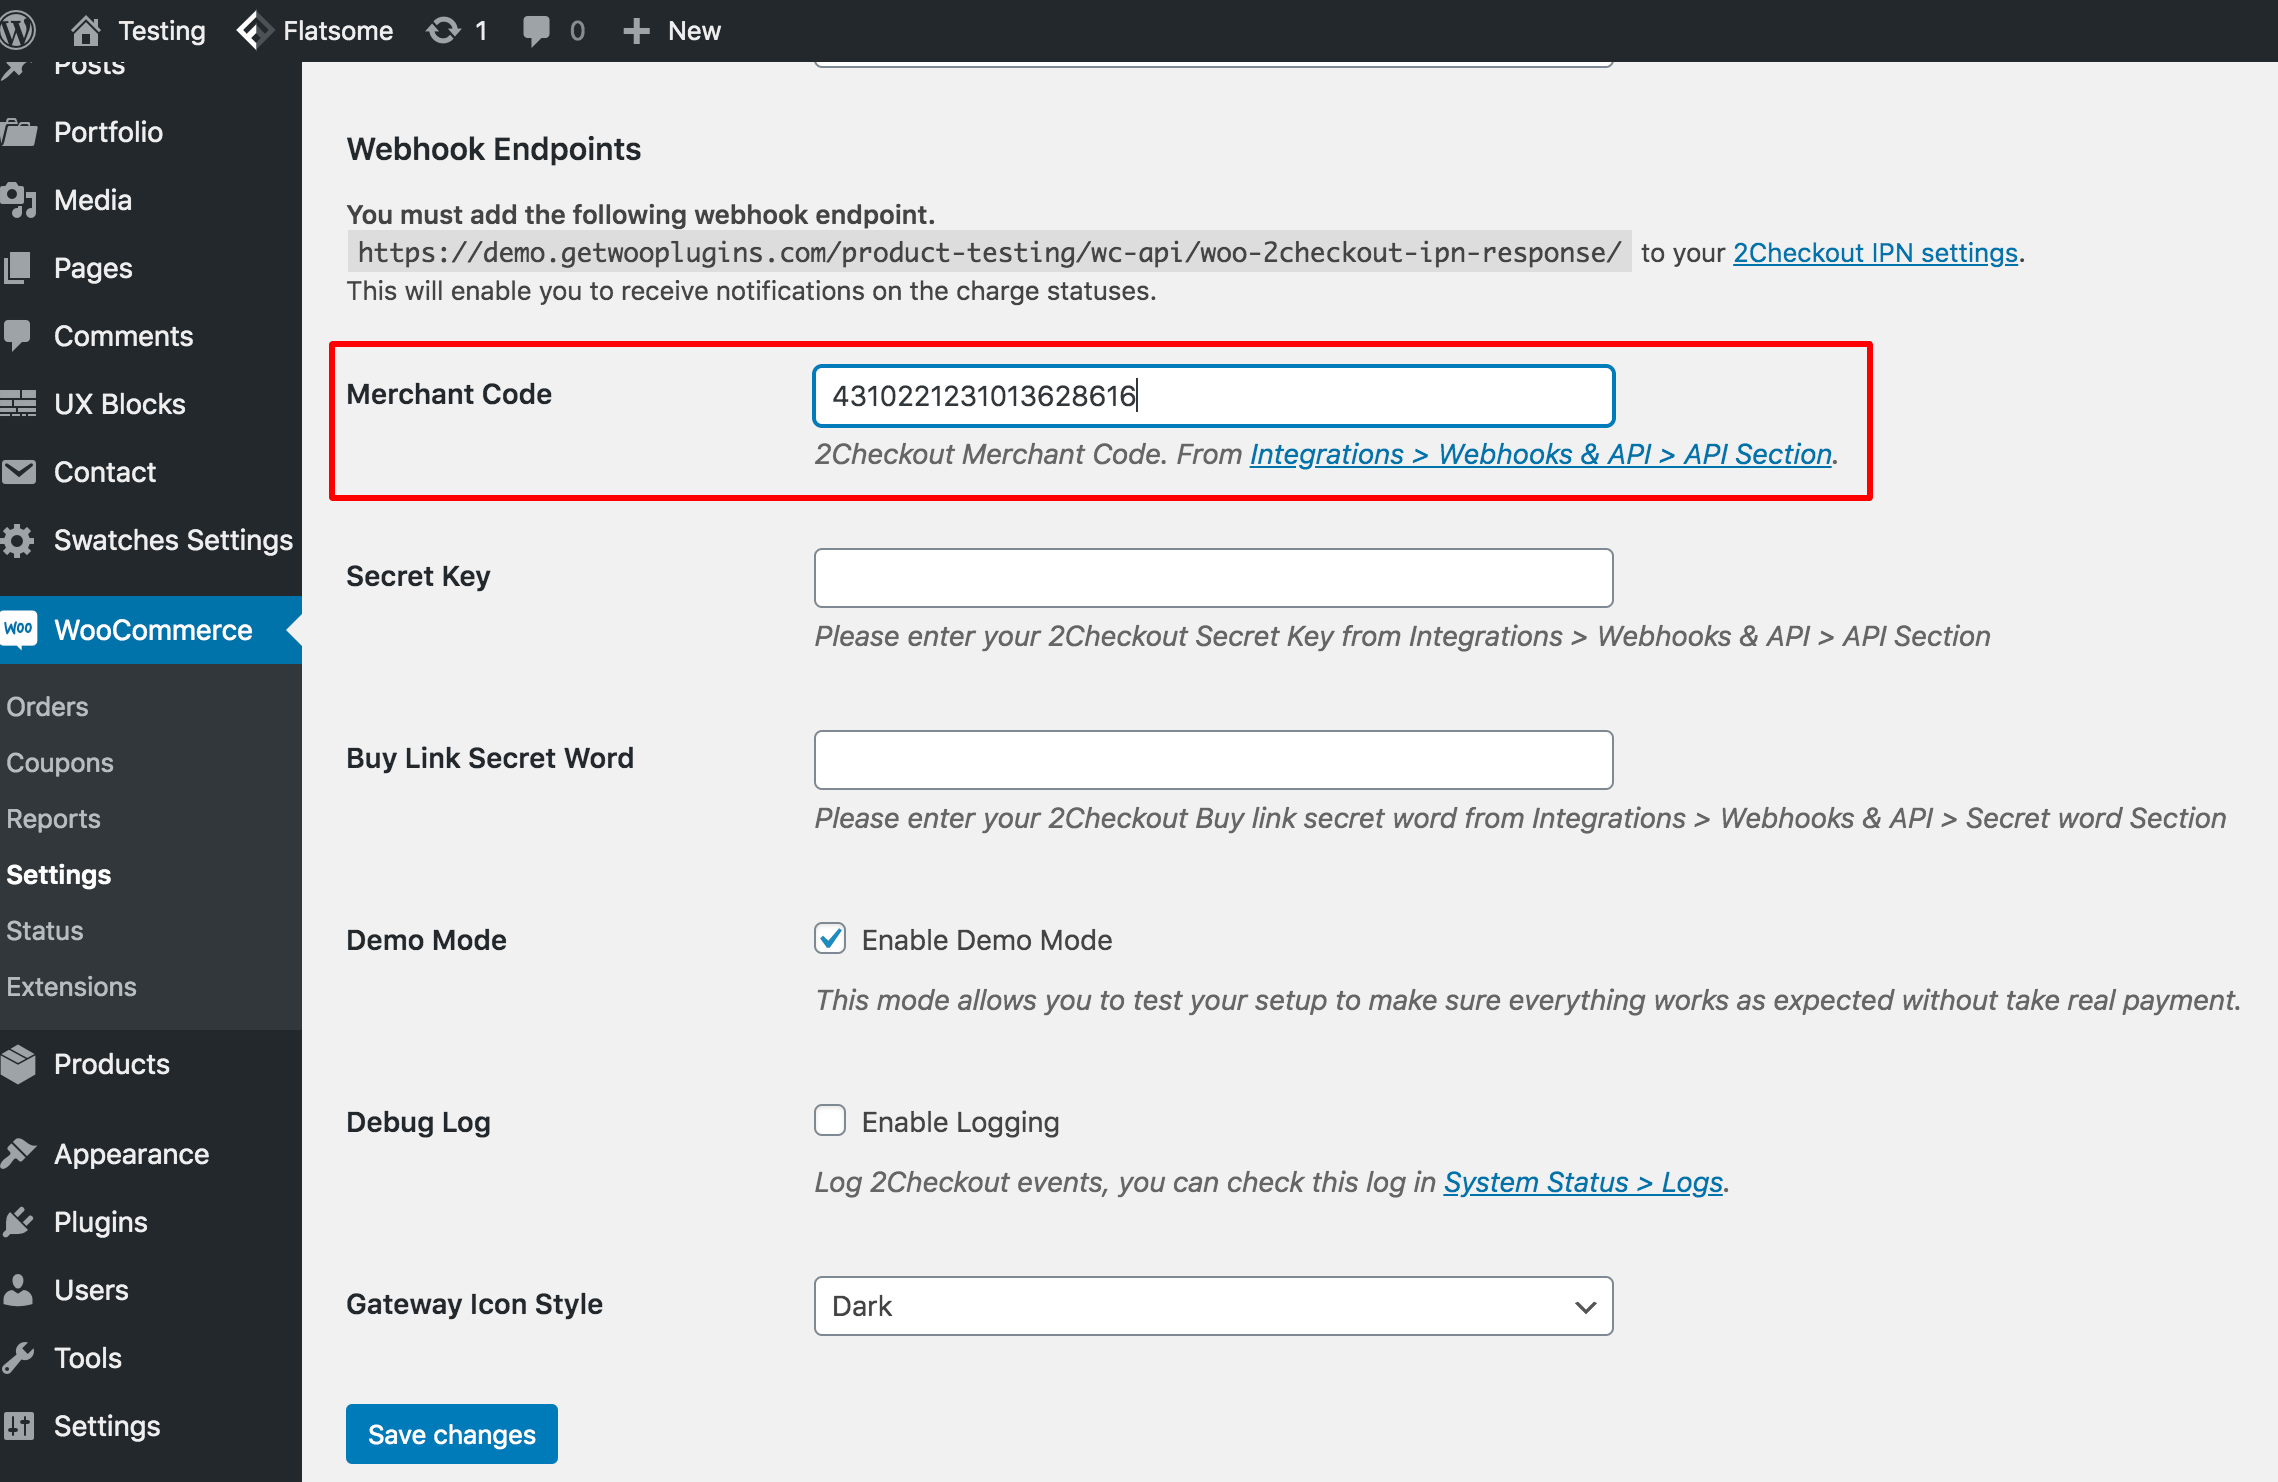
Return to the plugin settings page and paste the copied Merchant Code into the Merchant Code field, as shown in the screenshot below.
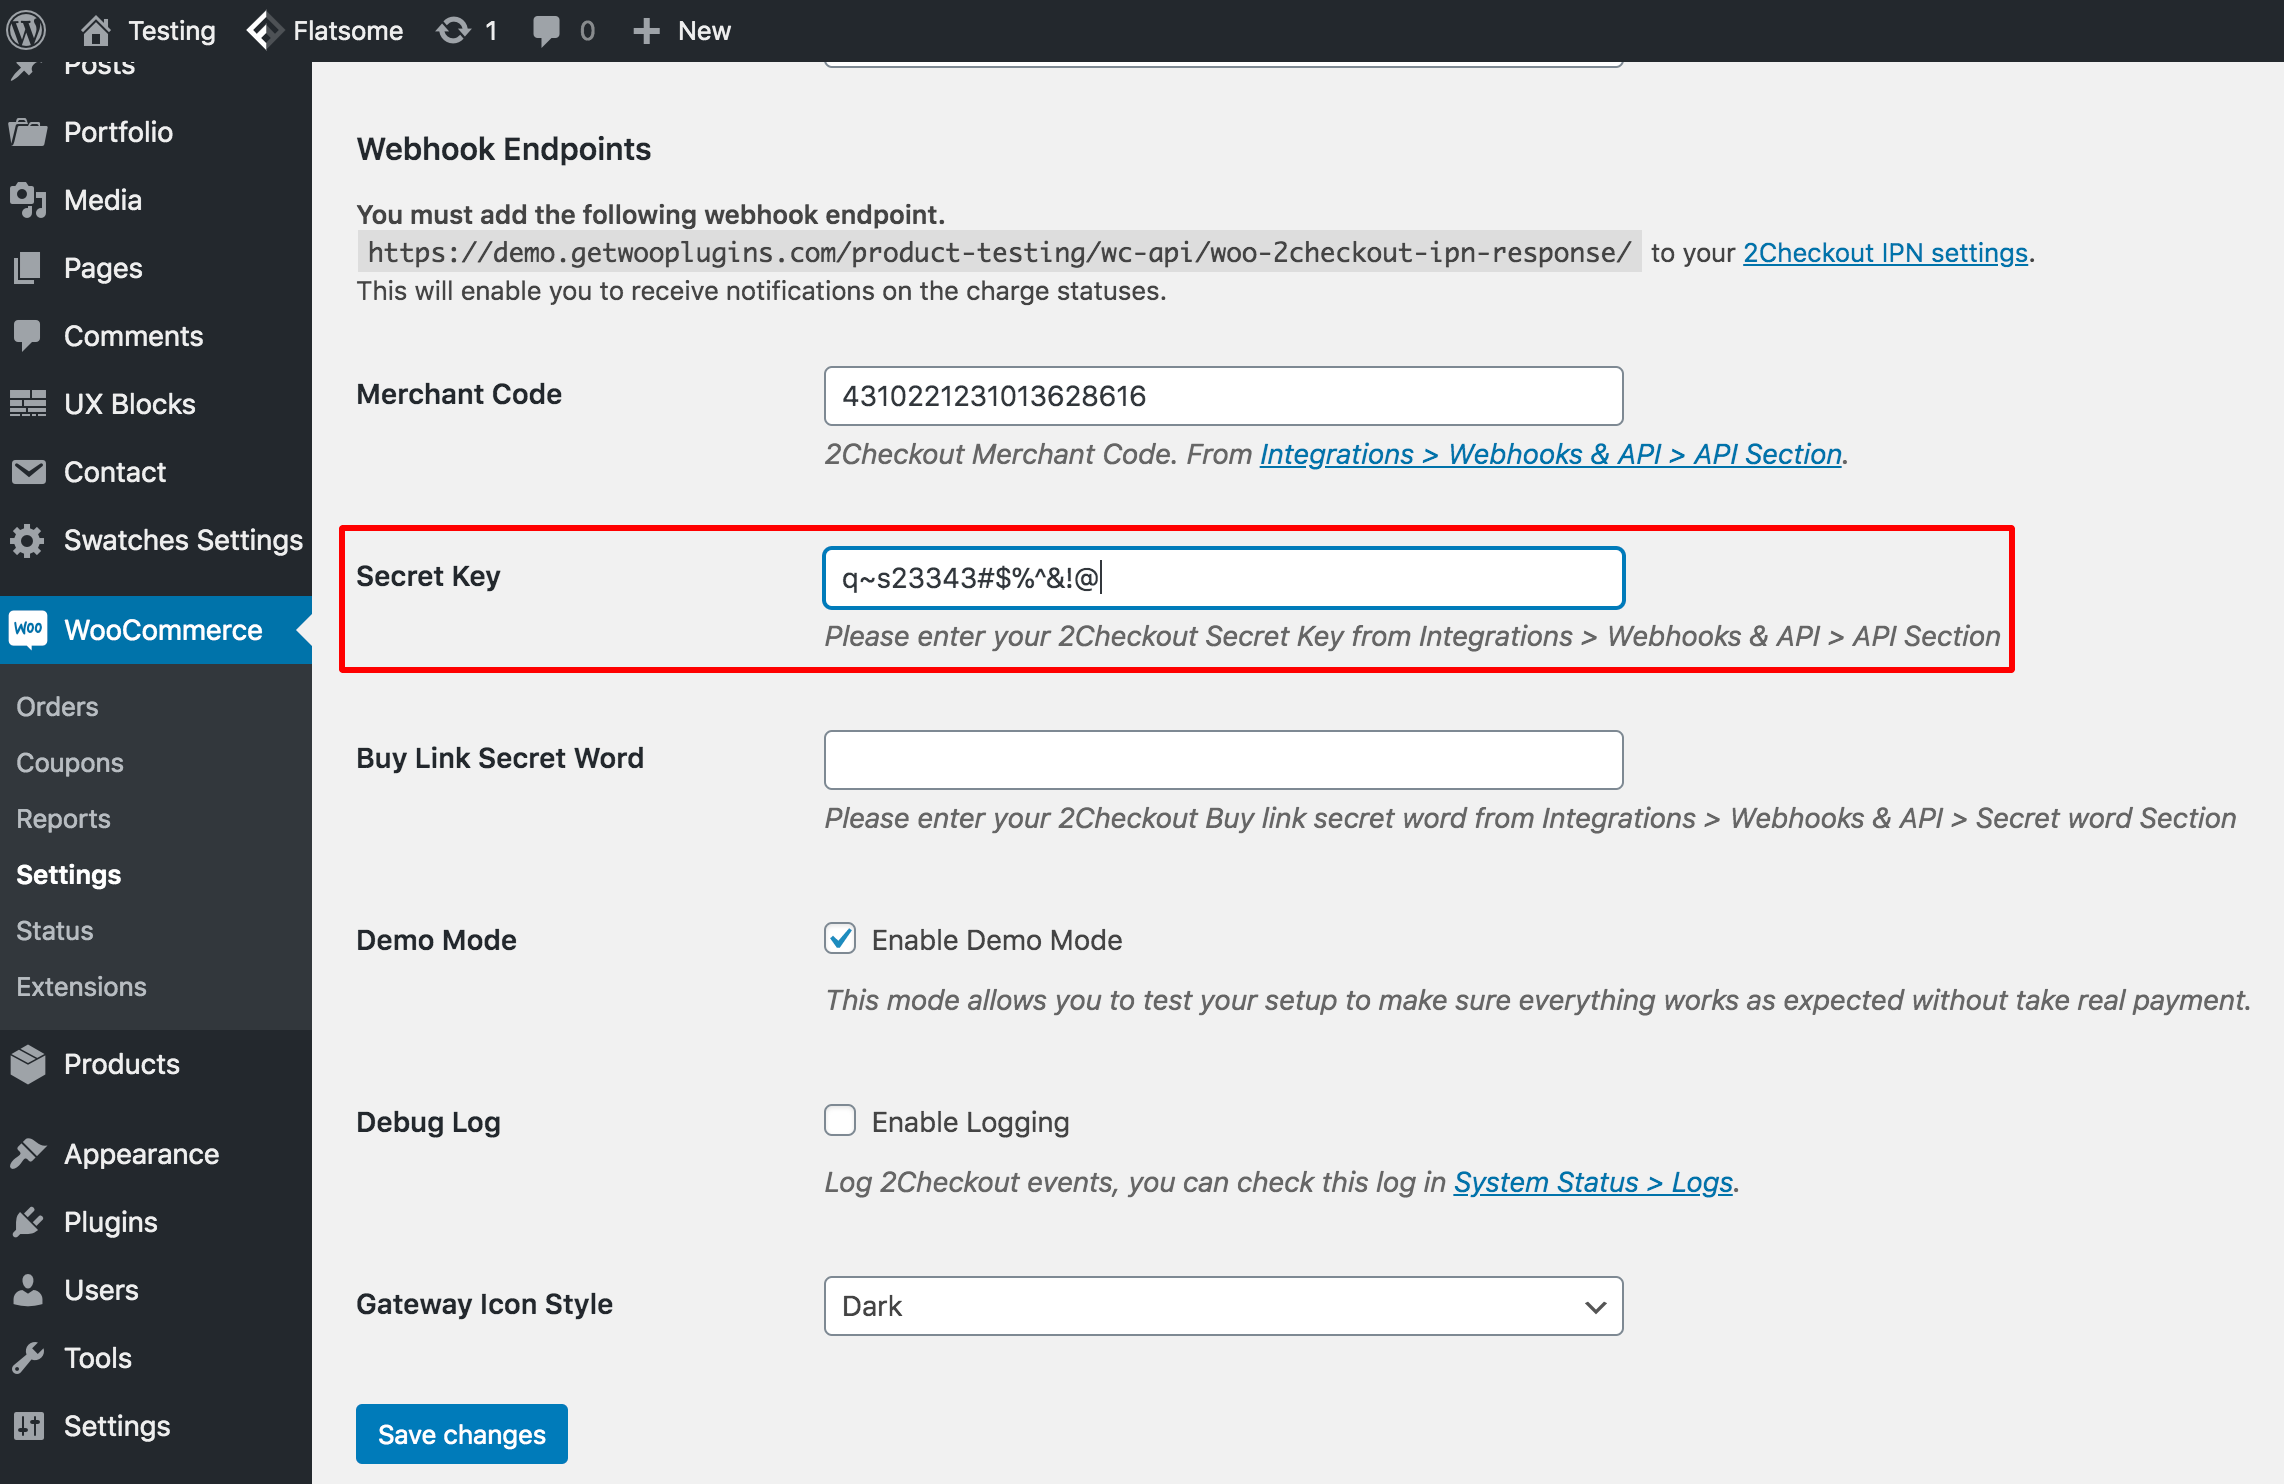
Step 4: Secret Code
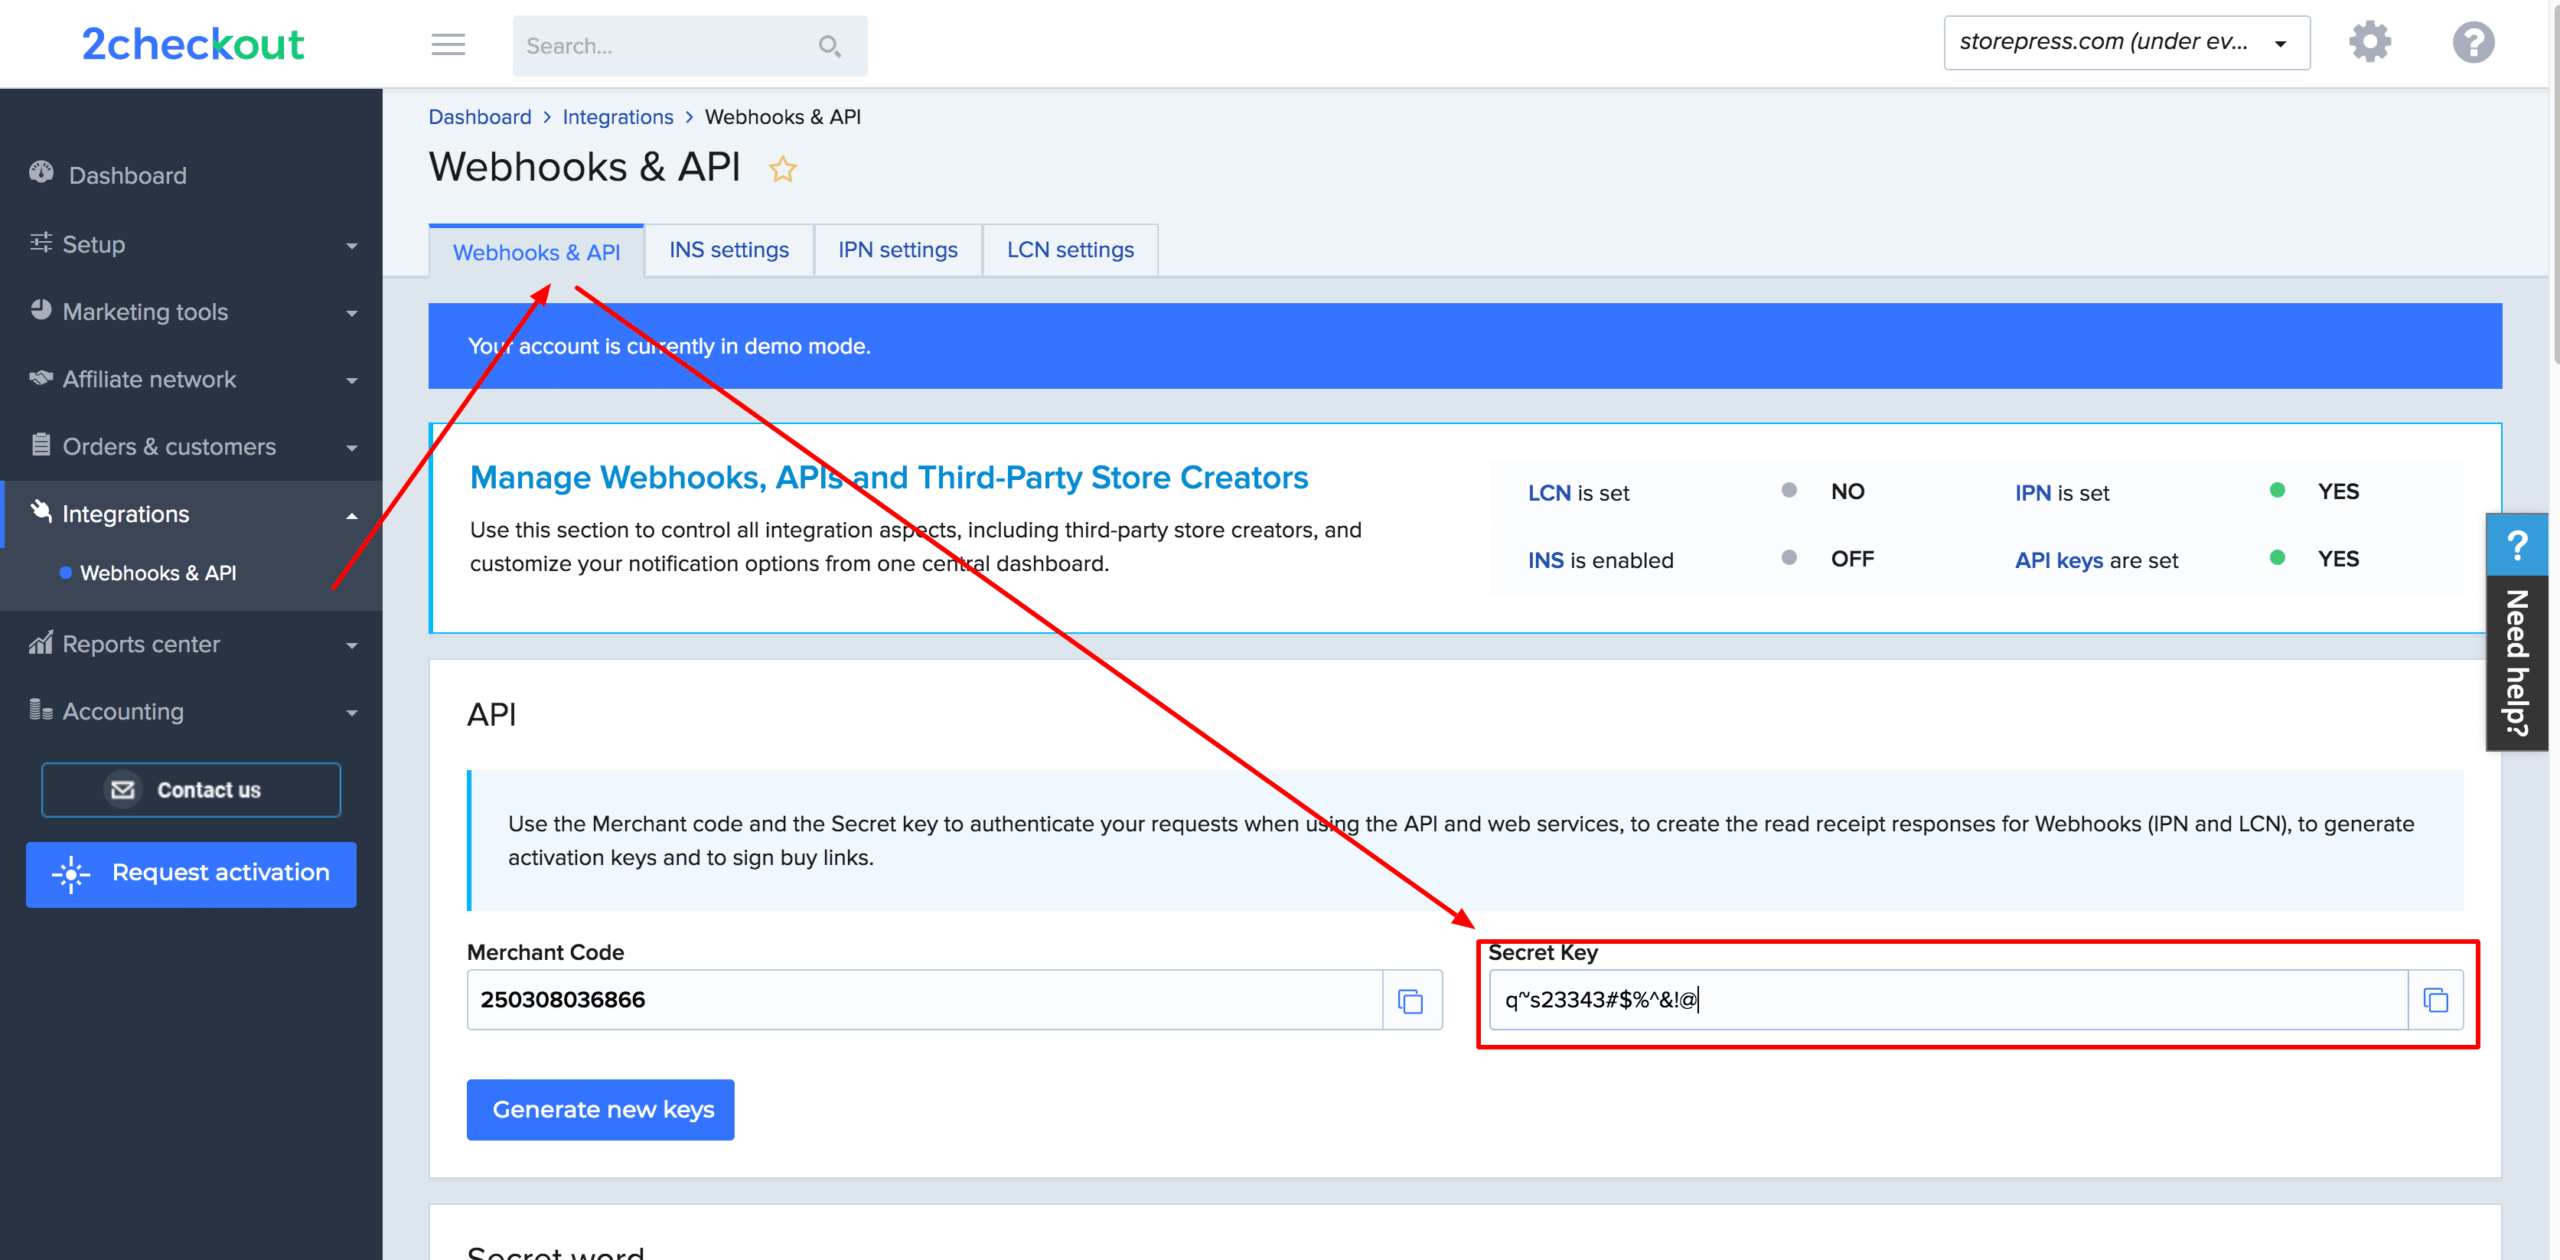
To add Secret Code to the following highlighted field, navigate to Integrations > Webhooks & API > API Section.
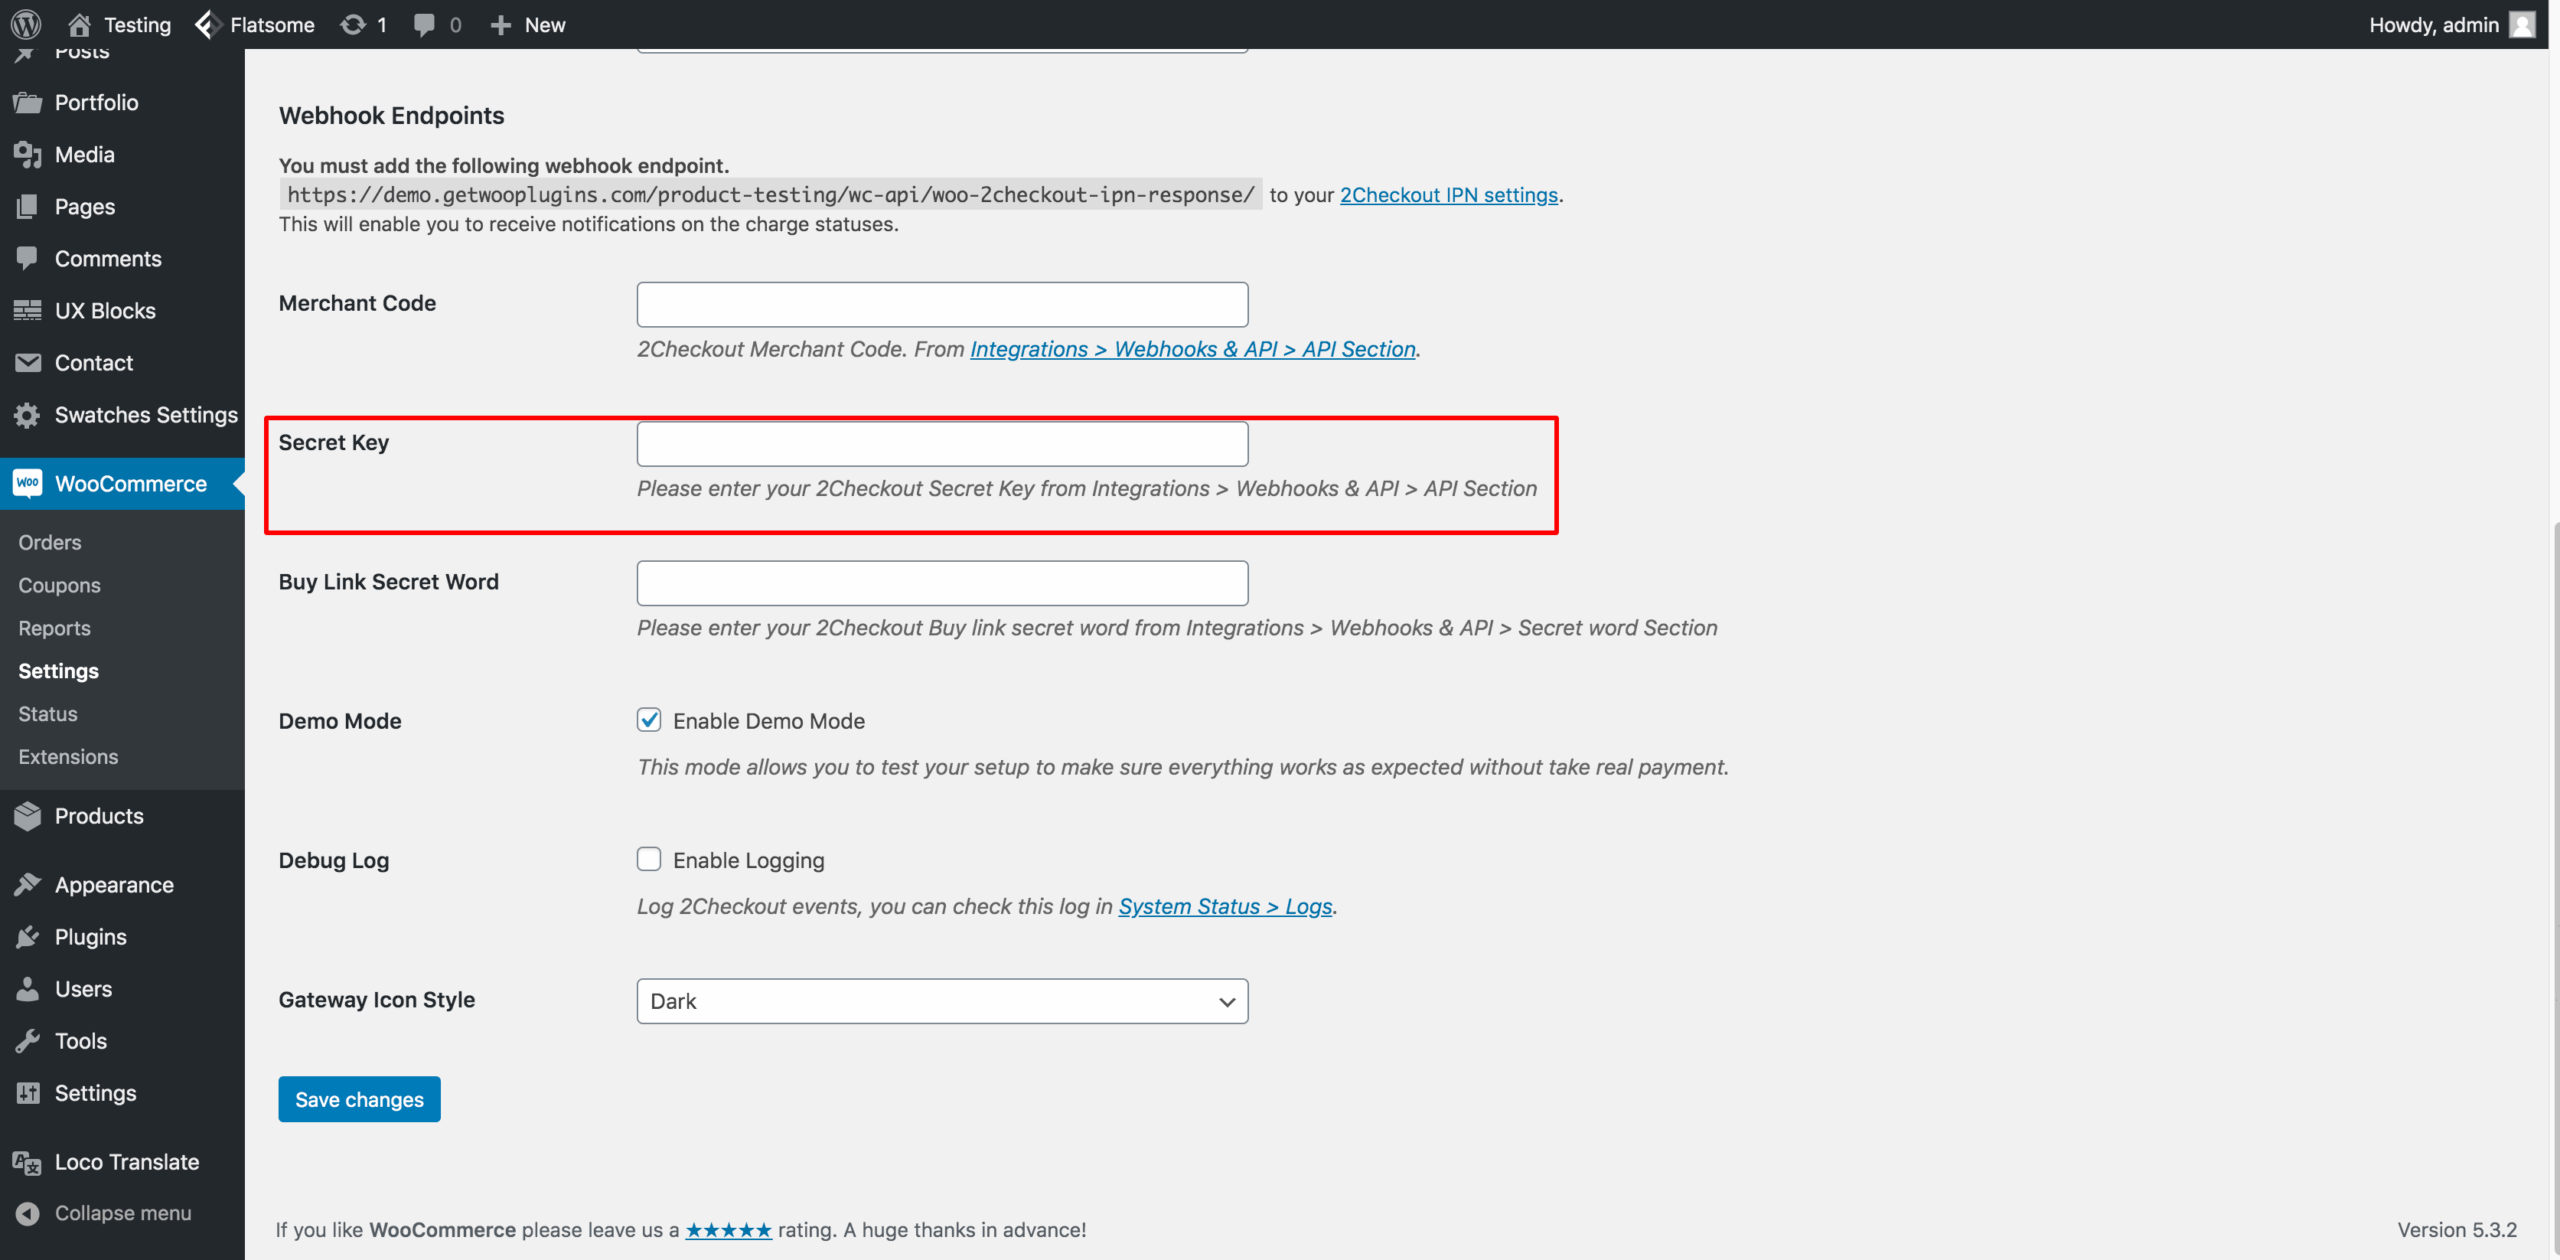
Copy the secret code from designated field from the 2Checkout page.
Return to the plugin settings page and paste the copied Secret Code into the plugin’s Secret Code field, as shown in the screenshot below.
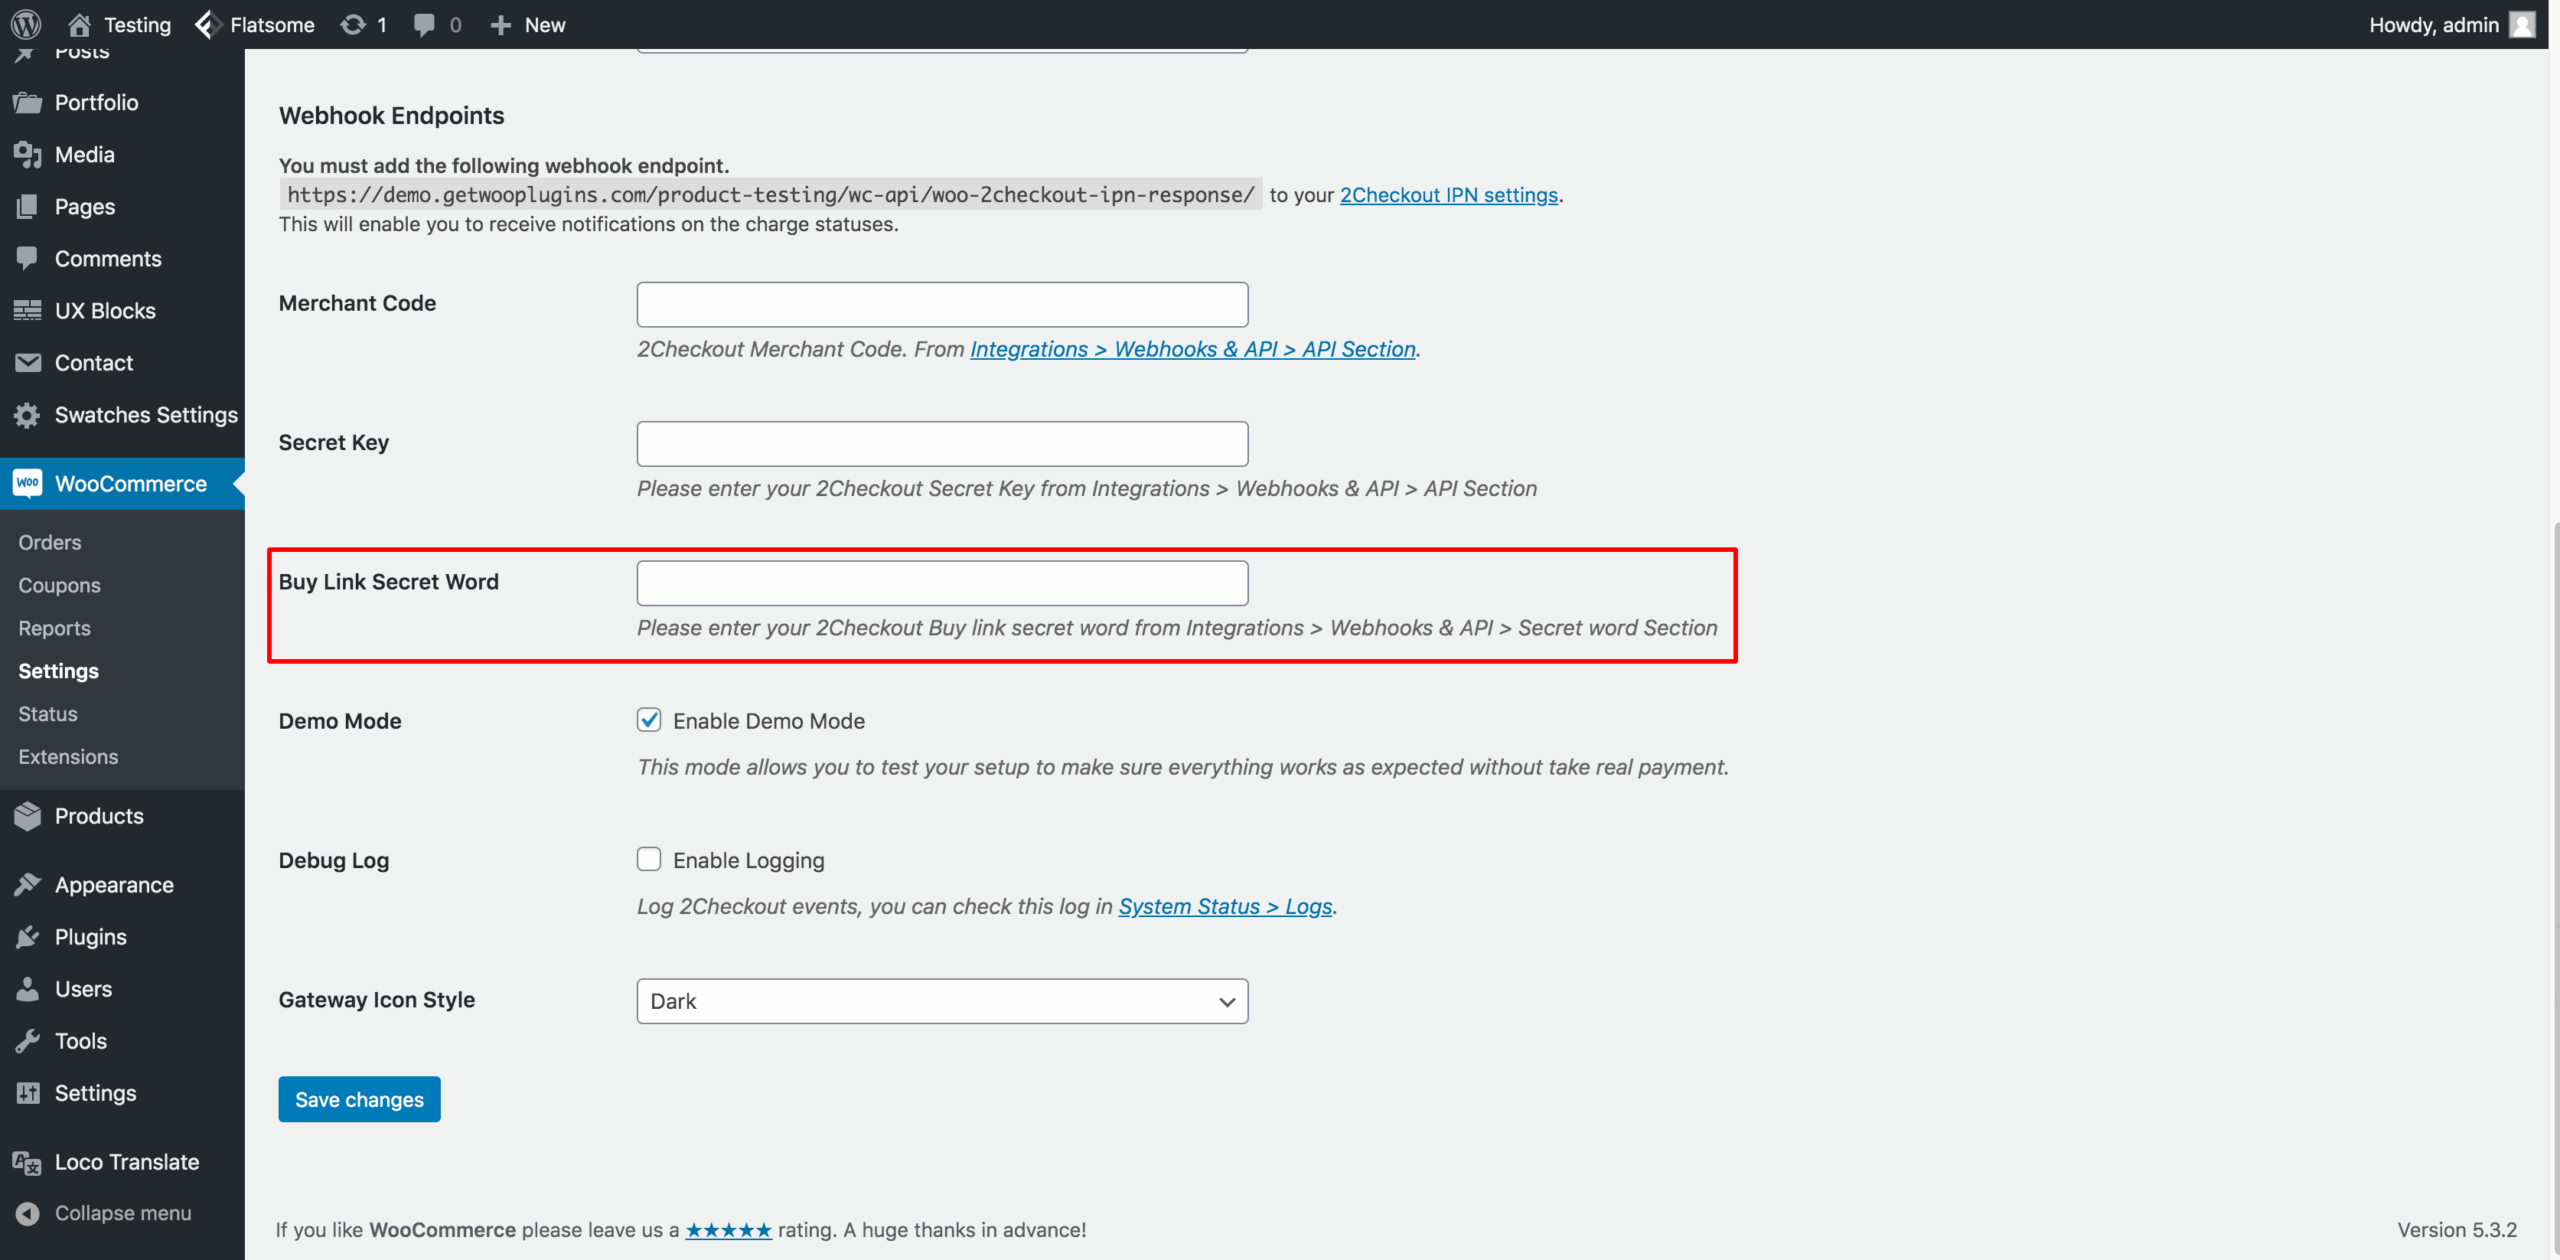
Step 5: Add Buy Link Secret Word
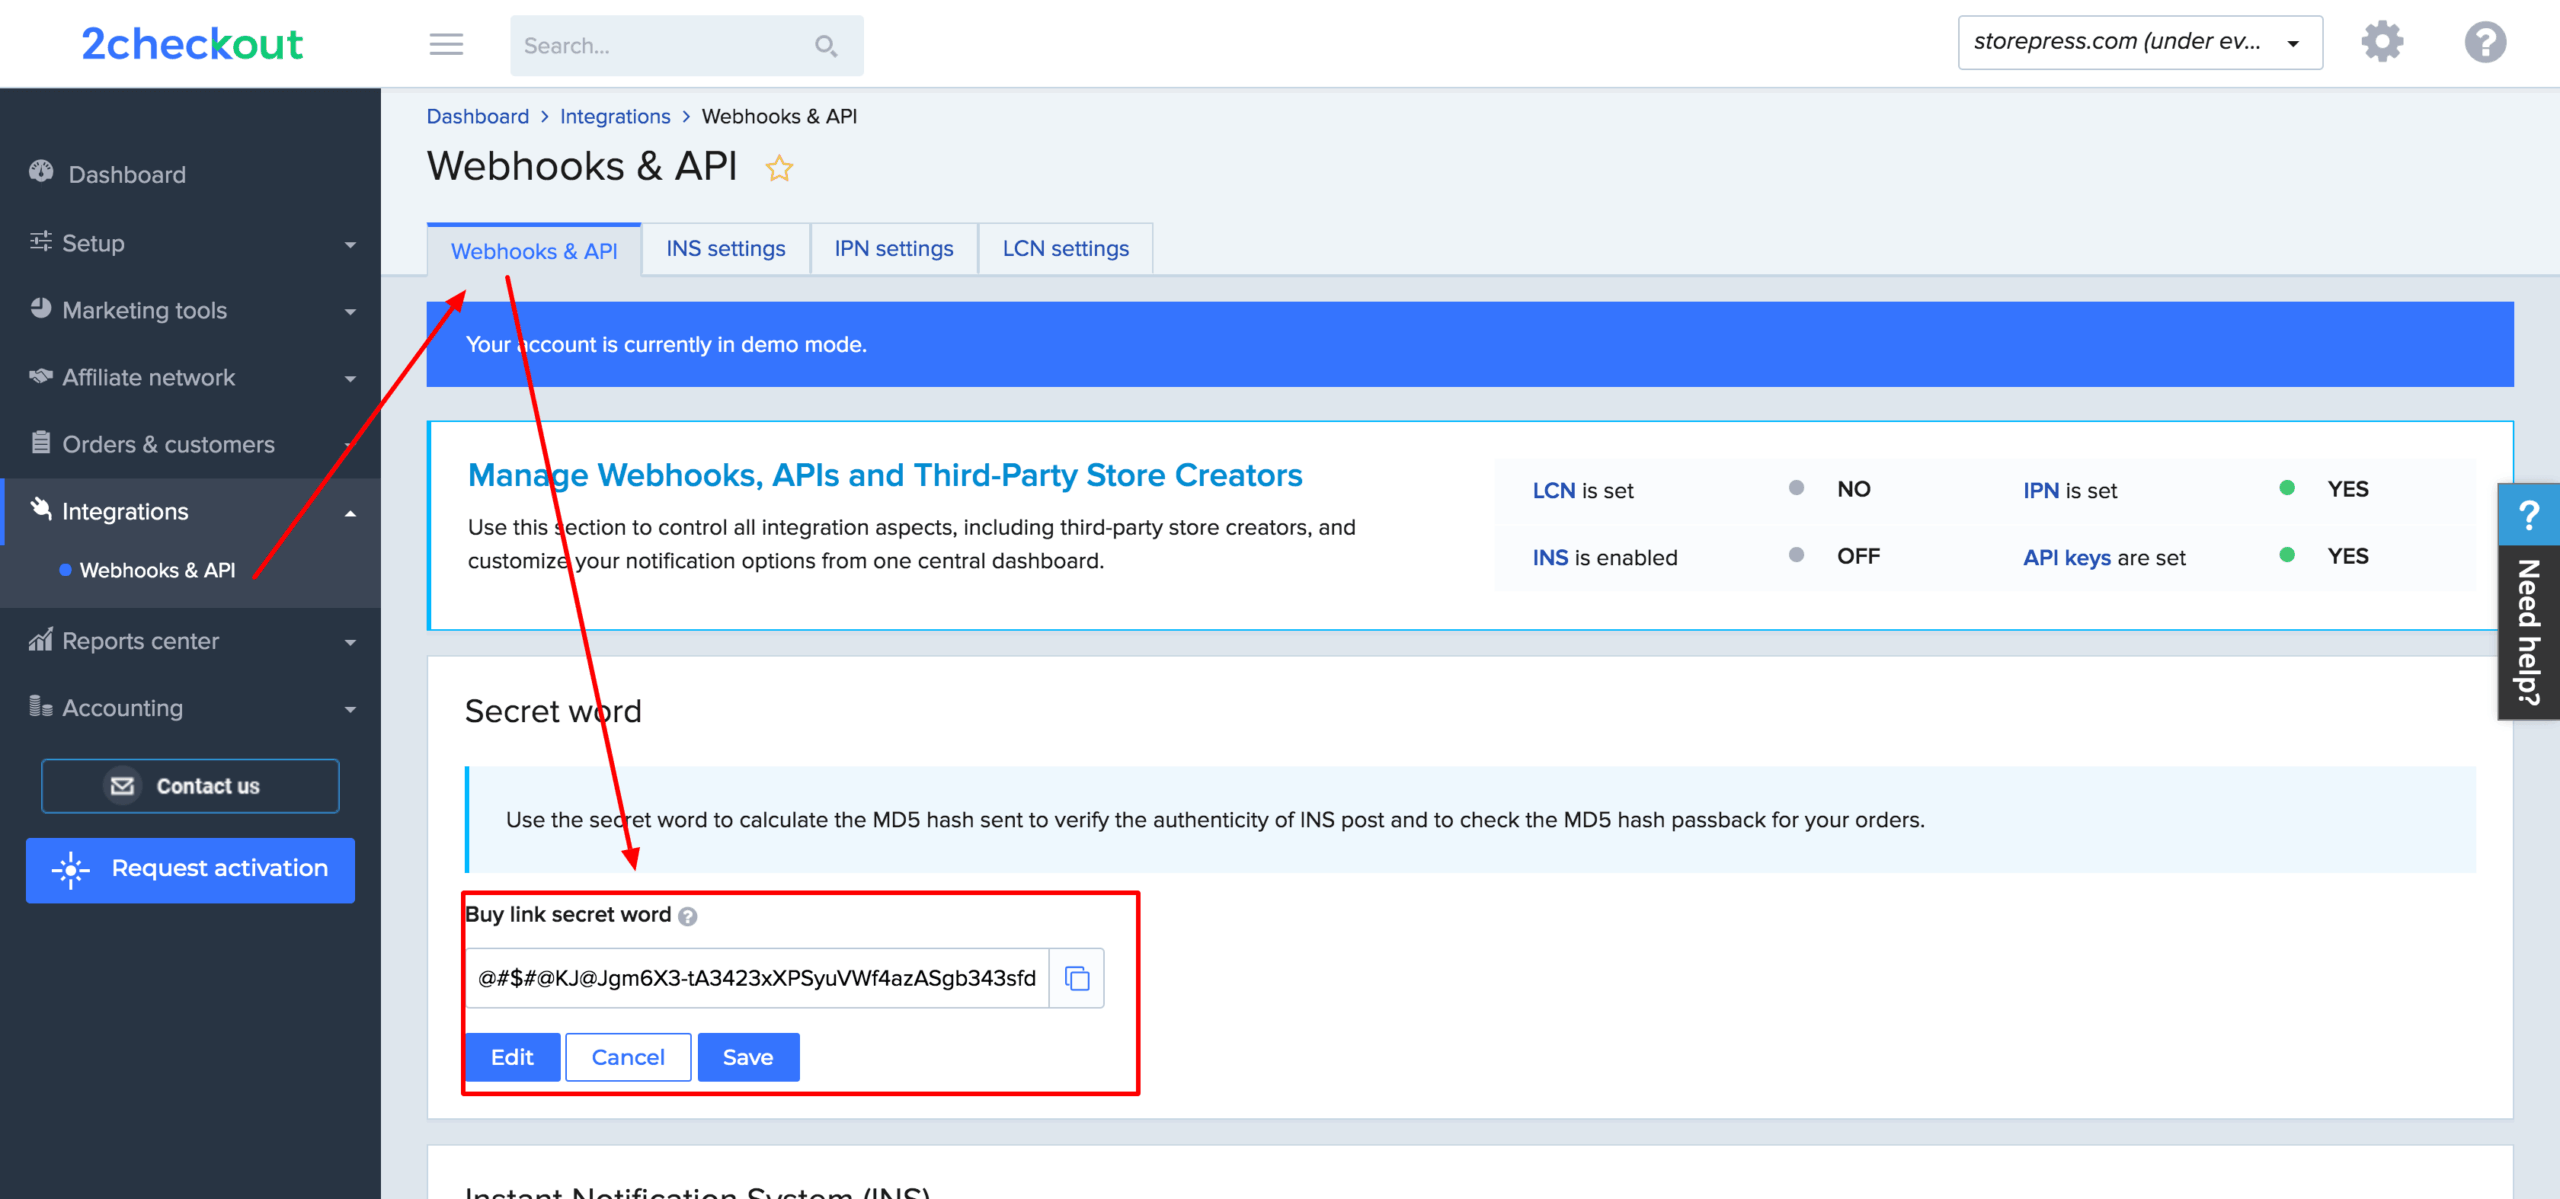
To add the Secret Word to the highlighted field, go to Integrations → Webhooks & API → API section.
Copy the Secret Word from the designated field on the 2Checkout page.
Return to the plugin settings page and paste the copied Secret Word into the plugin’s Secret Word field, as shown in the screenshot below.
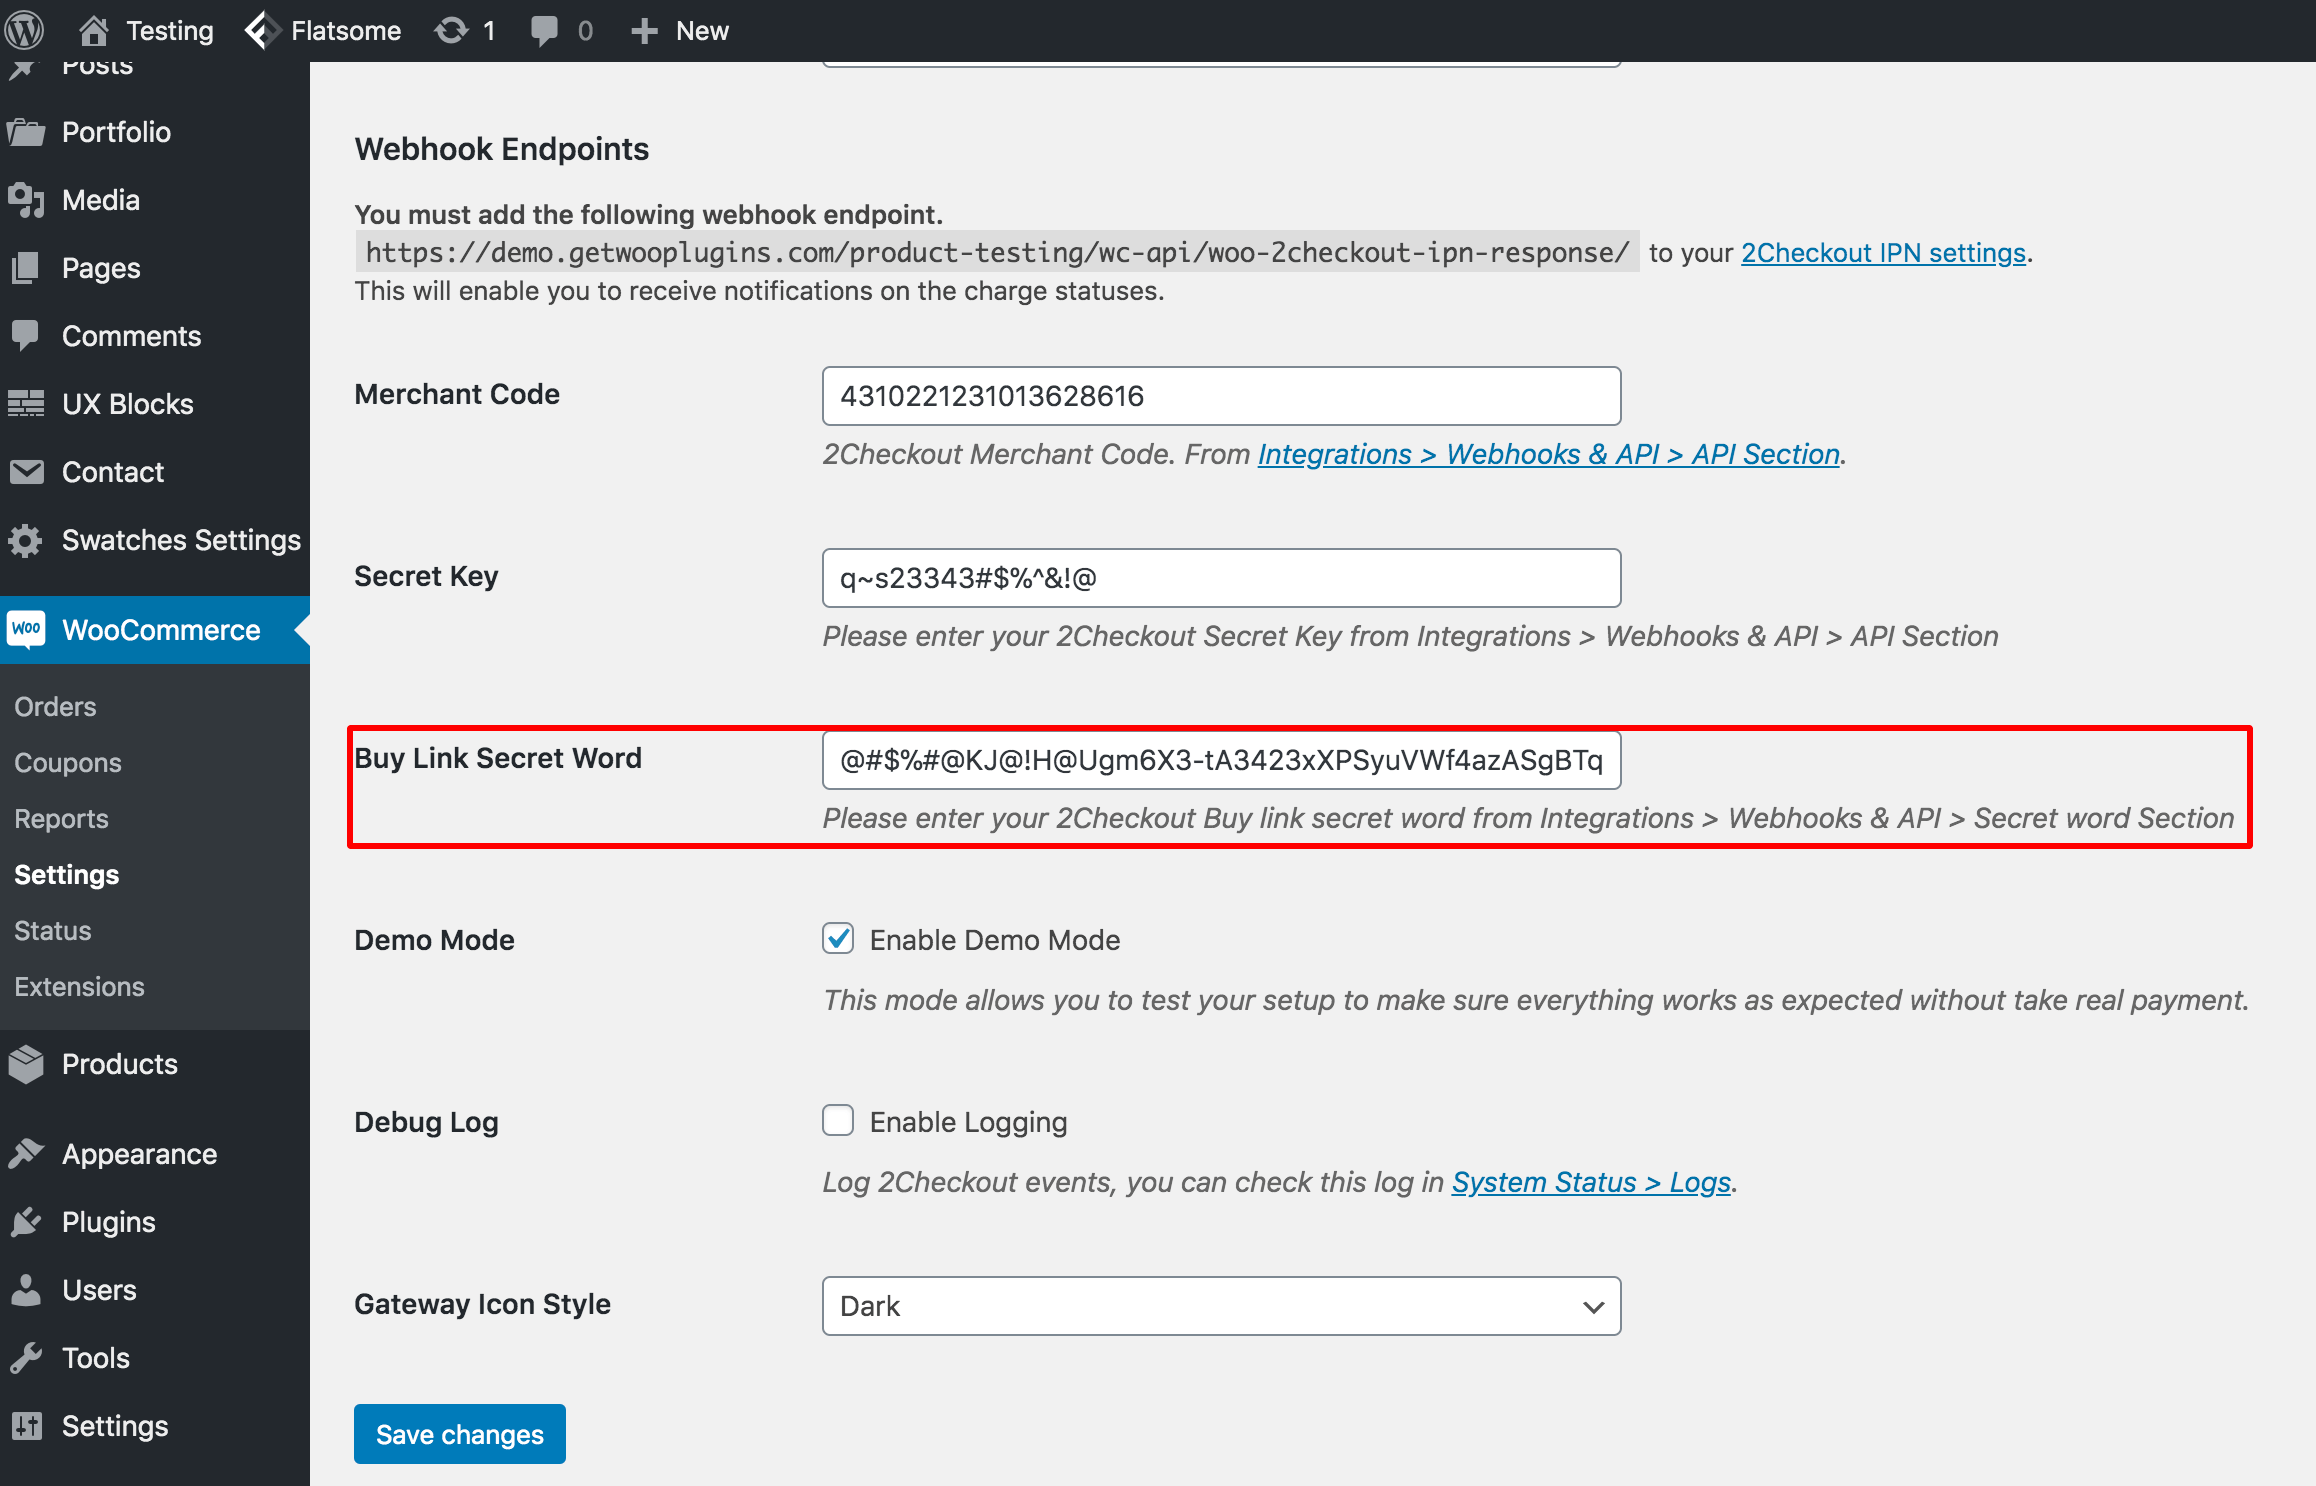
Once you have entered the Merchant Code, Secret Key, and Secret Word, click the Save Changes button to apply the settings.
Required IPN Settings
General IPN Settings
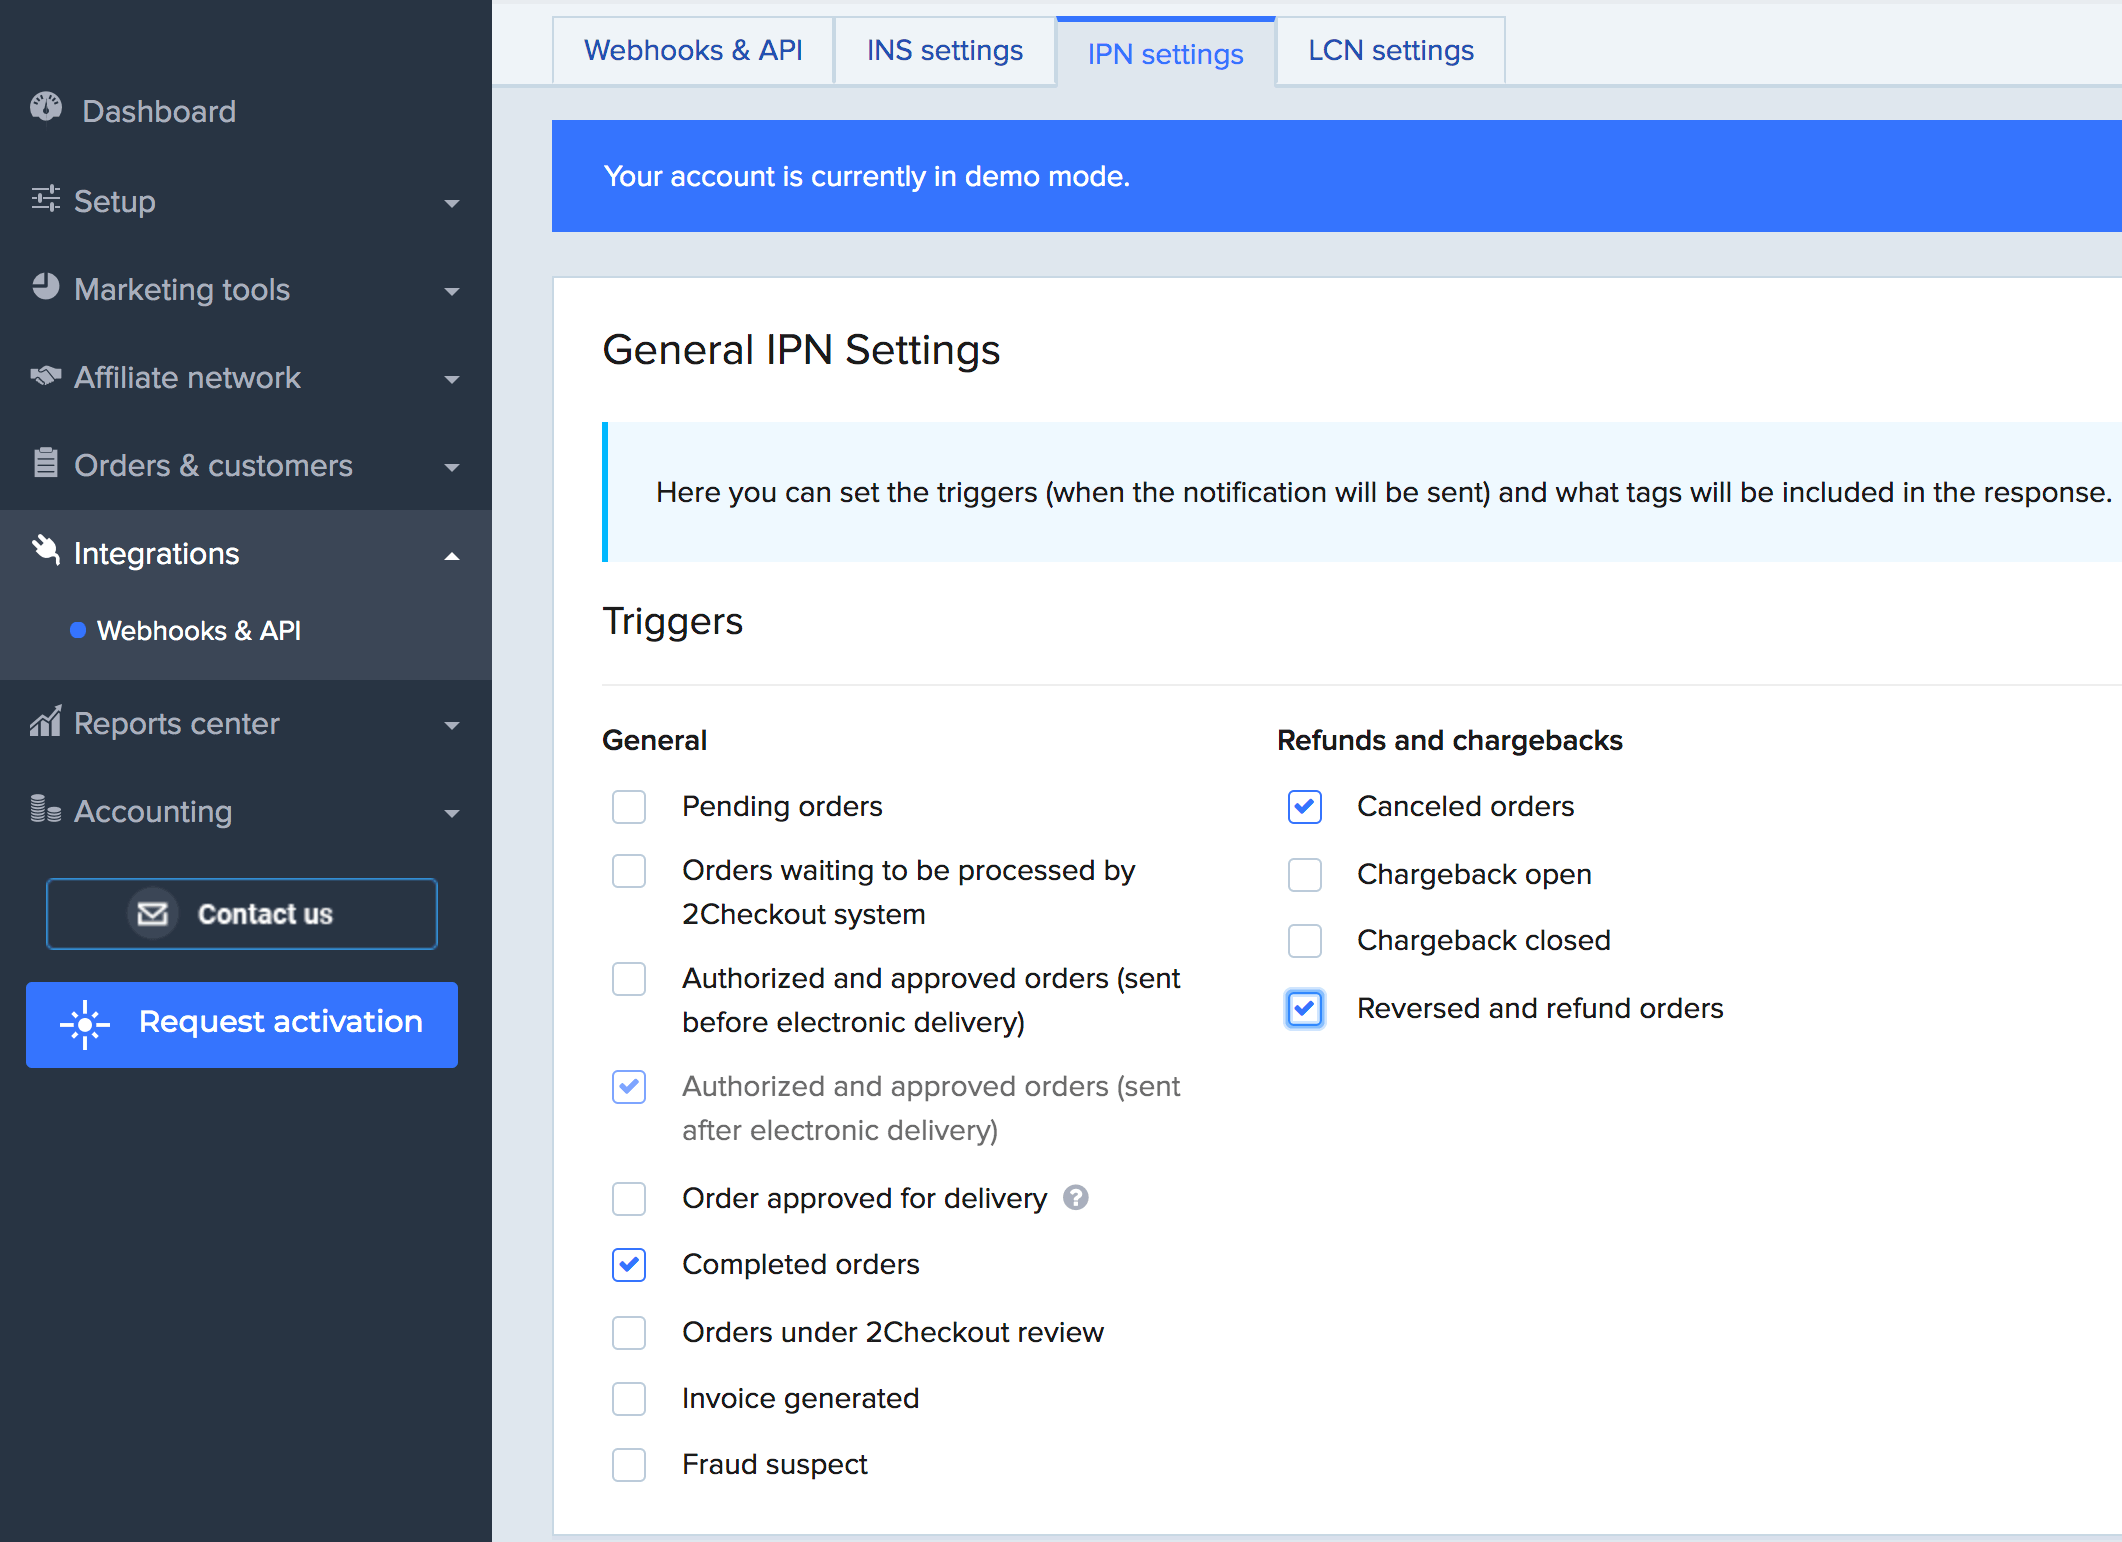
Navigate to Integrations → Webhooks & API → IPN Settings, and ensure the following options are selected.
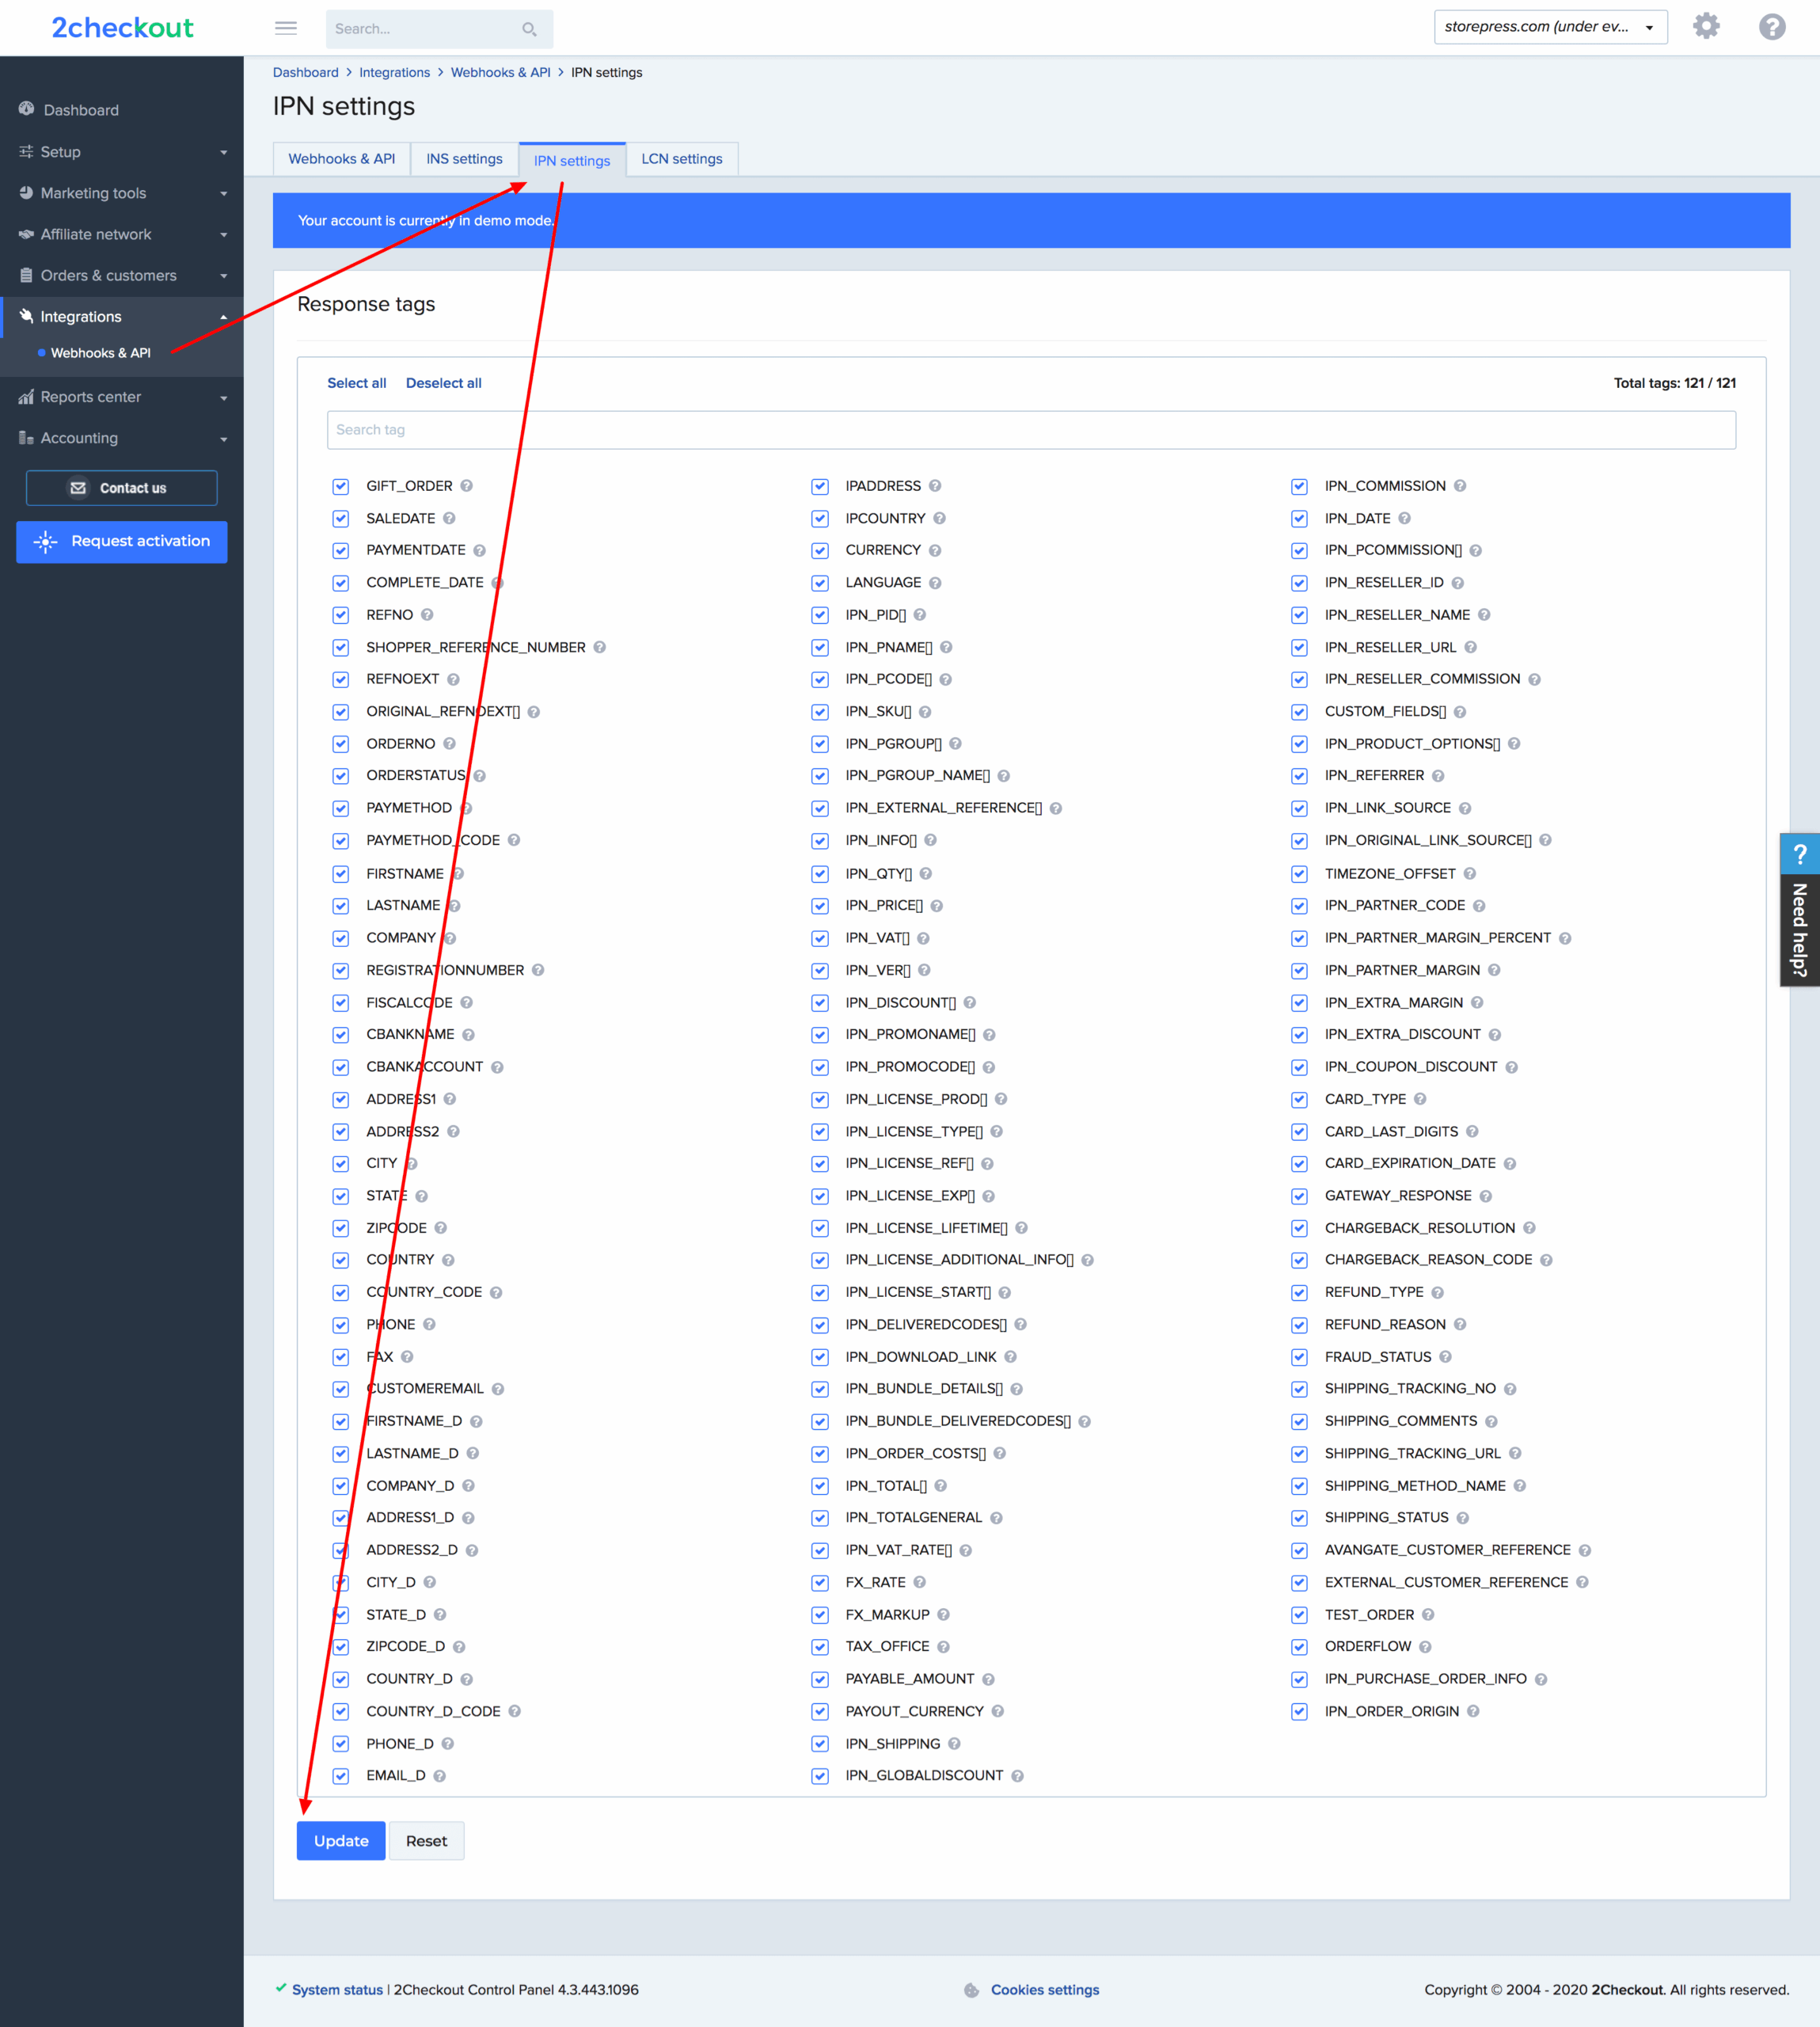
Response Tag
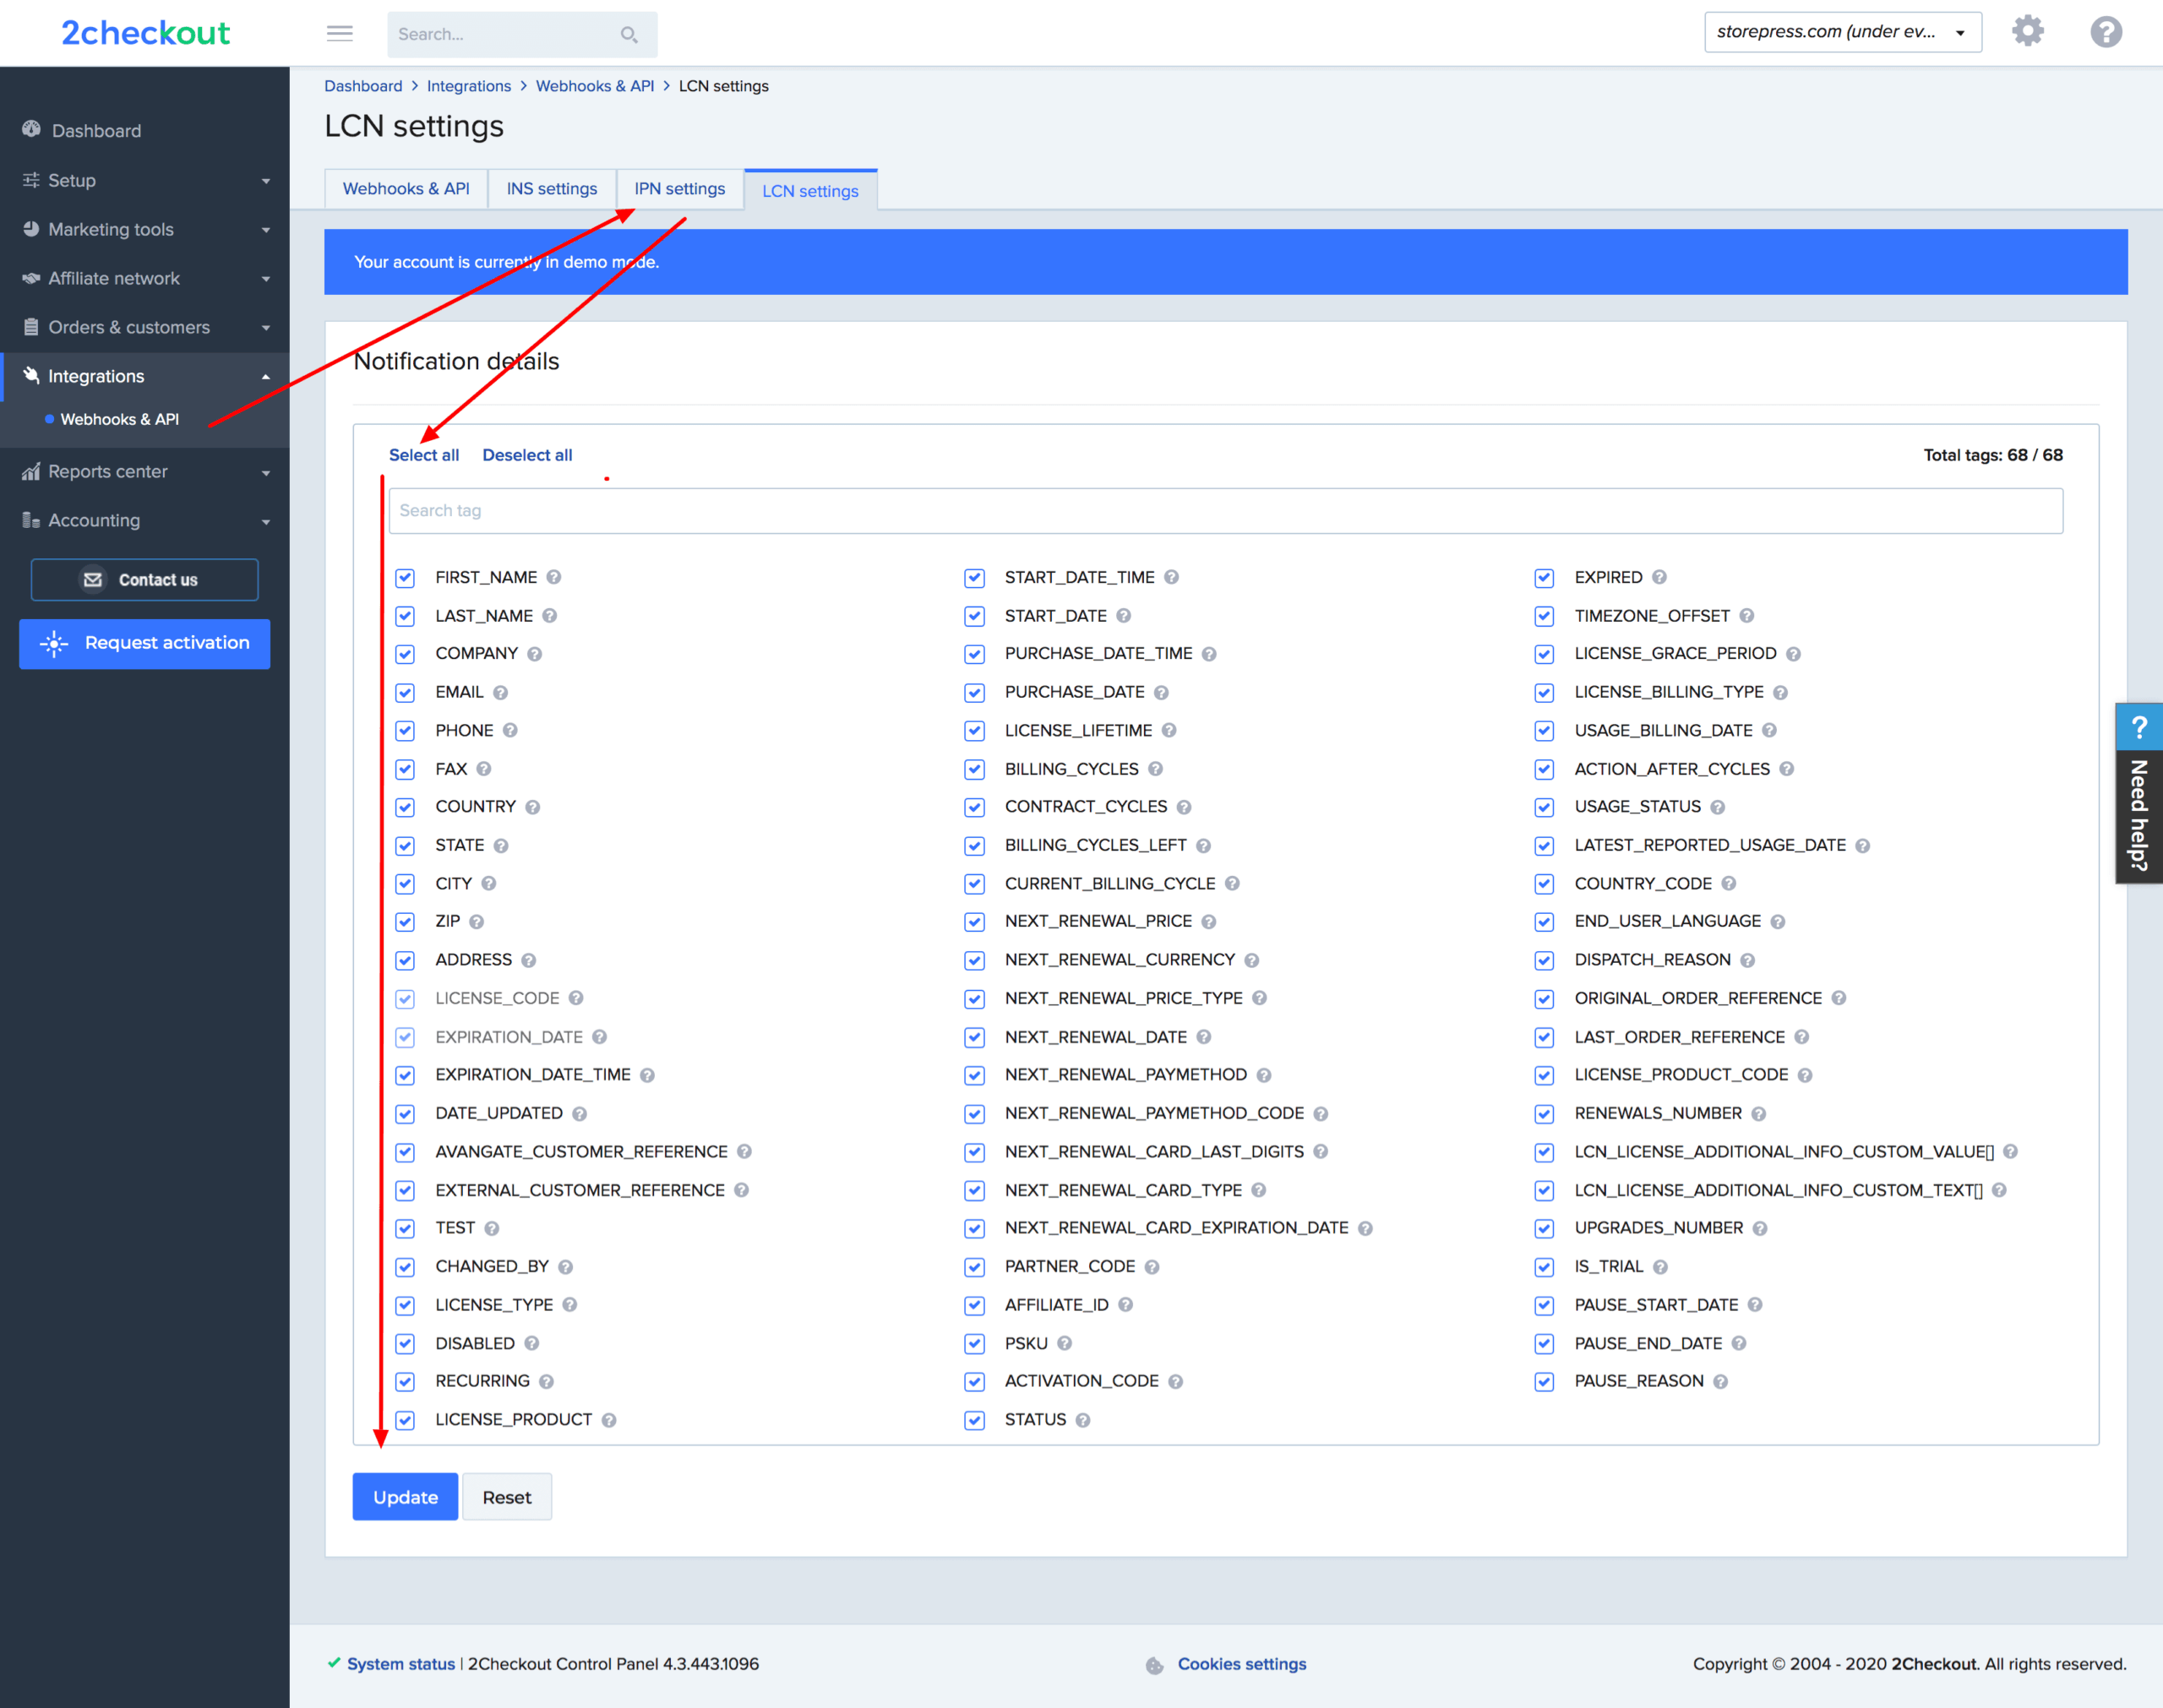
From the Response Tags settings, ensure that all options are selected. If they are not, click the Select All button and then press Update to save the changes.
Disable INS Settings
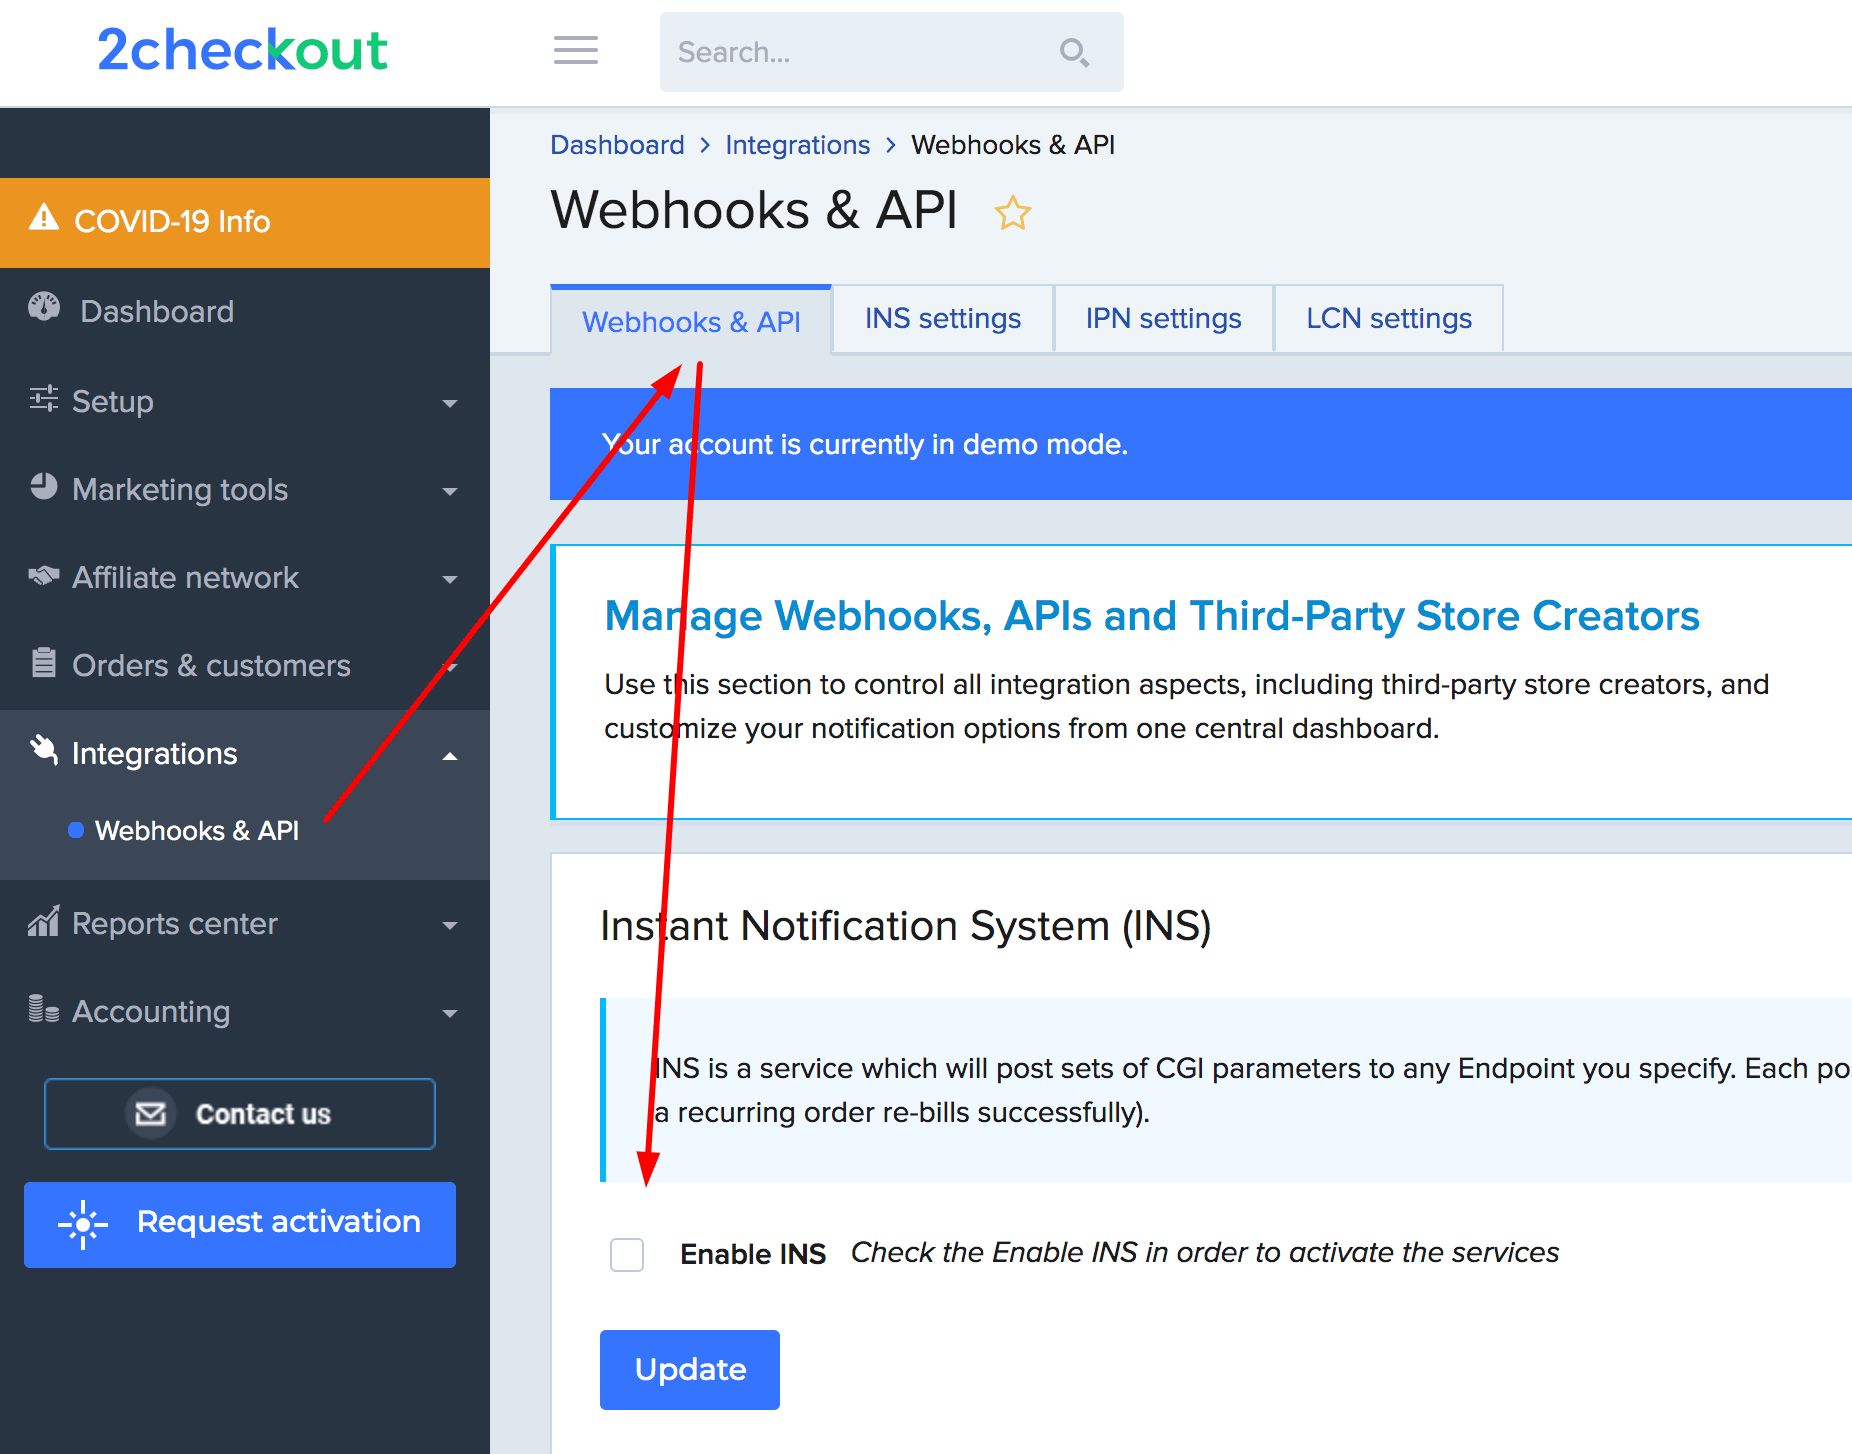
Enable Automatic Notifications for Transaction and Subscription/License
2Checkout automatically generates notifications for transaction and subscription or license-related events and sends them to a specified endpoint on your server.
Navigate to this link: https://secure.2checkout.com/cpanel/webhooks_api.php
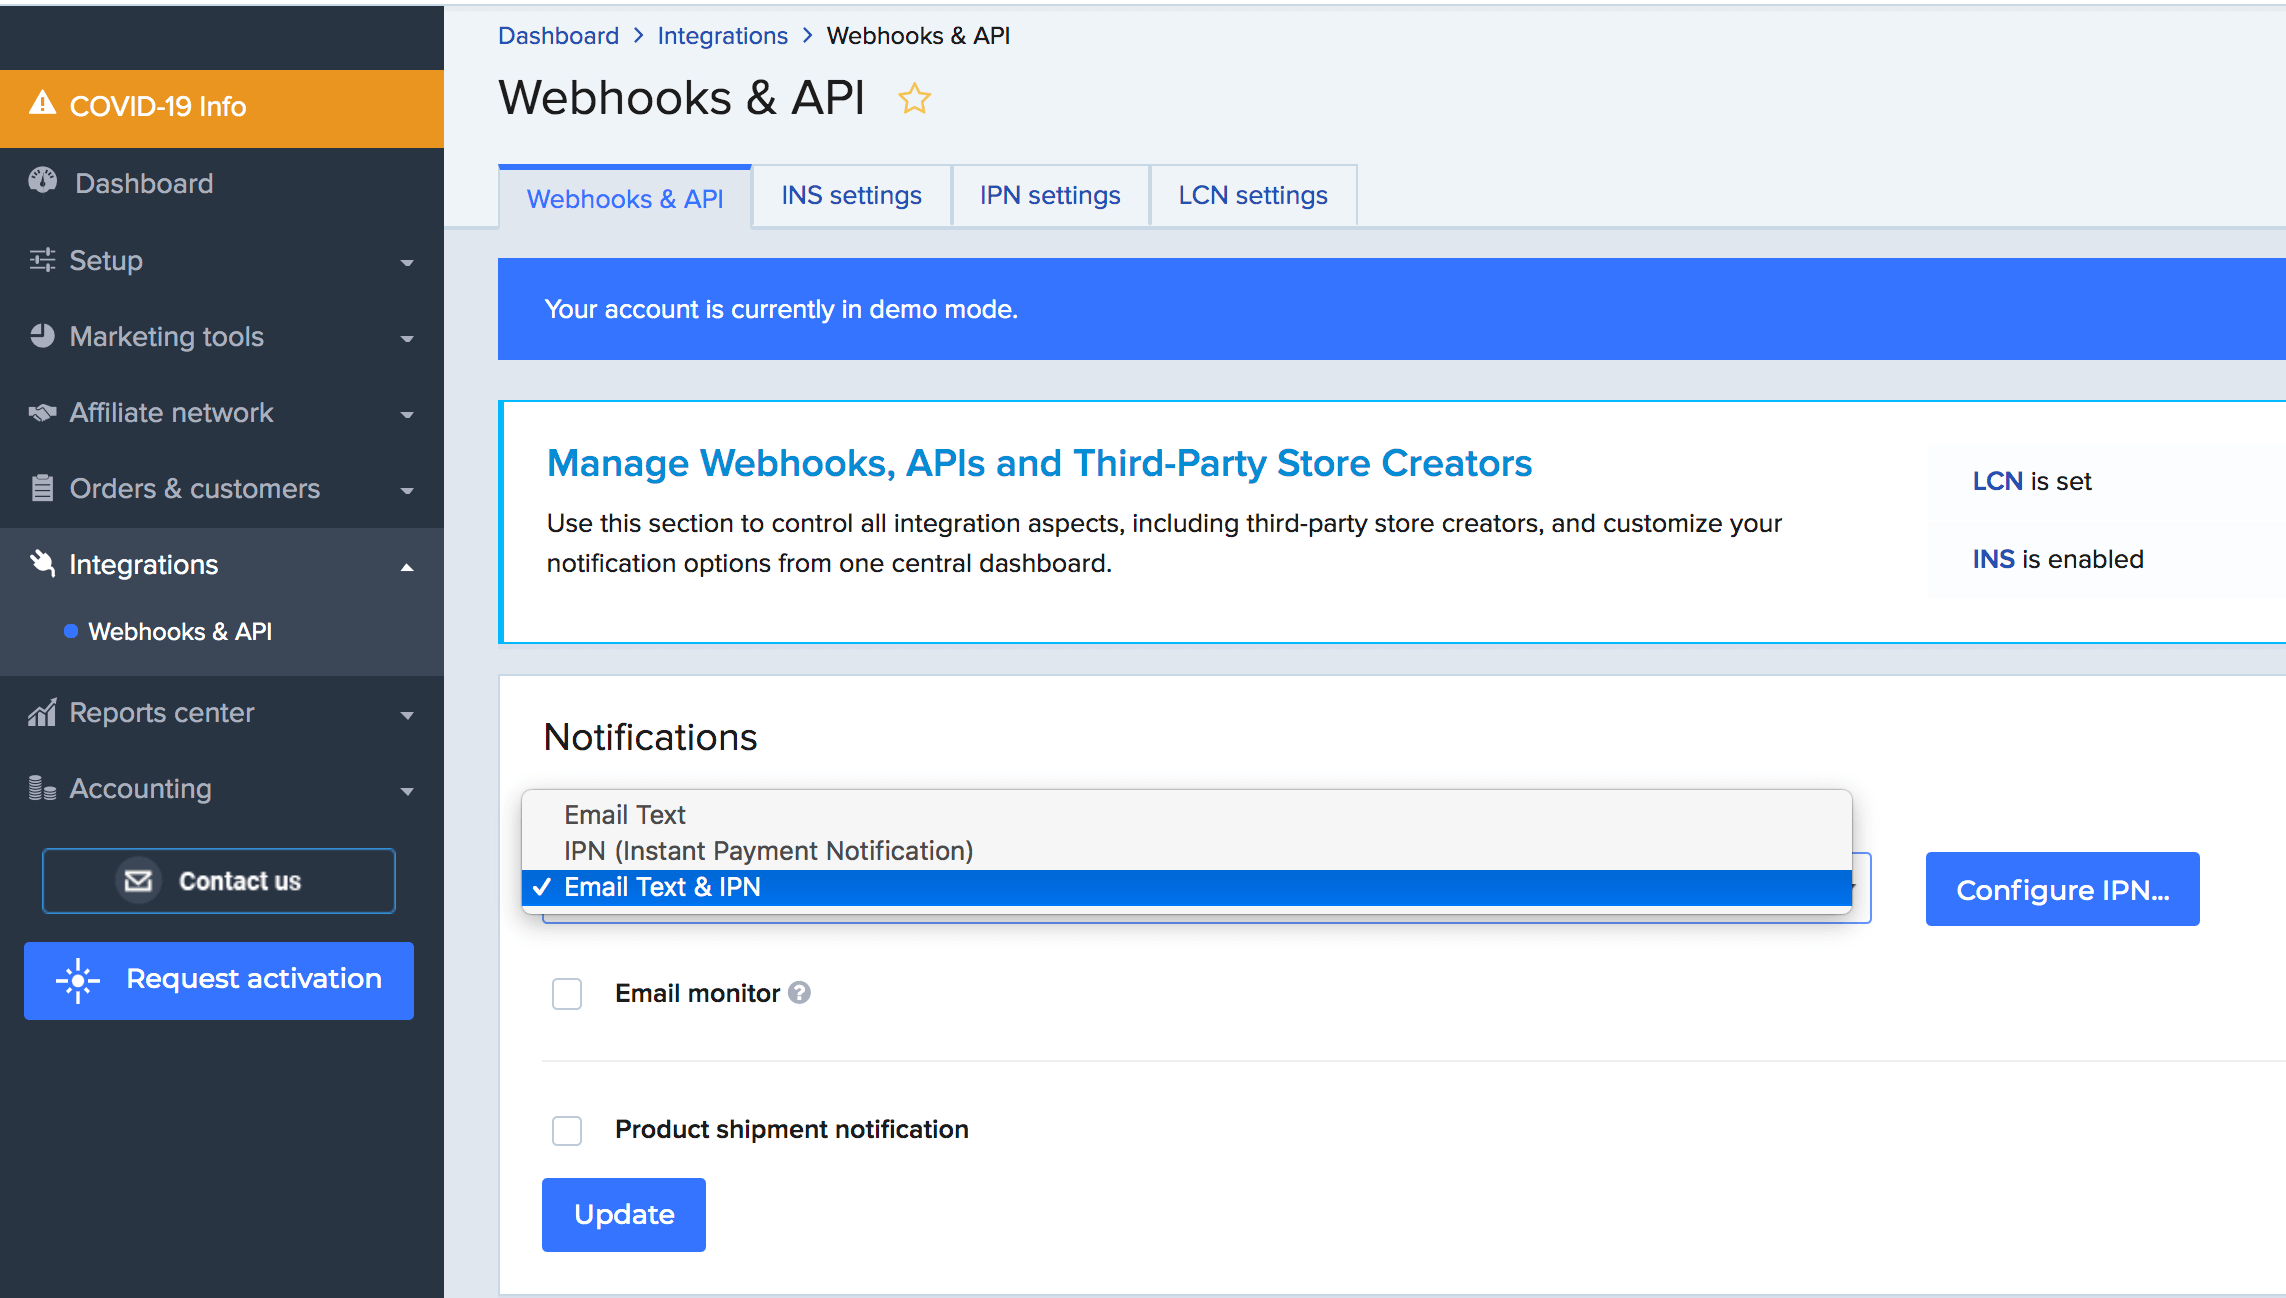
And head to the Notifications -> Payment notification type and select Email Text & IPN and press Update button.
Testing 2Checkout Payment Gateway
Troubleshoot
If you cannot find the ICL and LCN settings, please contact 2Checkout support to have them enabled.
Required LCN Settings (For WooCommerce Subscription Plugin)
LCN Settings
When using WooCommerce Subscriptions, you need to install the Pro version of the Payment Gateway – 2Checkout for WooCommerce plugin. After installing the Pro version, you will need to configure the LCN settings.
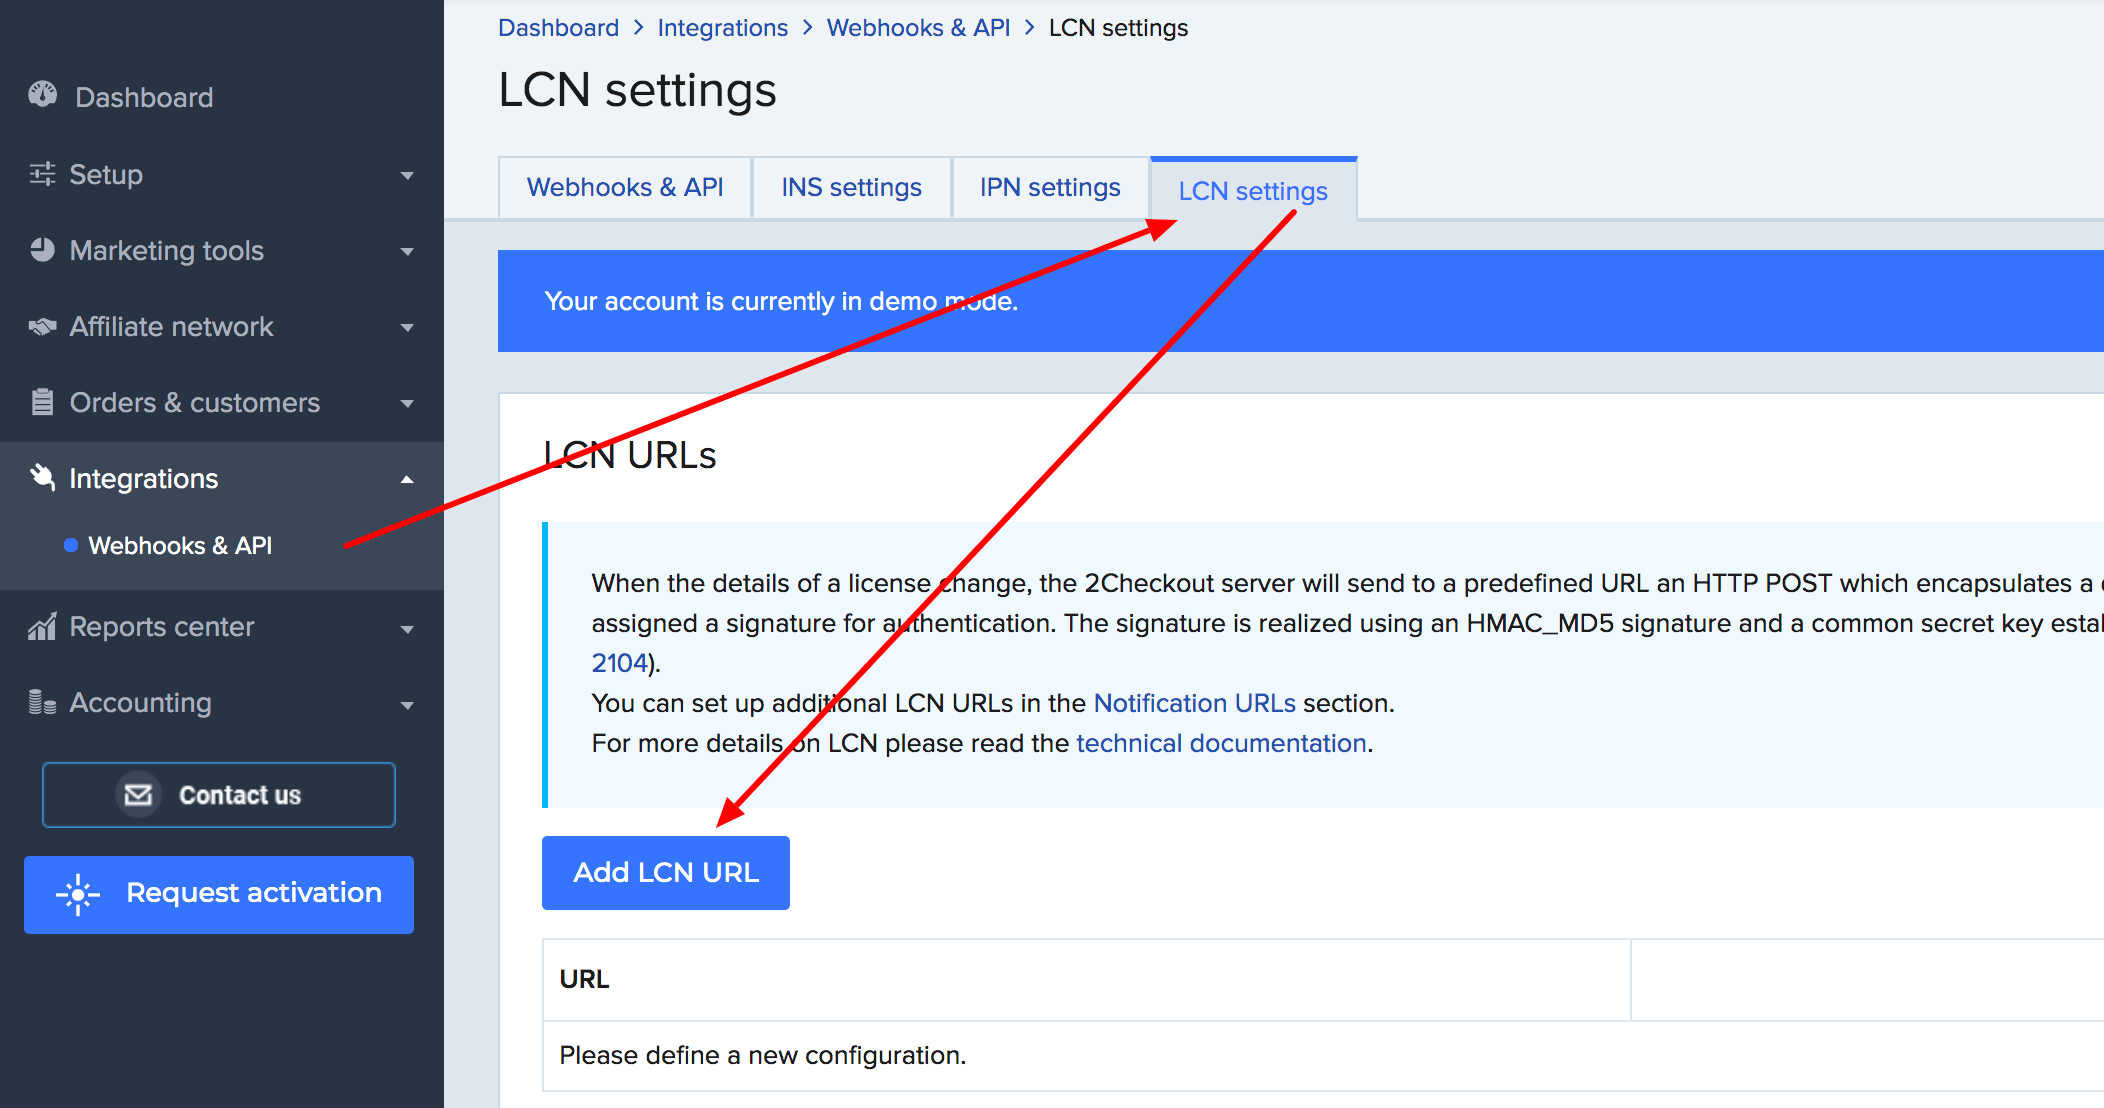
To do this, go to the Payment Gateway – 2Checkout for WooCommerce settings in your site’s backend. You will see a new URL generated with the slug woo-2checkout-lcn-response. Copy this URL and then open the 2Checkout LCN settings page to proceed with the configuration.

Press on the Add LCN URL button from the LCN settings.
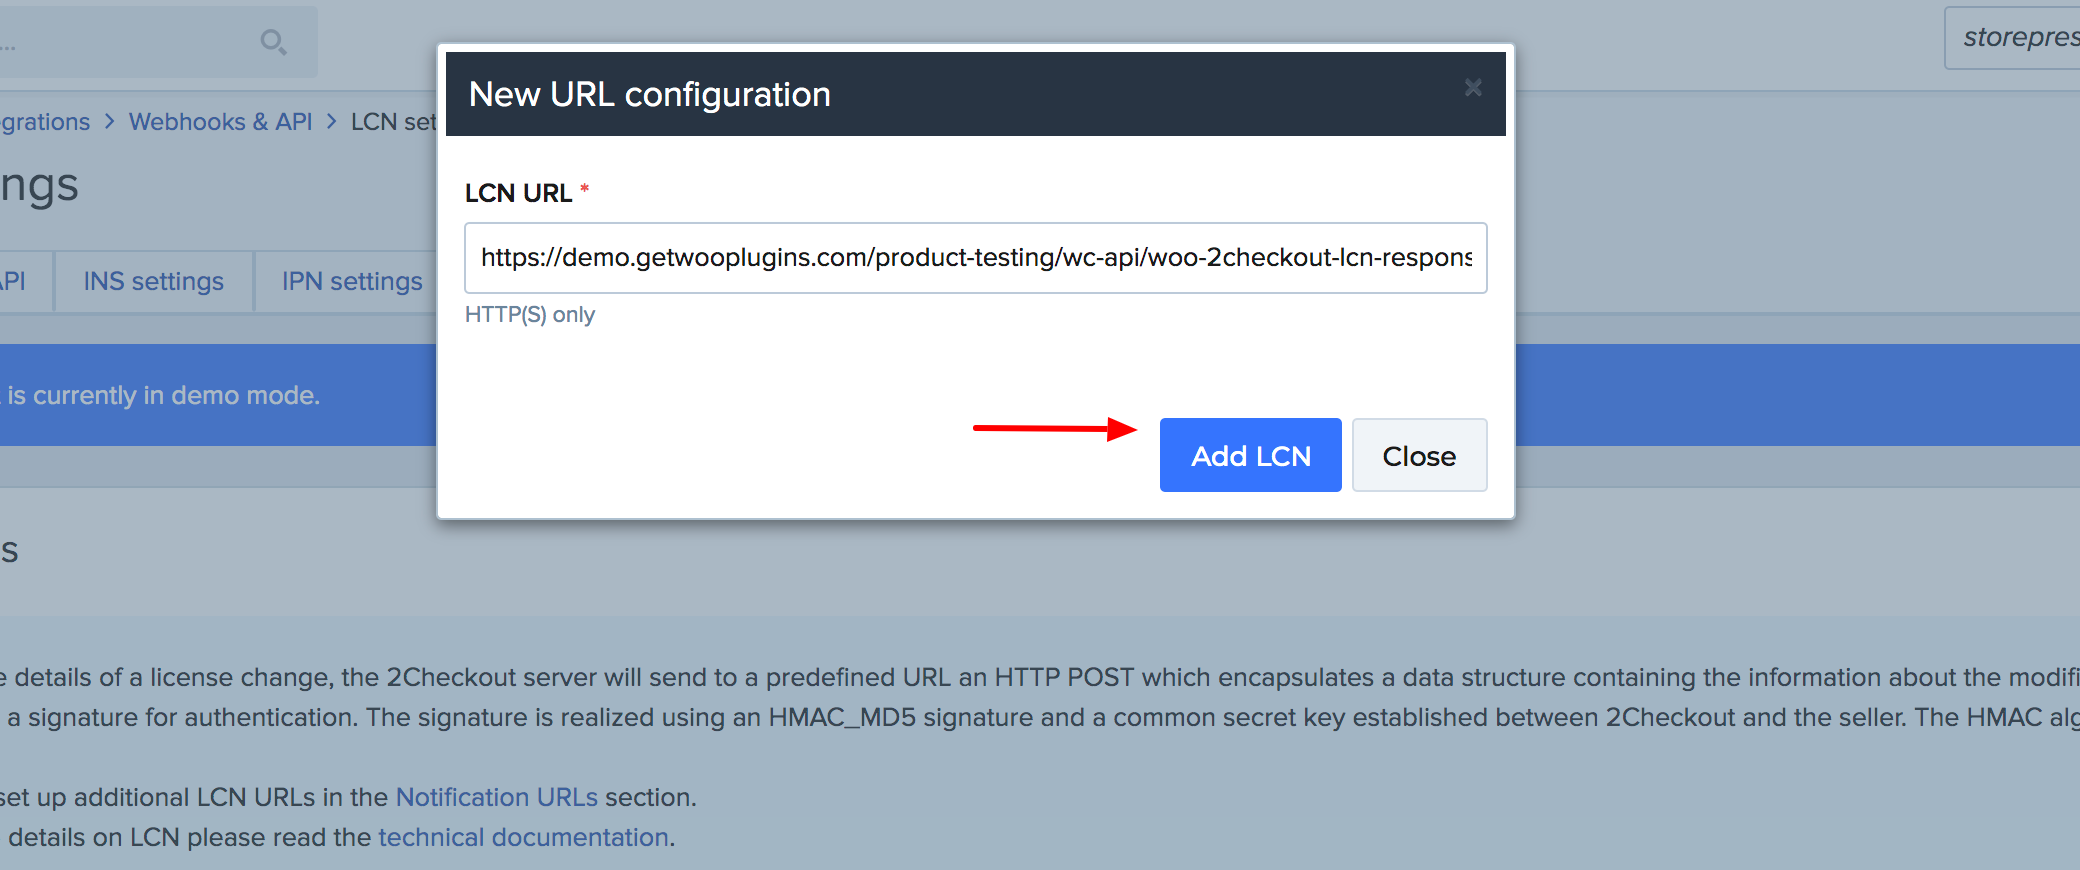
And paste the copied LCN URL in the designated field.
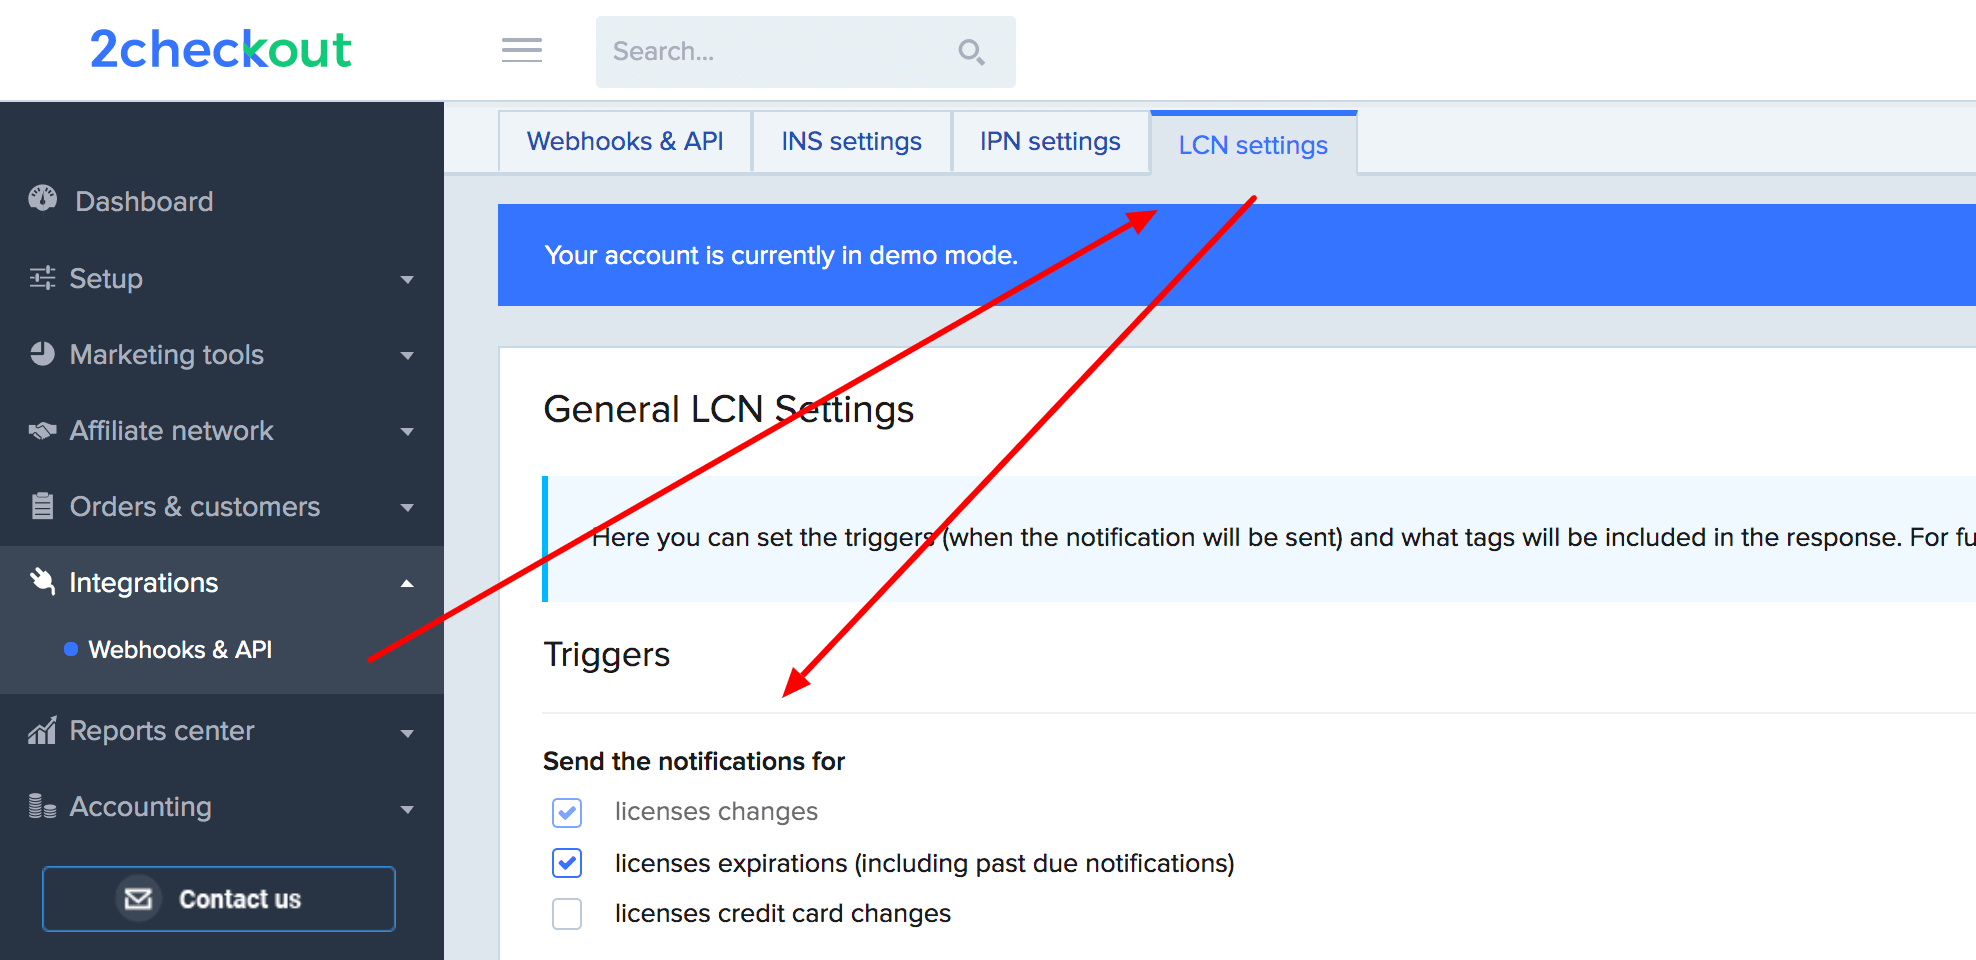
General LCN settings
Make sure you have showed settings is checked.
Notification Details
From the notification settings press Select All link and click on update button.