Table of Contents
01. Installation
Automatic Install from WordPress Dashboard
1. Log in to your WordPress admin dashboard.
2. Go to Plugins → Add New from the left menu.
3. Use the search bar to look for Additional variation image gallery.
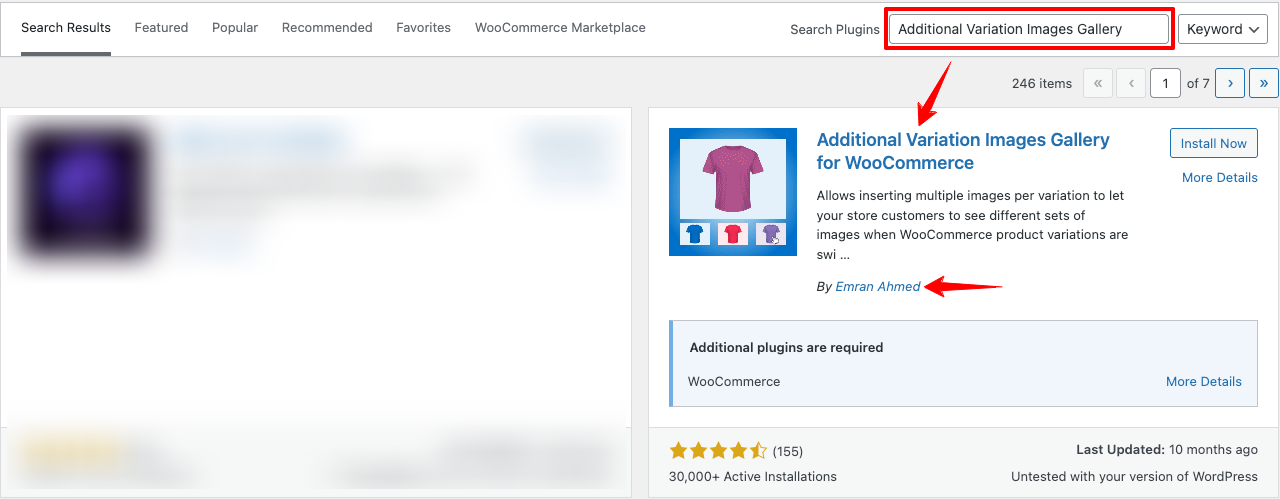
4. Install the WooCommerce Variation Image Gallery plugin by Emran Ahmed.
5. Once installed, click Activate to enable the plugin.
2. Installation (Advanced)
The advanced features of WooCommerce Variation Image Gallery are available through a premium extension. To use the advanced version on your site, you must install and activate the premium extension alongside the free version.
While upgrading the premium version, you should have got a username and password. Keep it safe for further guidance.
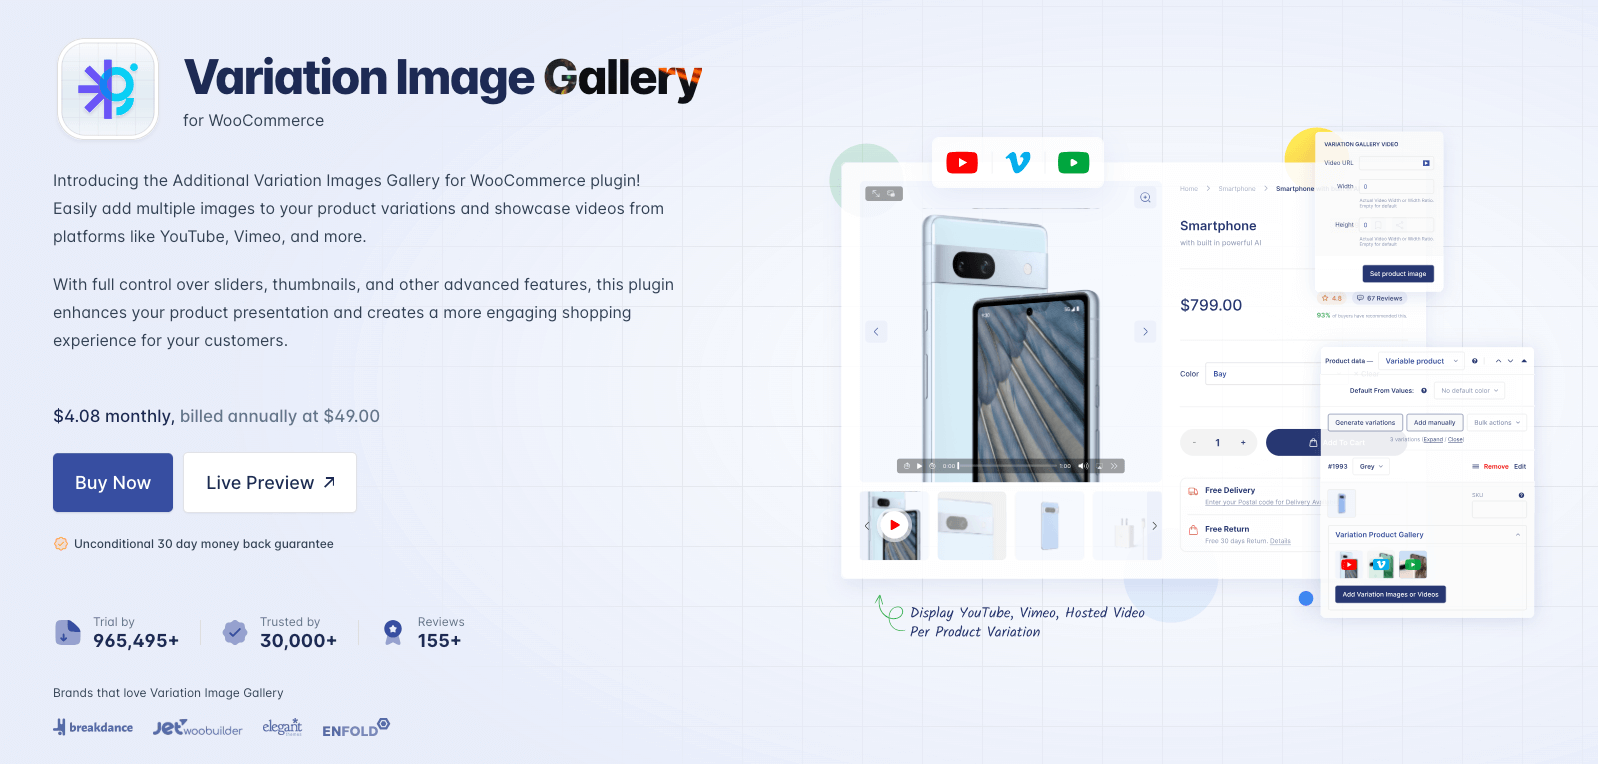
To upgrade the WooCommerce Variation Image Gallery Pro plugin, click on Buy Now button.
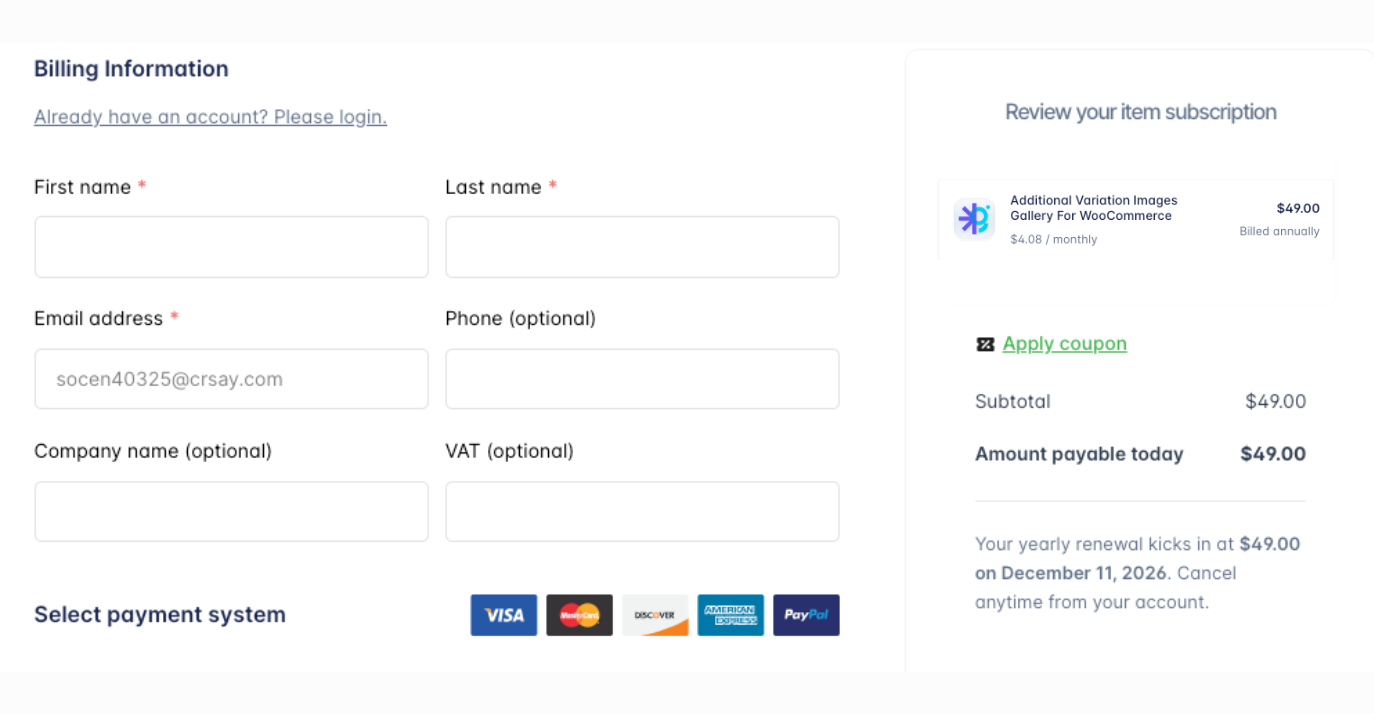
After clicking the Buy Now button, you will be redirected to the checkout page where you need to just fill up your name and email address. Then select any payment system suitable for you.
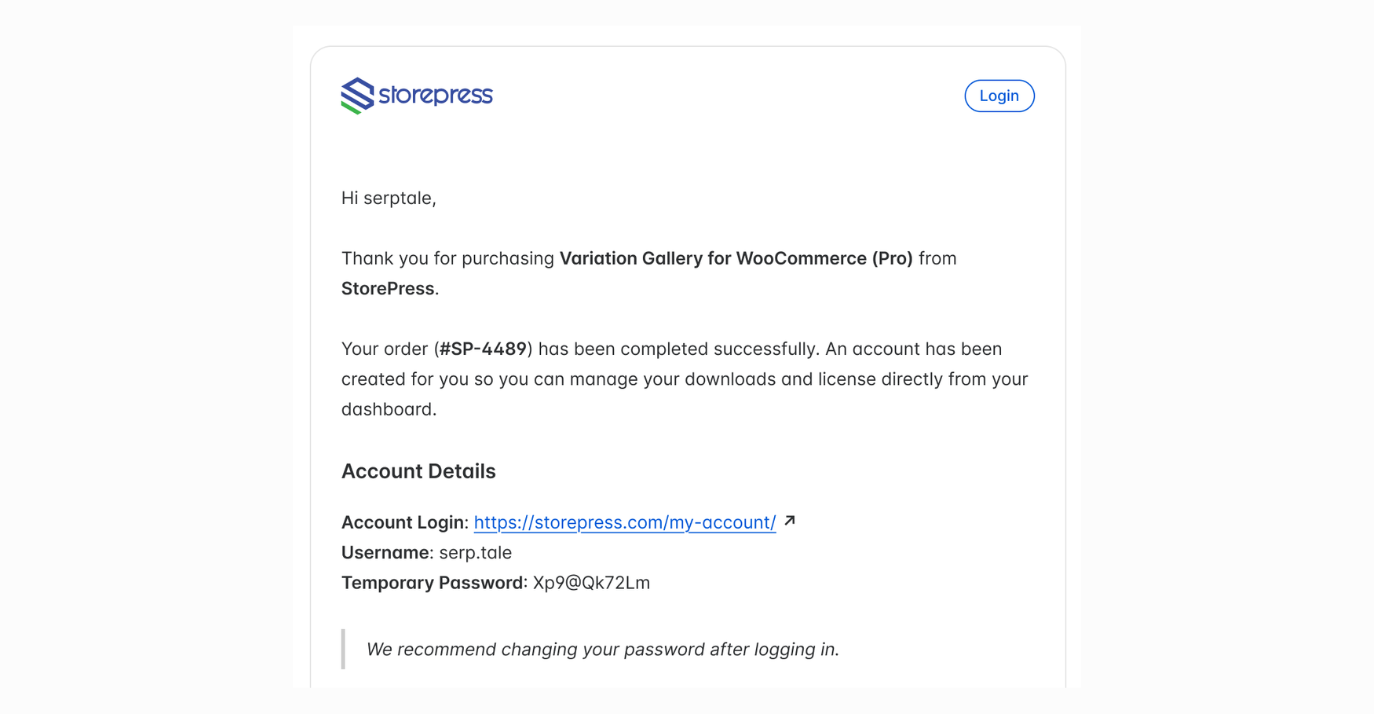
After completing the simple buying process, an email will be delivered to your inbox. Just check it out. You will be given a username and an automatically generated password to login your StorePress account.
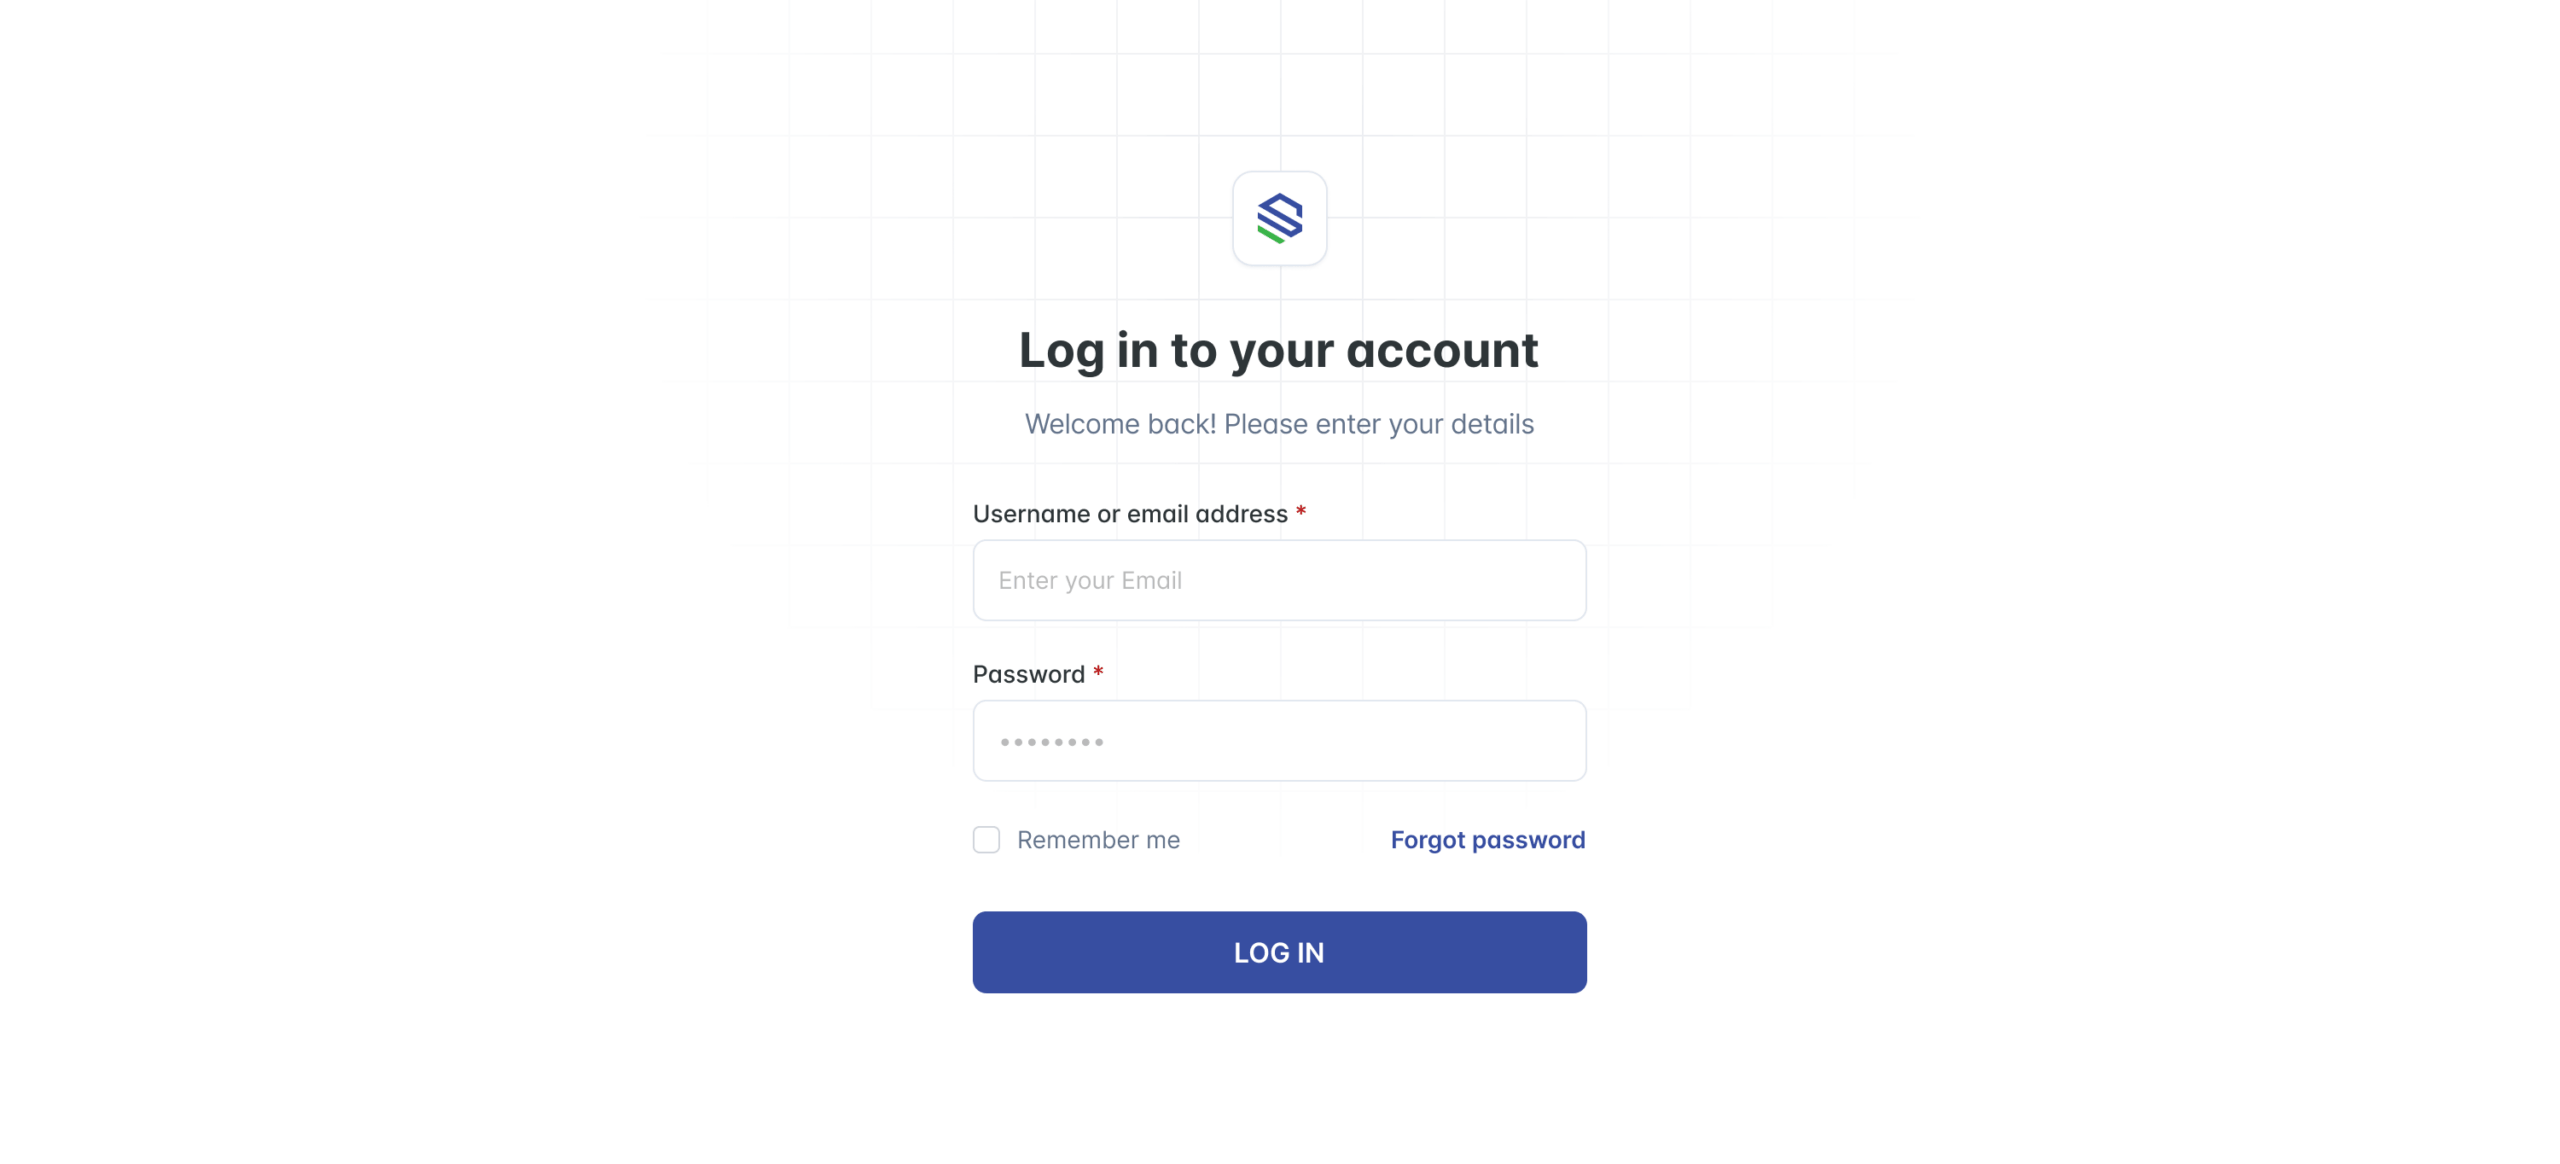
1. Login to StorePress.com website. To login you must enter your username and password that you have been sent through an email earlier.
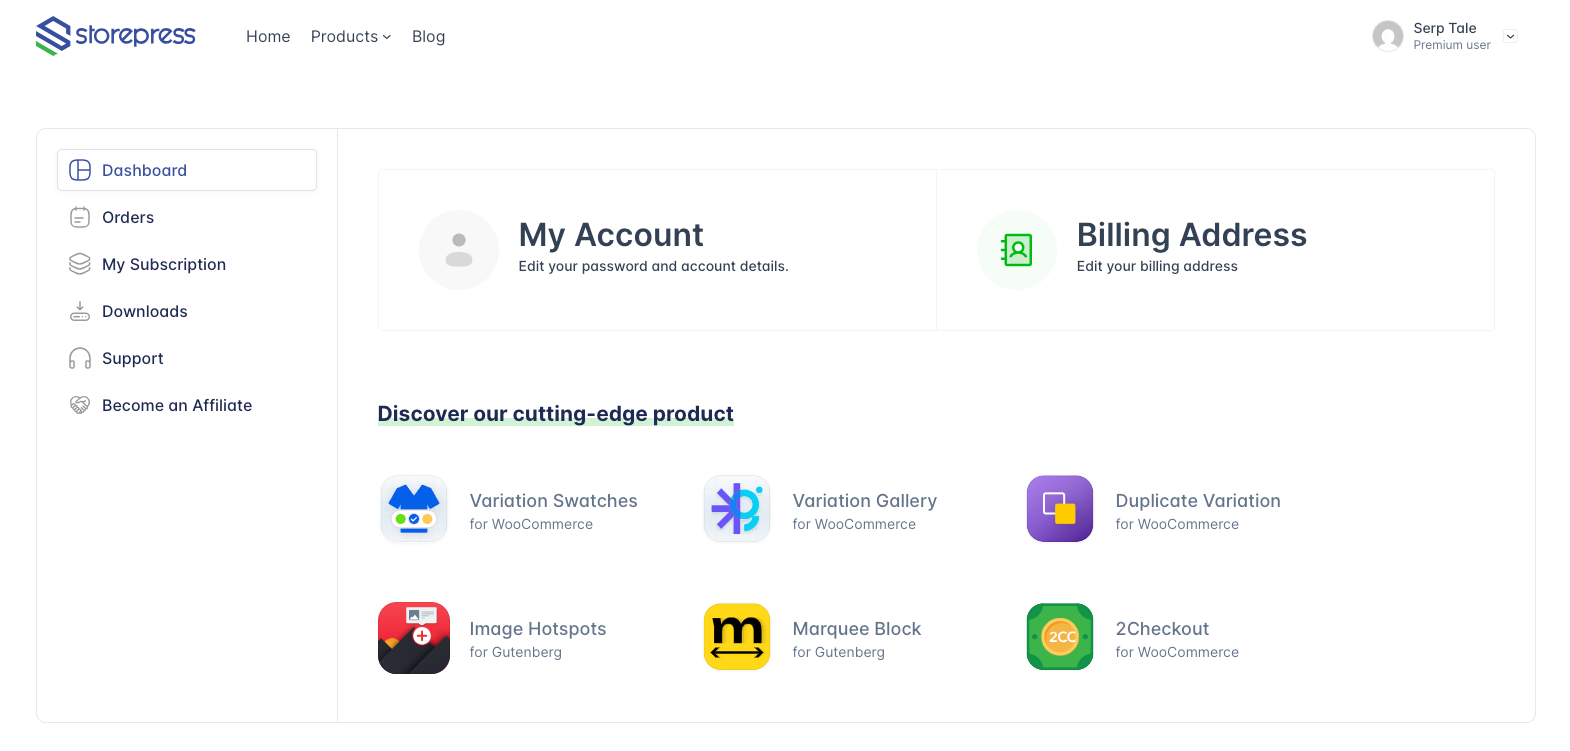
2. After login to your account, you will see an interface as the screenshot attached below.
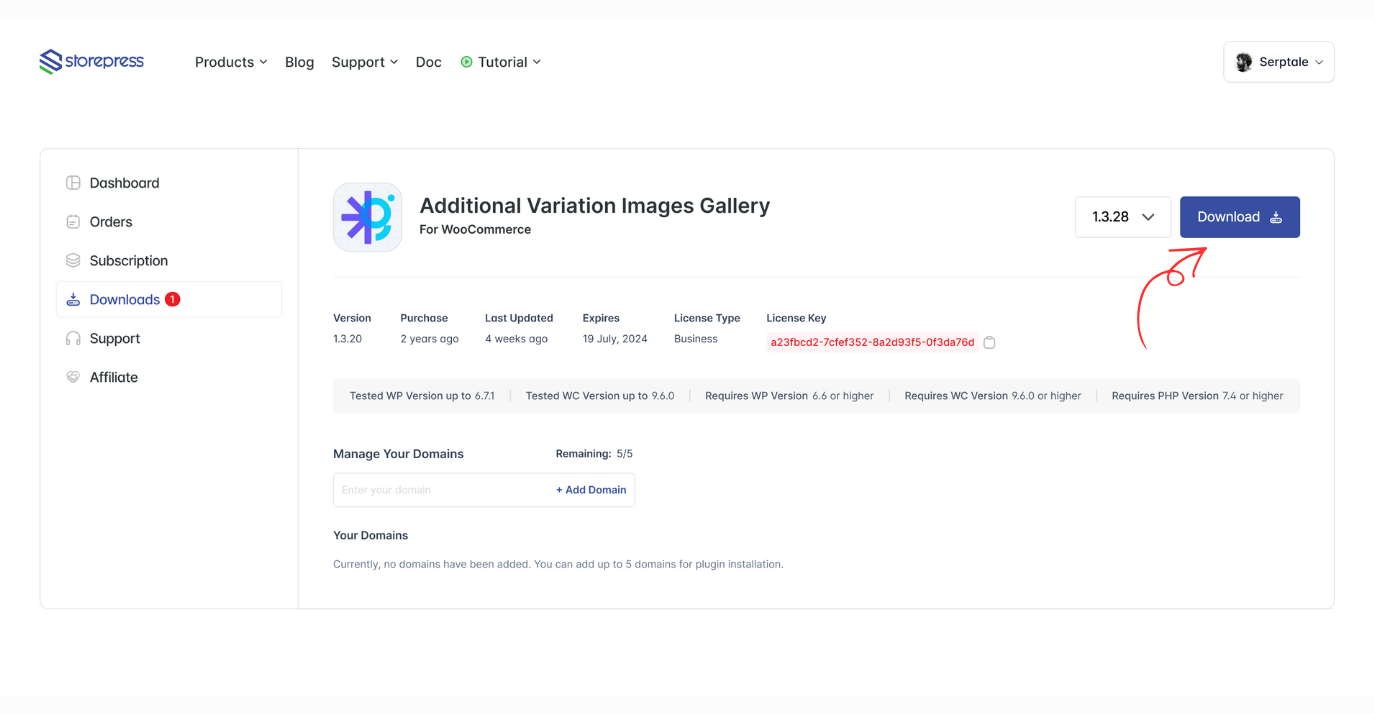
3. Click the Download button to get your Variation Gallery for WooCommerce Pro plugin.
4. Now return to your WordPress dashboard, go to Plugins → Add New, and click on Upload Plugin to upload the Addition Variation Image Gallery For WooCommerce pro plugin file.
Now select the downloaded pro ZIP file, click Install Now, and then press Activate Plugin to complete the installation.

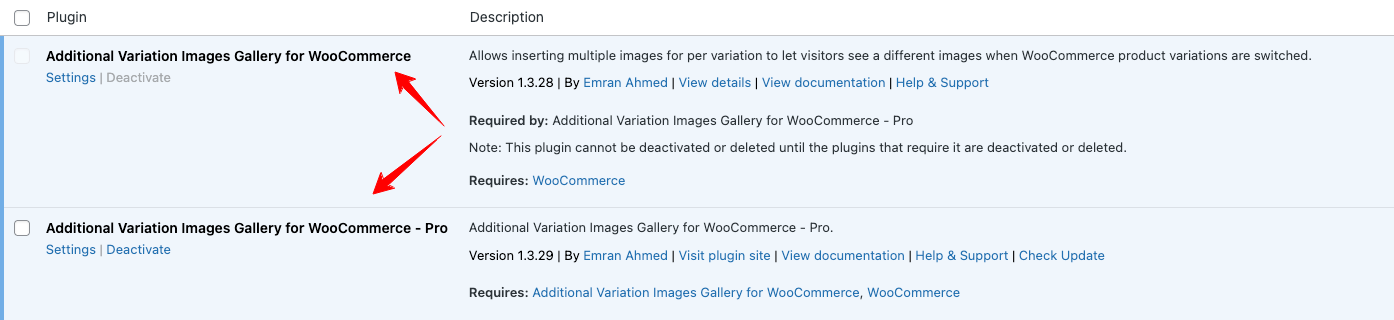
5. After Installing Premium version of Woo Variation Gallery plugin, it would appear after free version.
3. Automatic Update For Premium Version
Go to My Account → My Downloads on StorePress.com.
First, register the domain where you want automatic updates for the WooCommerce Variation Gallery Pro plugin.
Enter your domain name (with proper url) in the domain field and click Add Domain.

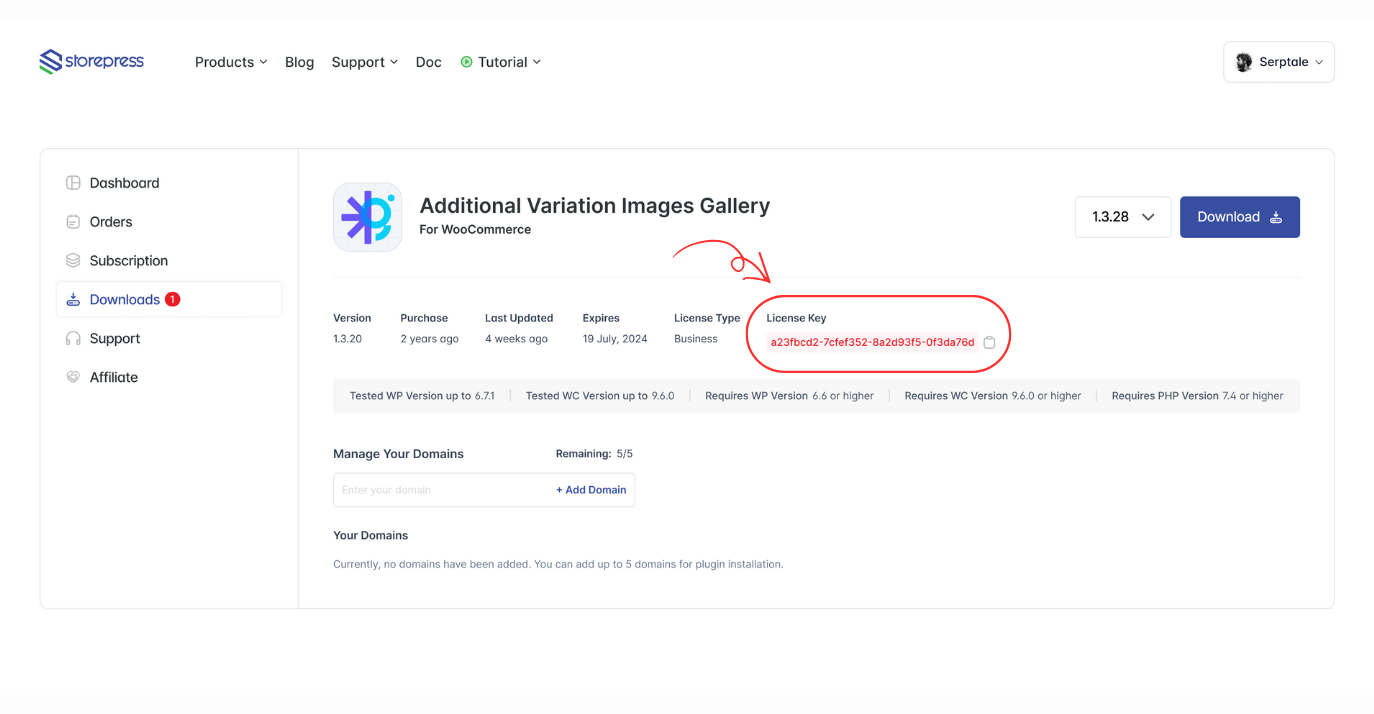
Secondly, Each purchase of item comes with license key, Copy the license key from the Downloads section.
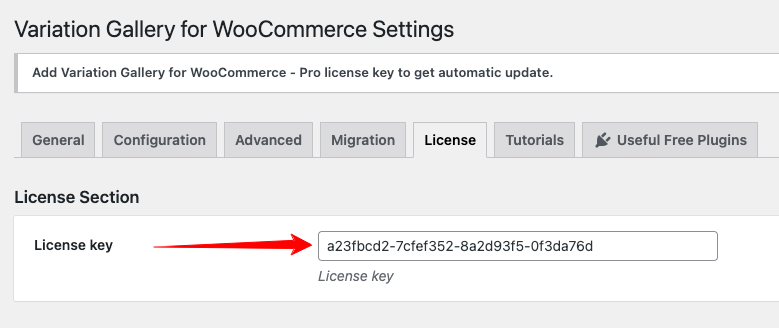
After copying the License Key, go to your site’s dashboard where you want to activate automatic updates. Navigate to Gallery Settings → License Key.
Paste the copied key into the License Key field. Once done, click the Save Changes button.
Once your domain is successfully registered in your StorePress dashboard and the purchase key is added in the plugin’s License Key section, you will start seeing update notifications in the Plugins page.
Manually Update For Premium Version
Sometimes you may not see the latest update notification for Variation Swatches for WooCommerce. In that situation, you’ll need to update the plugin manually.
4. Fix Small Gallery Issue (Desktop, Tablet, Mobile)
Desktop Width Adjustment
Tablet Width Adjustment
Mobile Width Adjustment
Video Tutorial
Upload images in the Variation Gallery
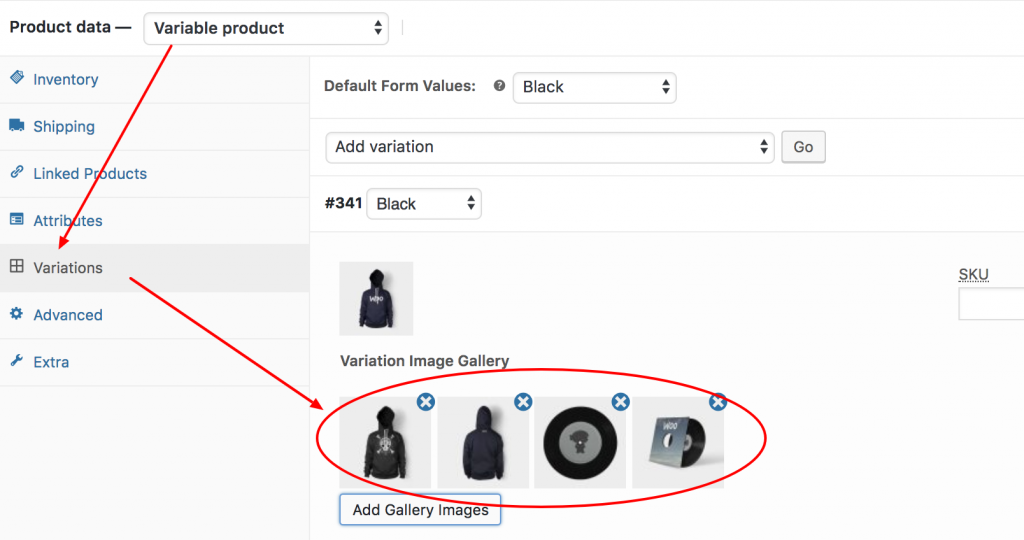
To upload variation images, open your desired variable product and navigate to the Variations tab from the Product Data panel. Select the variation where you want to add extra or additional images. Then, click the Add Gallery Images button to upload images from your computer or choose them from the WordPress Media Library.
Settings Preview

Frontend Preview
Live Preview
Upload YouTube Video In The Product Variation Gallery
Upload Vimeo Video In The Product Variation Gallery
Upload Hosted Video In The Product Variation Gallery
Show Video in Simple Product Gallery / WooCommerce Default Product Gallery
Add Featured Video in Simple Product
If you want to display a video instead of a featured image, you can either embed a video using YouTube or Vimeo links or upload a video file directly.
- Navigate to WooCommerce → All Products from your dashboard.
- Click Edit on the desired simple product.
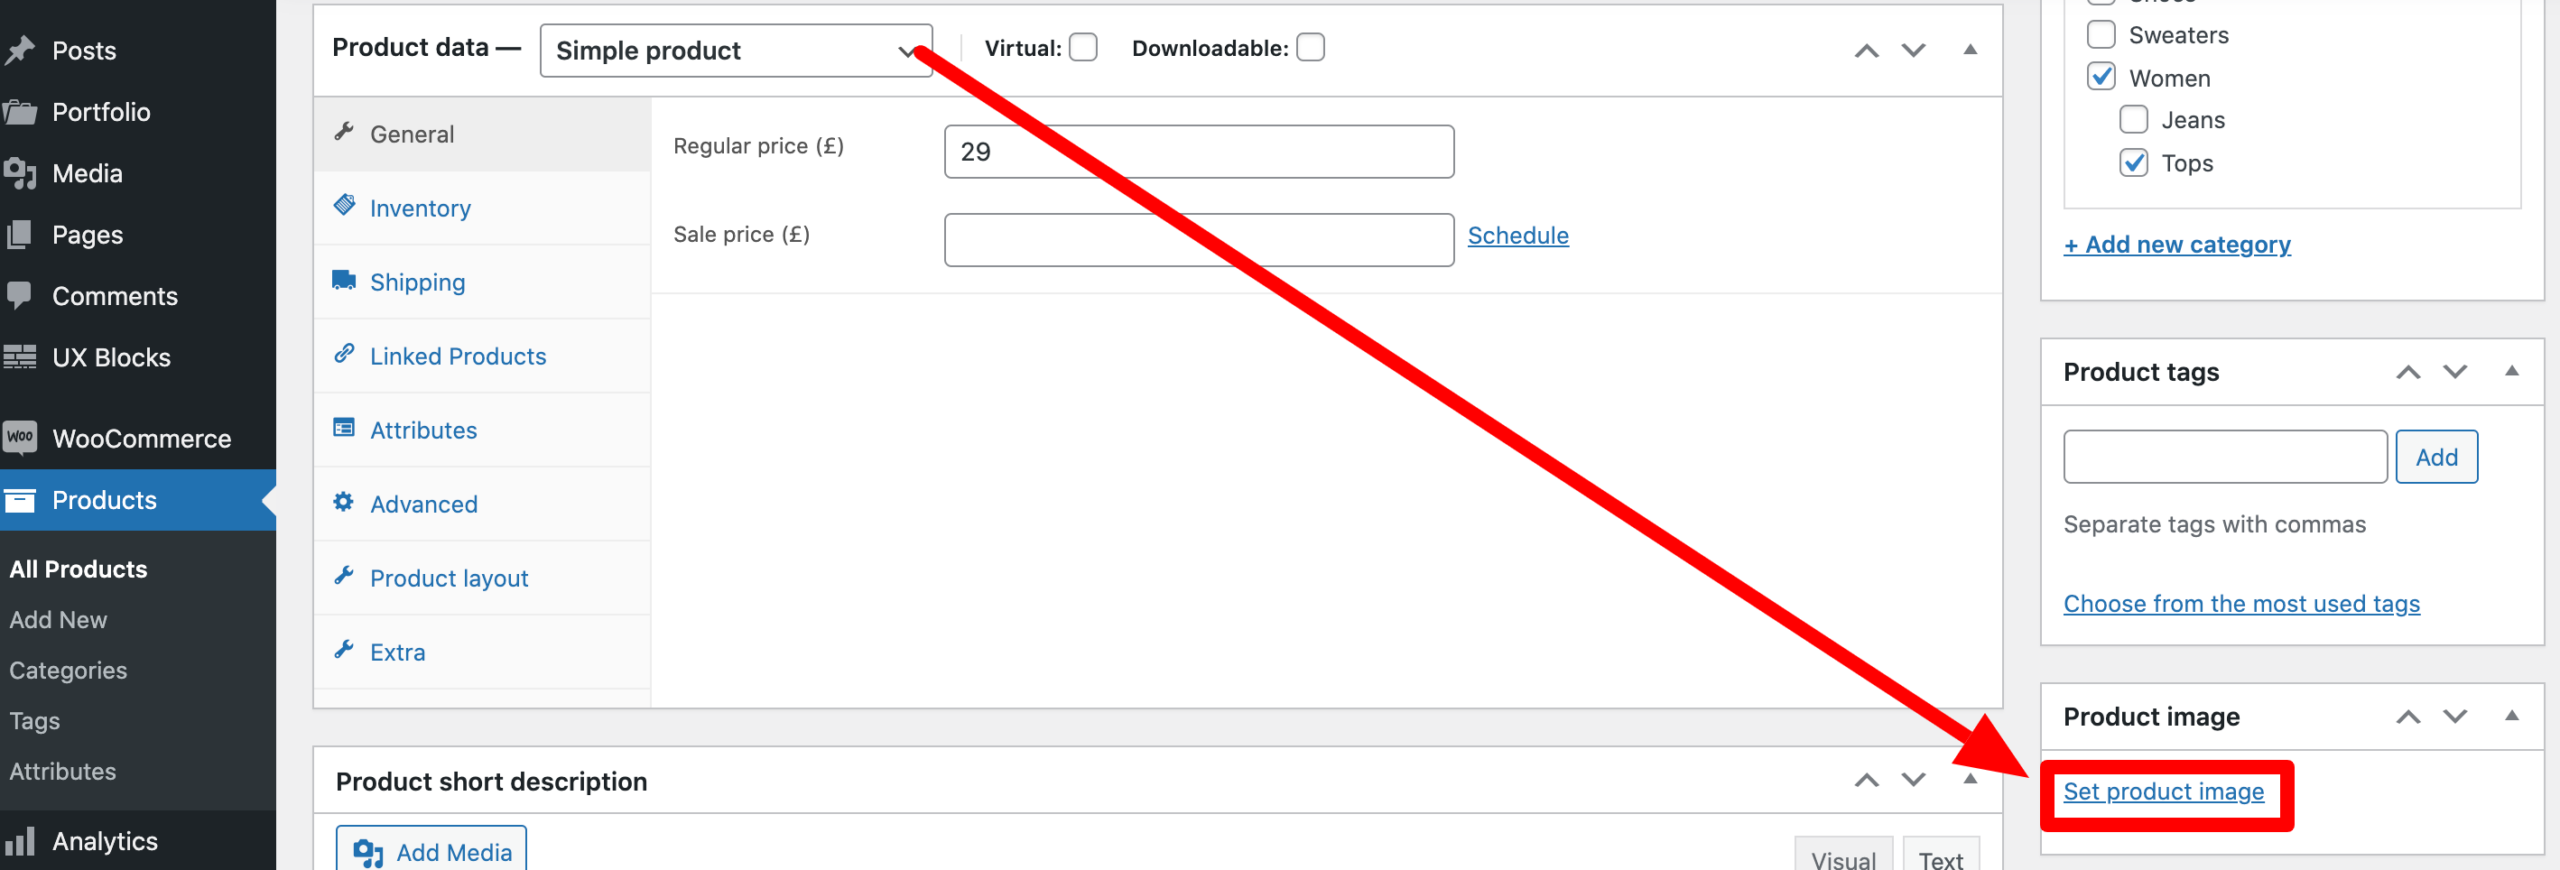
- Scroll down to the Product Image section on the right-hand side and click Set product image link.
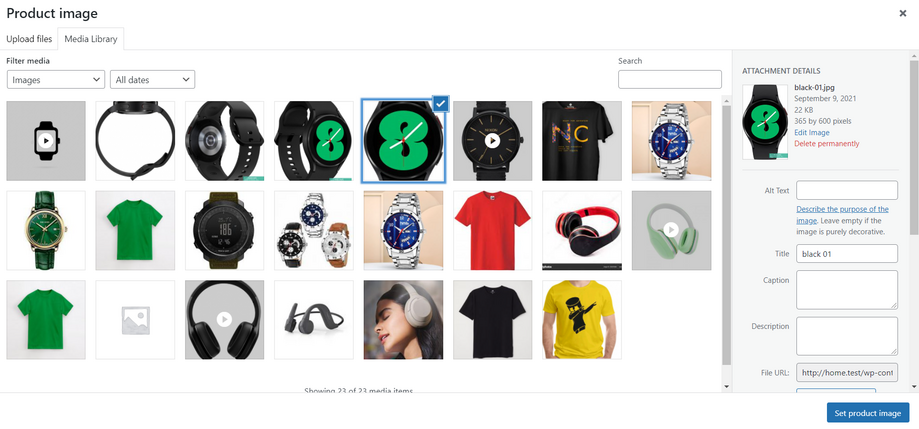
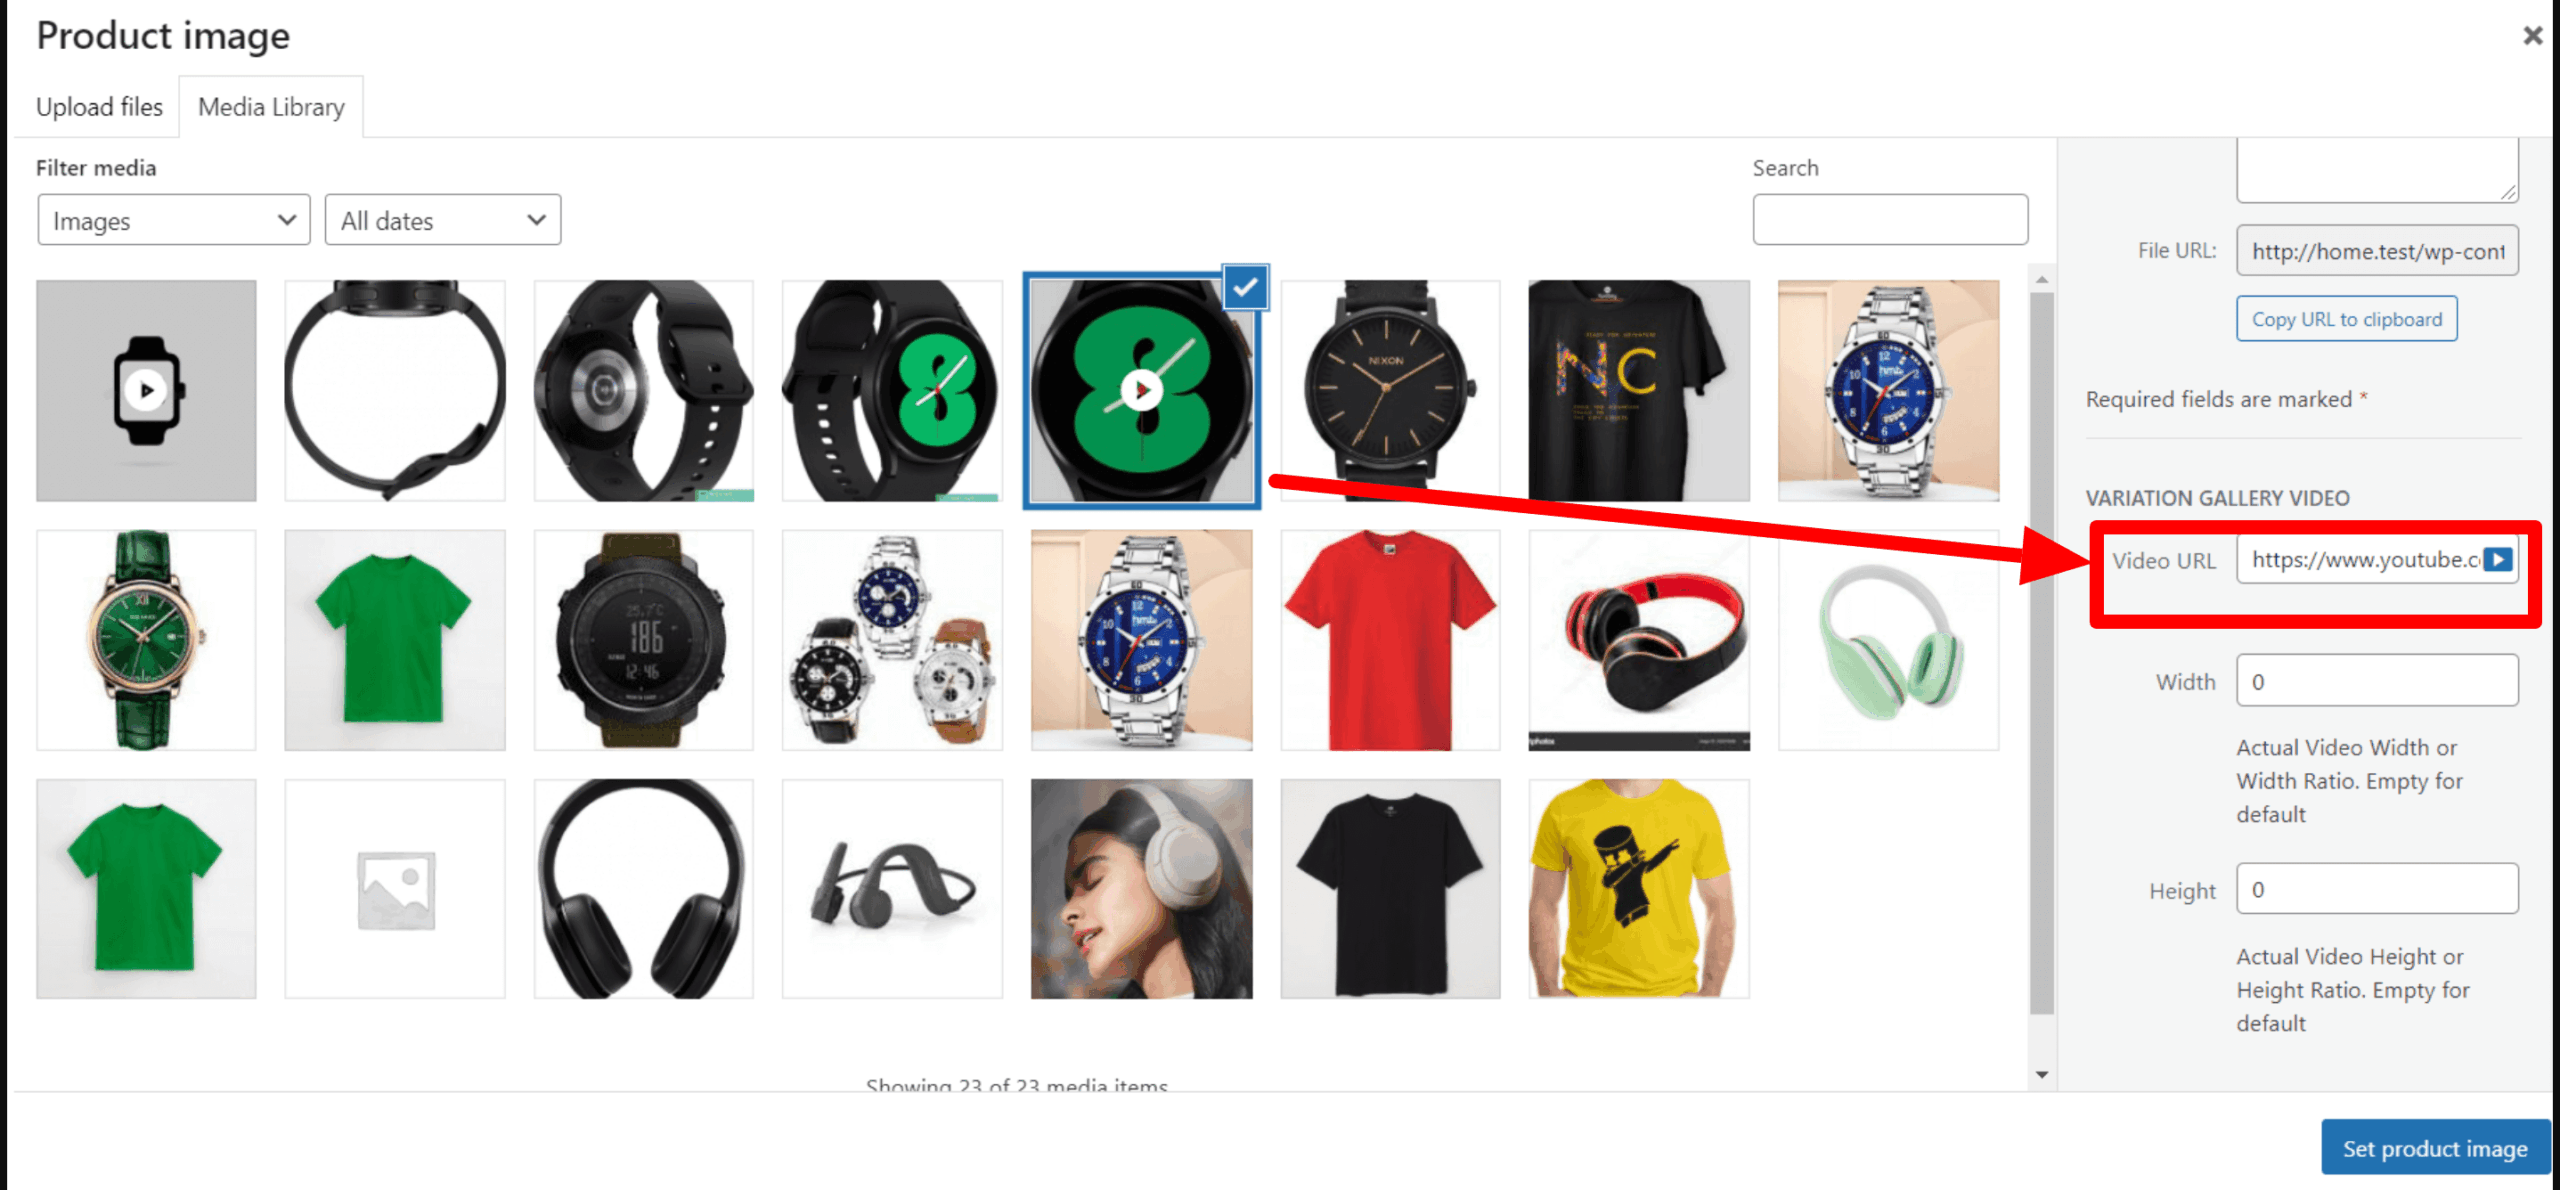
- Upload a featured image for the video, or select an existing image from the WordPress Media Library to use as the video’s featured image.
- Add the YouTube, Vimeo, or self-hosted video URL to the Variation Gallery Video field.
Check the following screenshot. it shows how the backend featured image area will look like after adding featured video
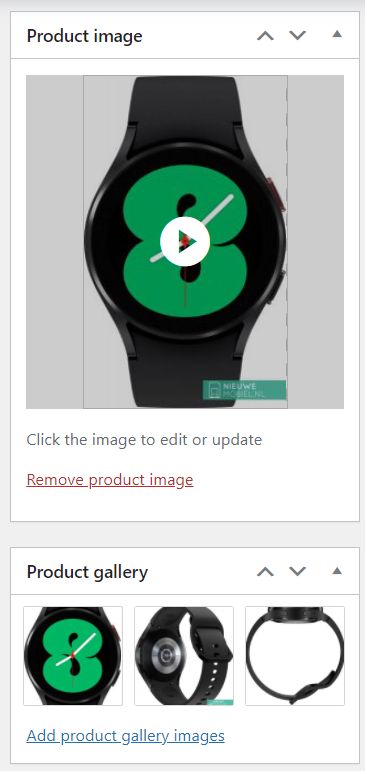
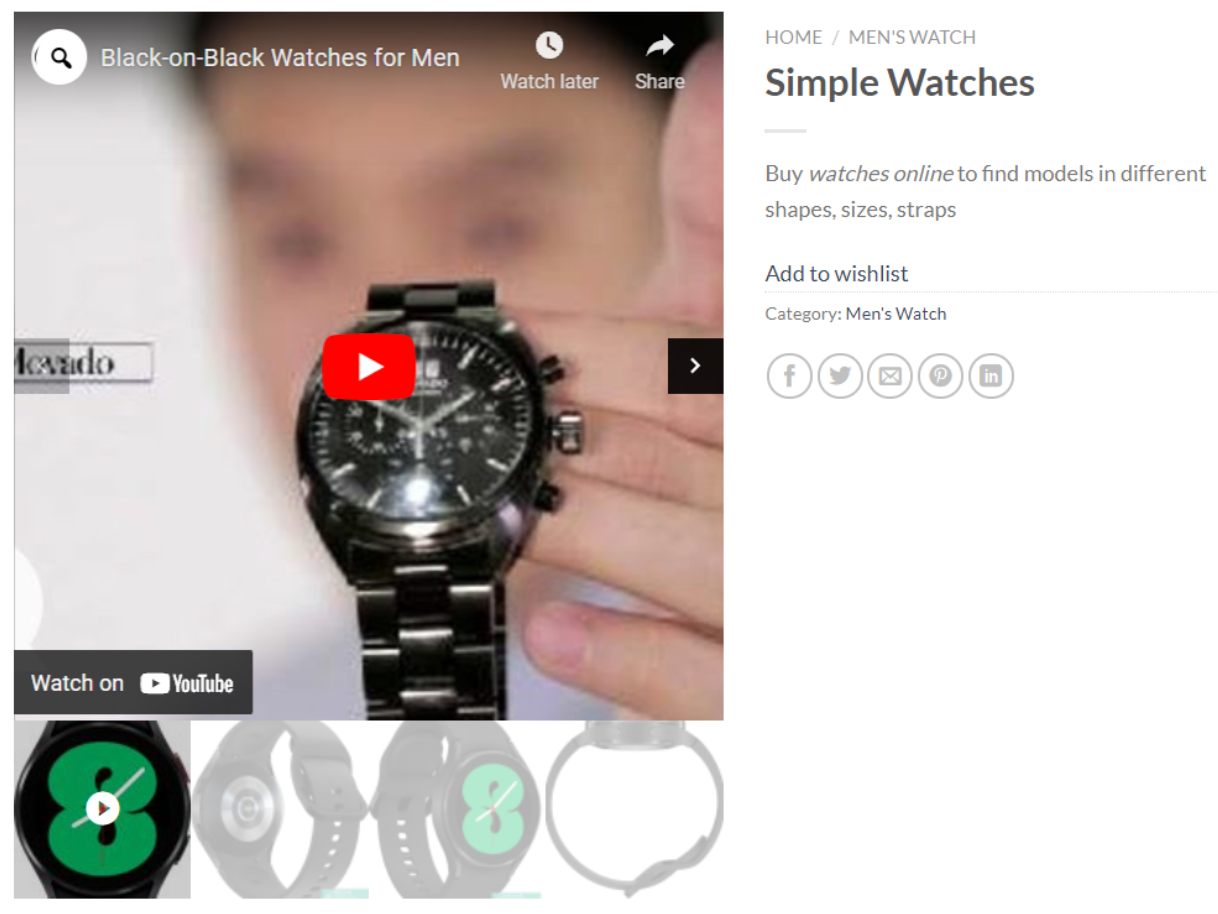
Save your changes and visit the frontend. Your product page’s featured video will appear as shown in the screenshot below.
How To add Self-Hosted Video in Simple Product Featured Image
How To add YouTube Video in Simple Product Featured Image
How To add Vimeo Video in Simple Product Featured Image
Add Featured Video in Variable Product
If you want to display a video instead of the featured image, you can either embed a video using YouTube or Vimeo links or upload a video file directly.
1. Navigate to WooCommerce → All Products from your dashboard.
2. Click Edit on your desired variable product.
3. Scroll down to the Product Image section on the right-hand side and click Set product image.
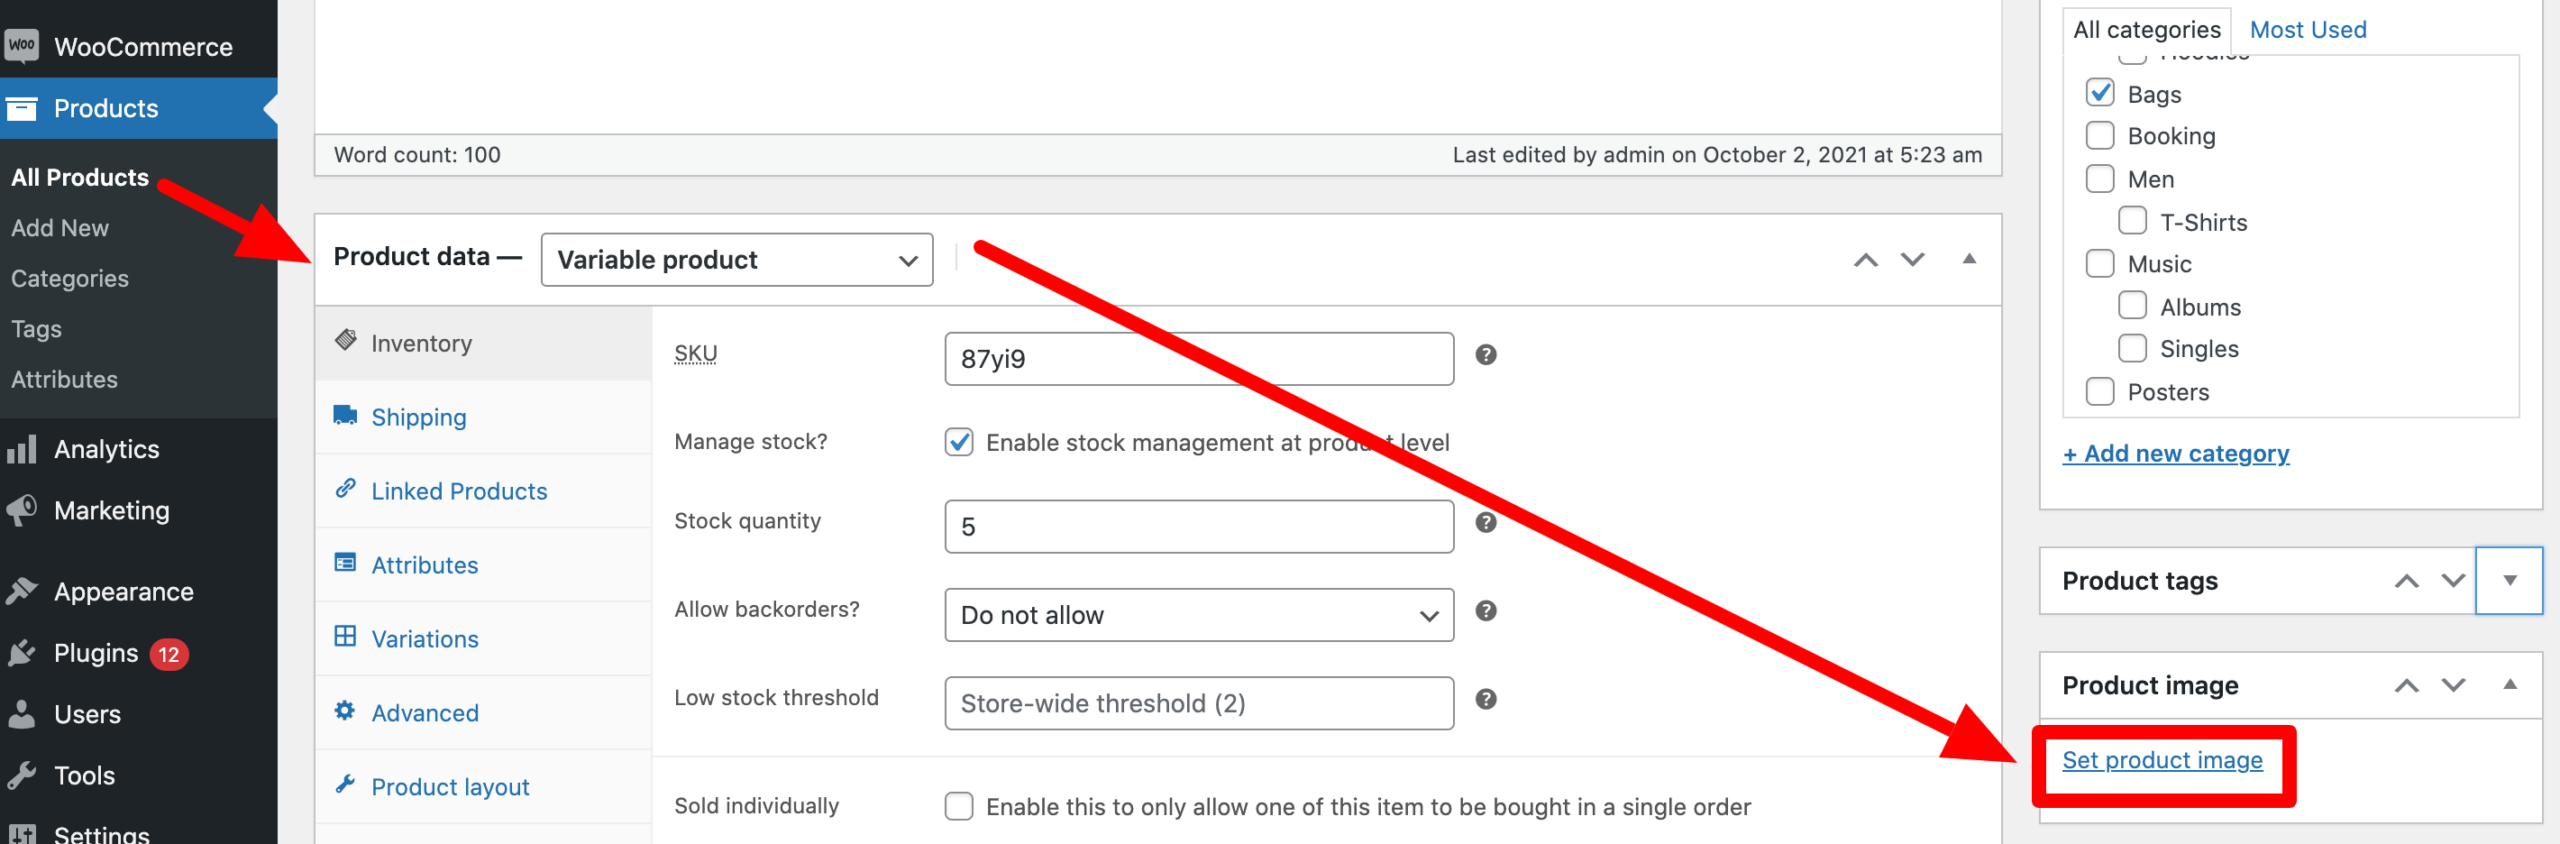
4. Upload a featured image for the video, or choose an existing image from the WordPress Media Library to use as the video’s featured image.
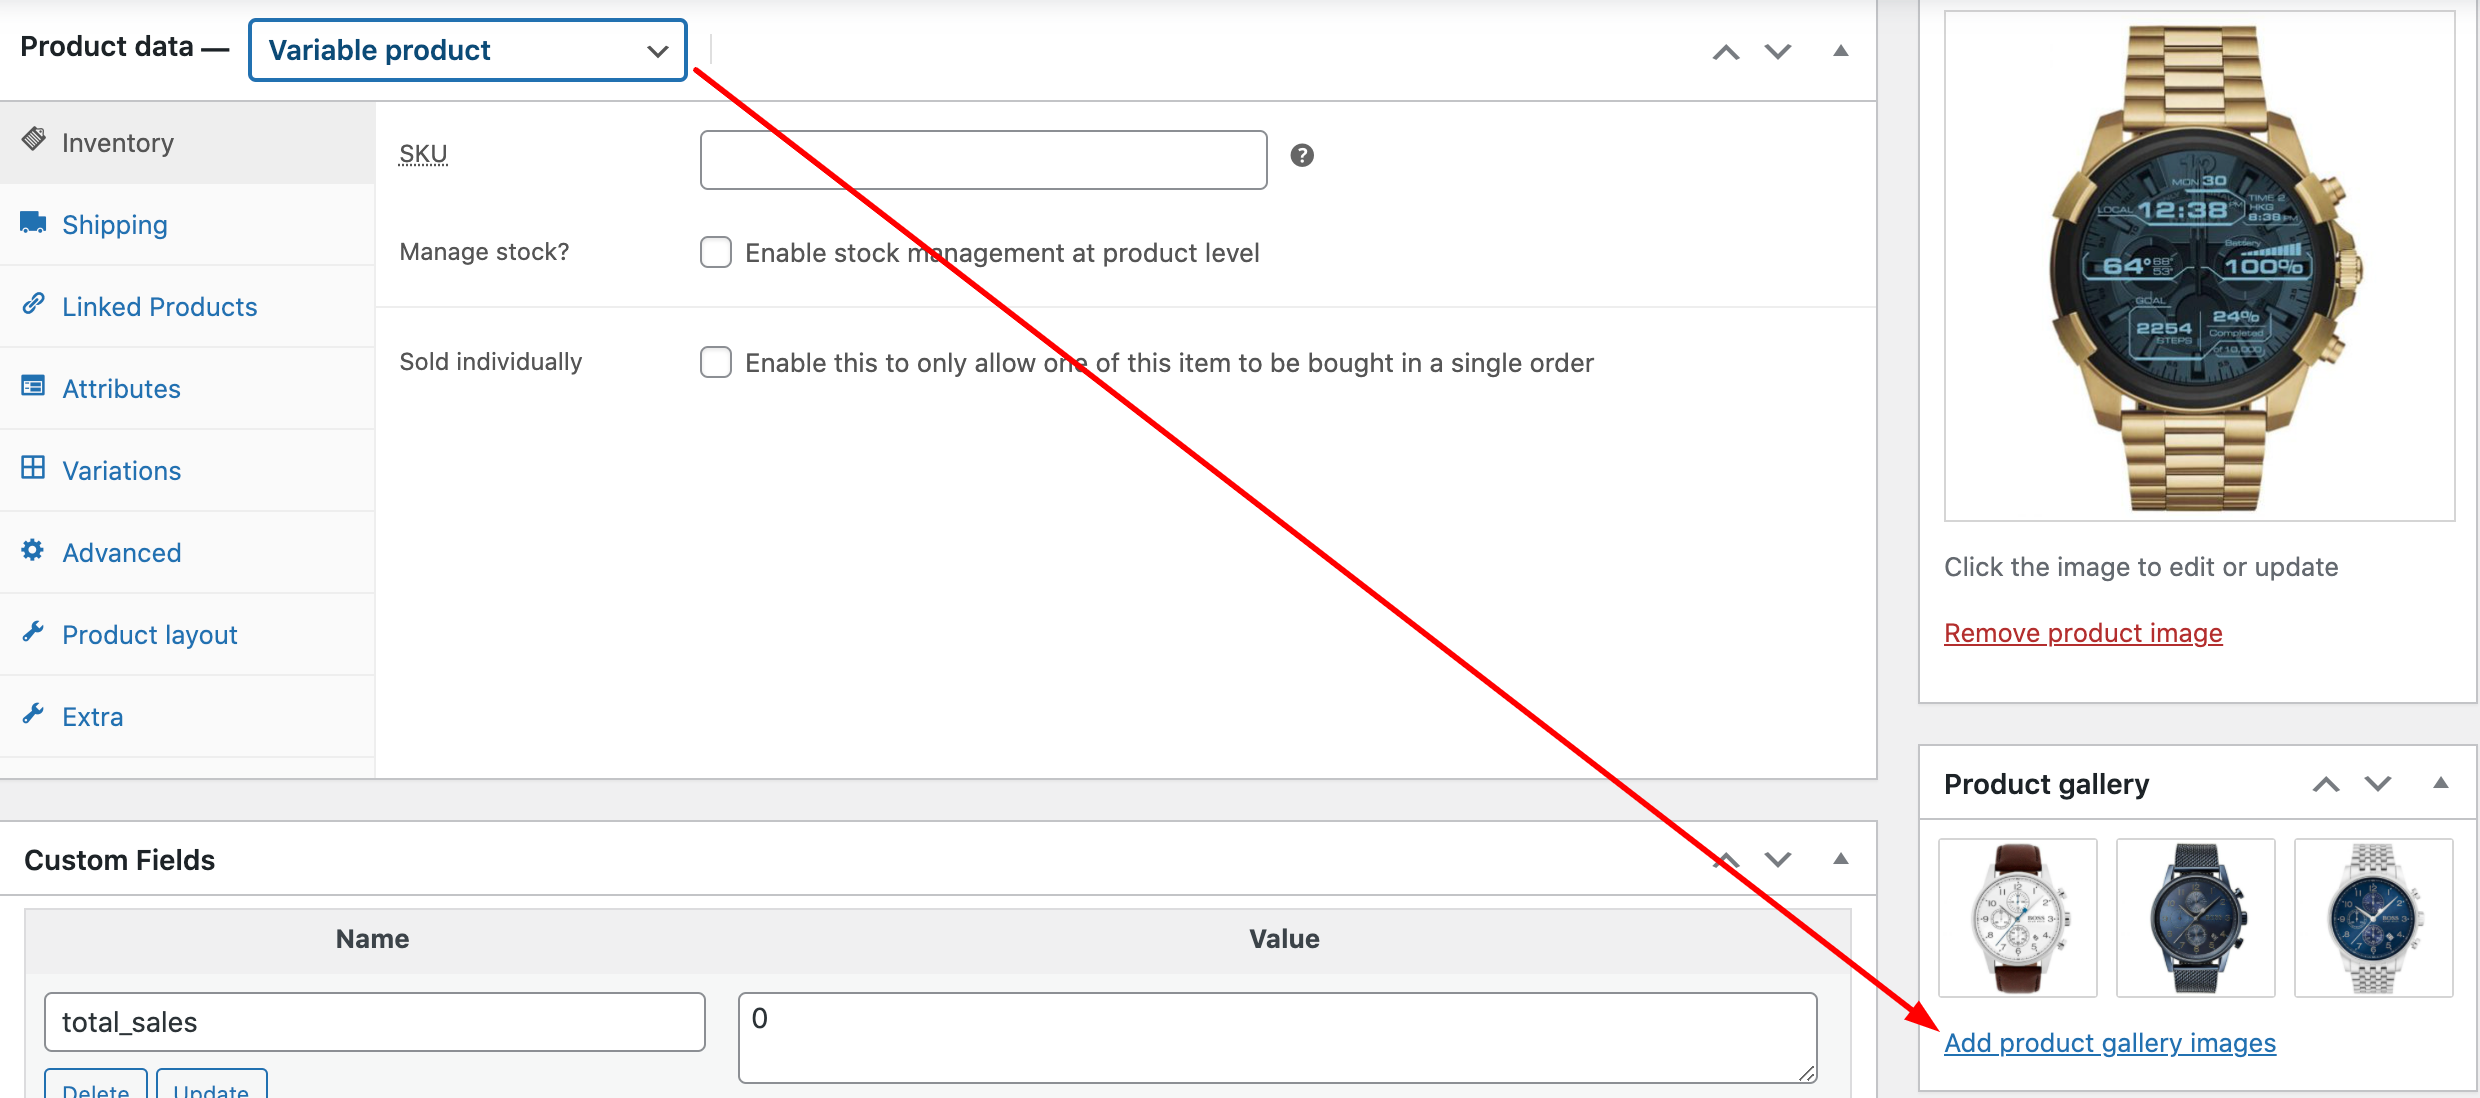
5. Enter the YouTube, Vimeo, or self-hosted video URL in the Variation Gallery Video section.
How the following image shows how the Simple product feature image area looks after adding the video.
Save the changes and visit the frontend. The featured video on your product page will appear as shown in the screenshot below.
How To add Self-Hosted Video in Variable Product Featured Image
How To add YouTube Video in Variable Product Featured Image
How To add Vimeo Video in Variable Product Featured Image
Add Featured Video in Grouped Product
If you want to display a video instead of the featured image, you can either embed a video using YouTube or Vimeo links or upload a video file directly.
1. Navigate to WooCommerce → All Products from your dashboard.
2. Click Edit on your desired grouped product.
3. Scroll down to the Product Image section on the right-hand side and click Set product image.
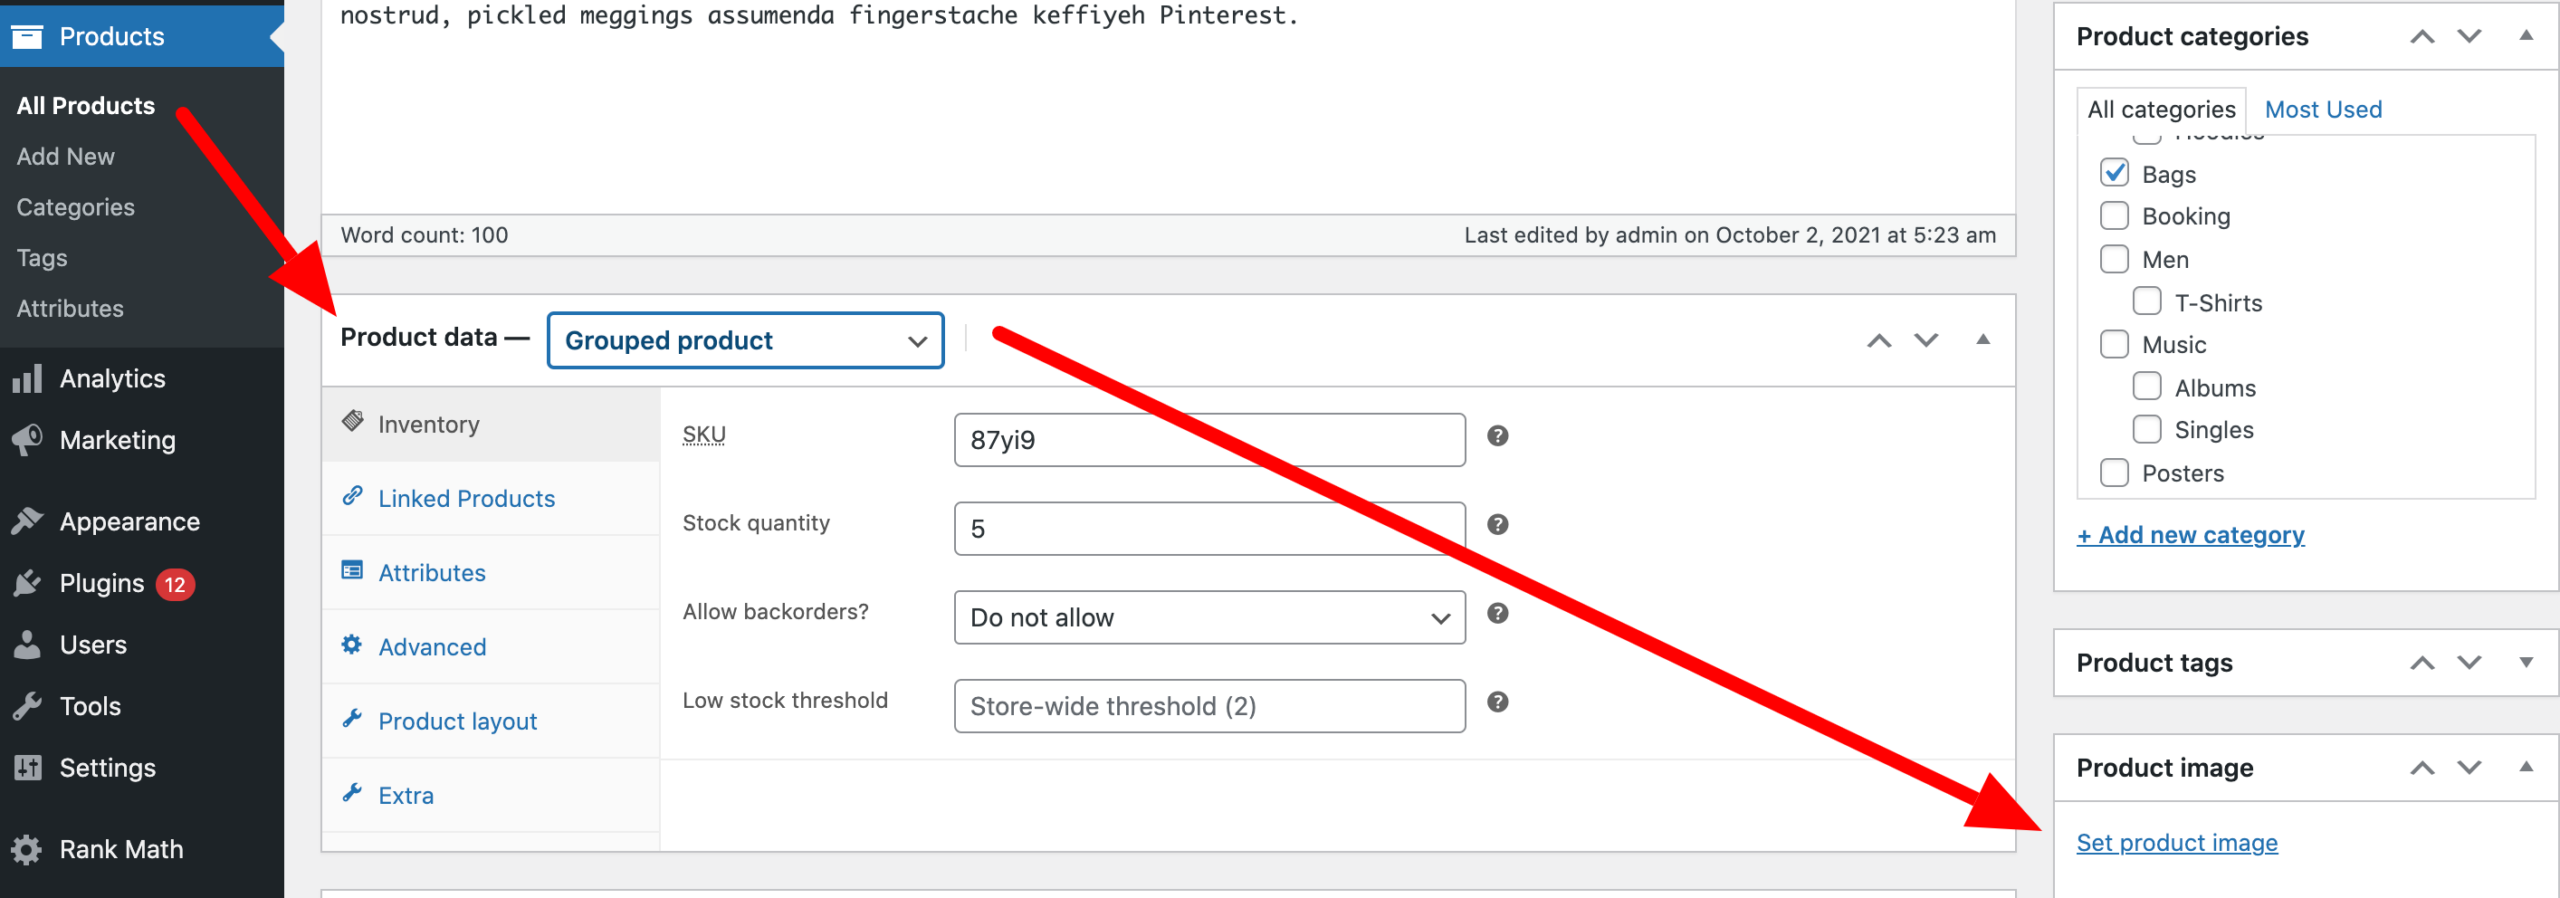
4. Upload a featured image for the video, or select an existing image from the WordPress Media Library to use as the video’s featured image.

5. Add the YouTube, Vimeo, or self-hosted video URL to the Variation Gallery Video section.
Check the screenshot below to see how the featured image section appears in the backend after adding a featured video.
Save the changes and visit the frontend. The featured video on your product page will appear as shown in the screenshot below.
How To add Self-Hosted Video in Grouped Product Featured Image
How To add YouTube Video in Grouped Product Featured Image
How To add Vimeo Video in Grouped Product Featured Image
Add Featured Video in External / Affiliate Product
If you want to replace the featured image with a video, you can embed a video using YouTube or Vimeo links or upload a video file directly.
1. Navigate to WooCommerce → All Products from your dashboard.
2. Click Edit on the grouped product you want to update.
3. Scroll down to the Product Image section on the right-hand side and click Set product image.
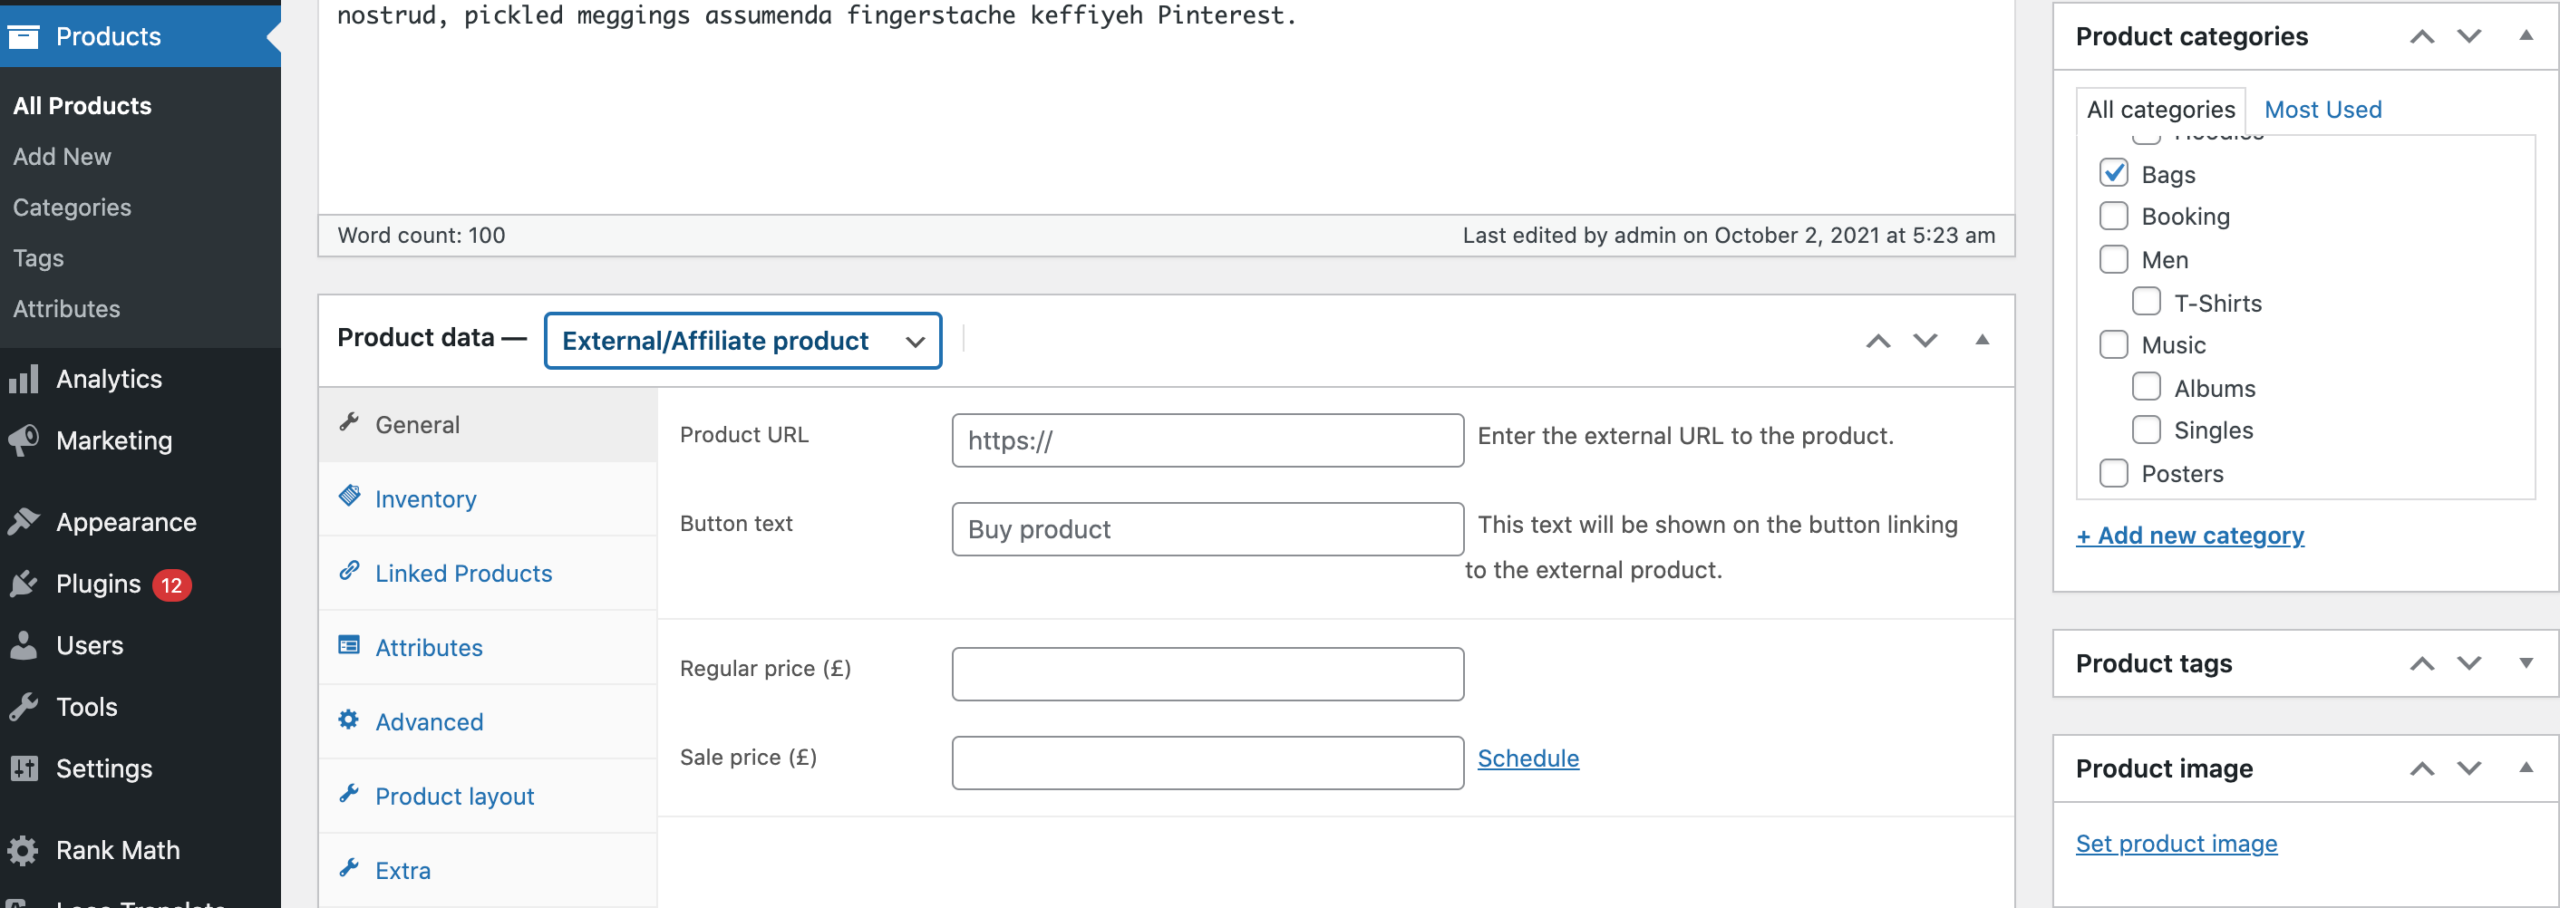
4. You’ll need to upload a featured image or select an image from the media library of the video you want to show as a featured image.
5. Try to add YouTube / Vimeo / Self-hosted video URL to the Variation Gallery Video section.
Refer to the screenshot below to see how the featured image section appears in the backend after a featured video has been added.
Save the changes and visit the frontend. The featured video on your product page will appear as shown in the screenshot below.
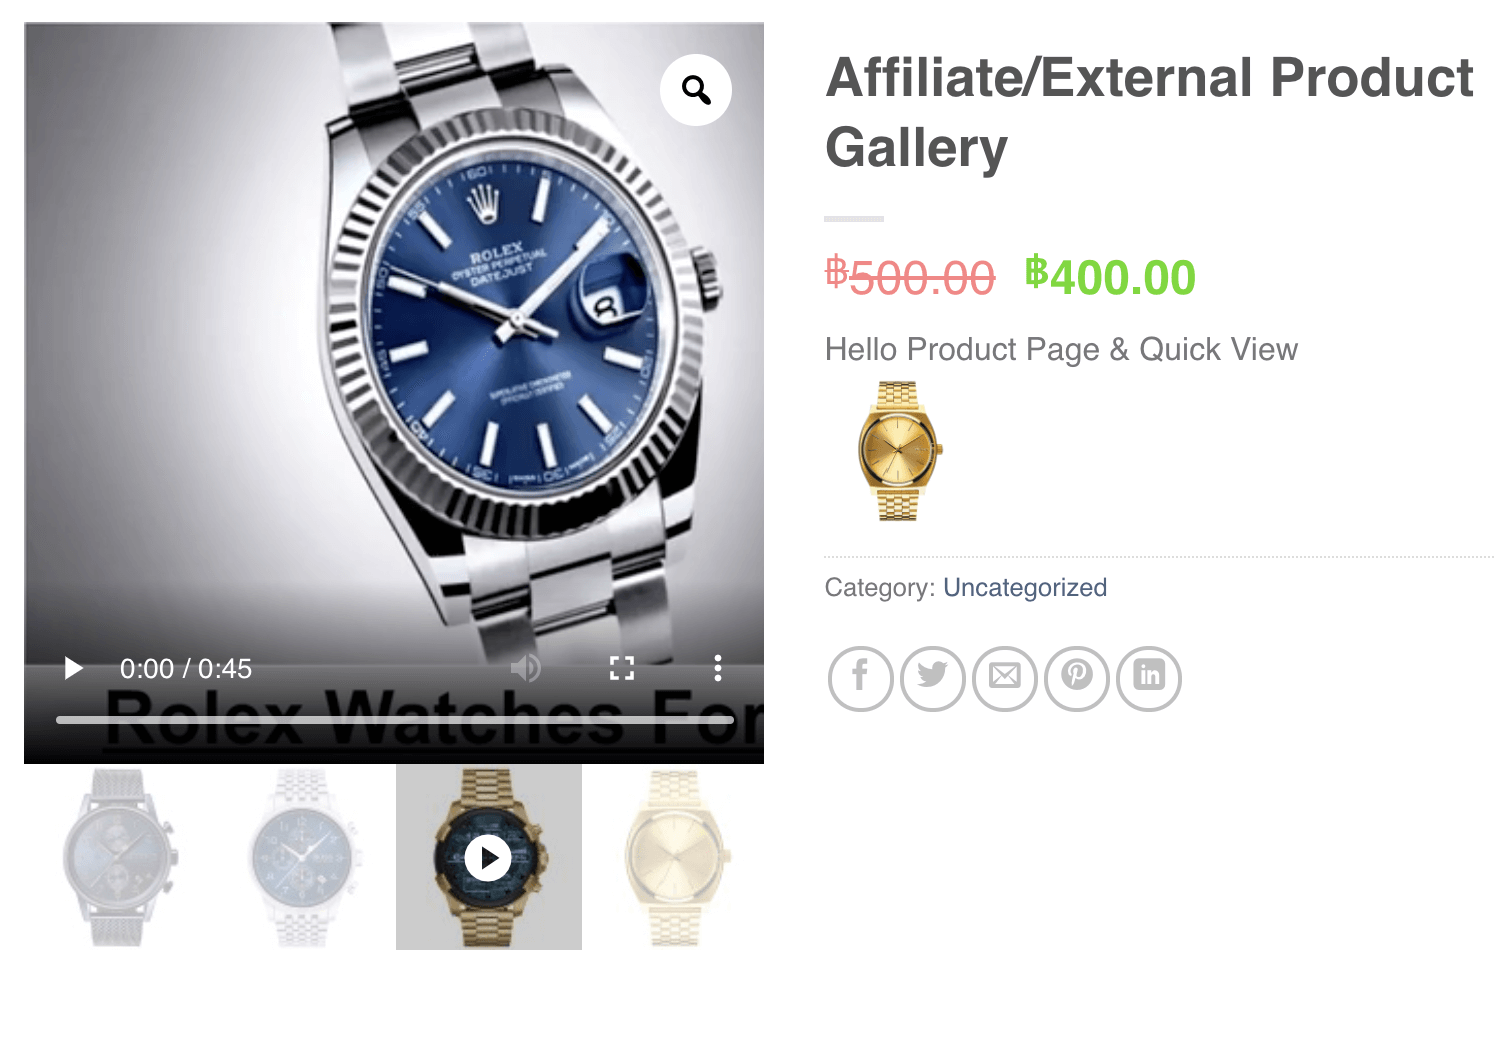
How To add Self-Hosted Video in External / Affiliate Product Featured Image
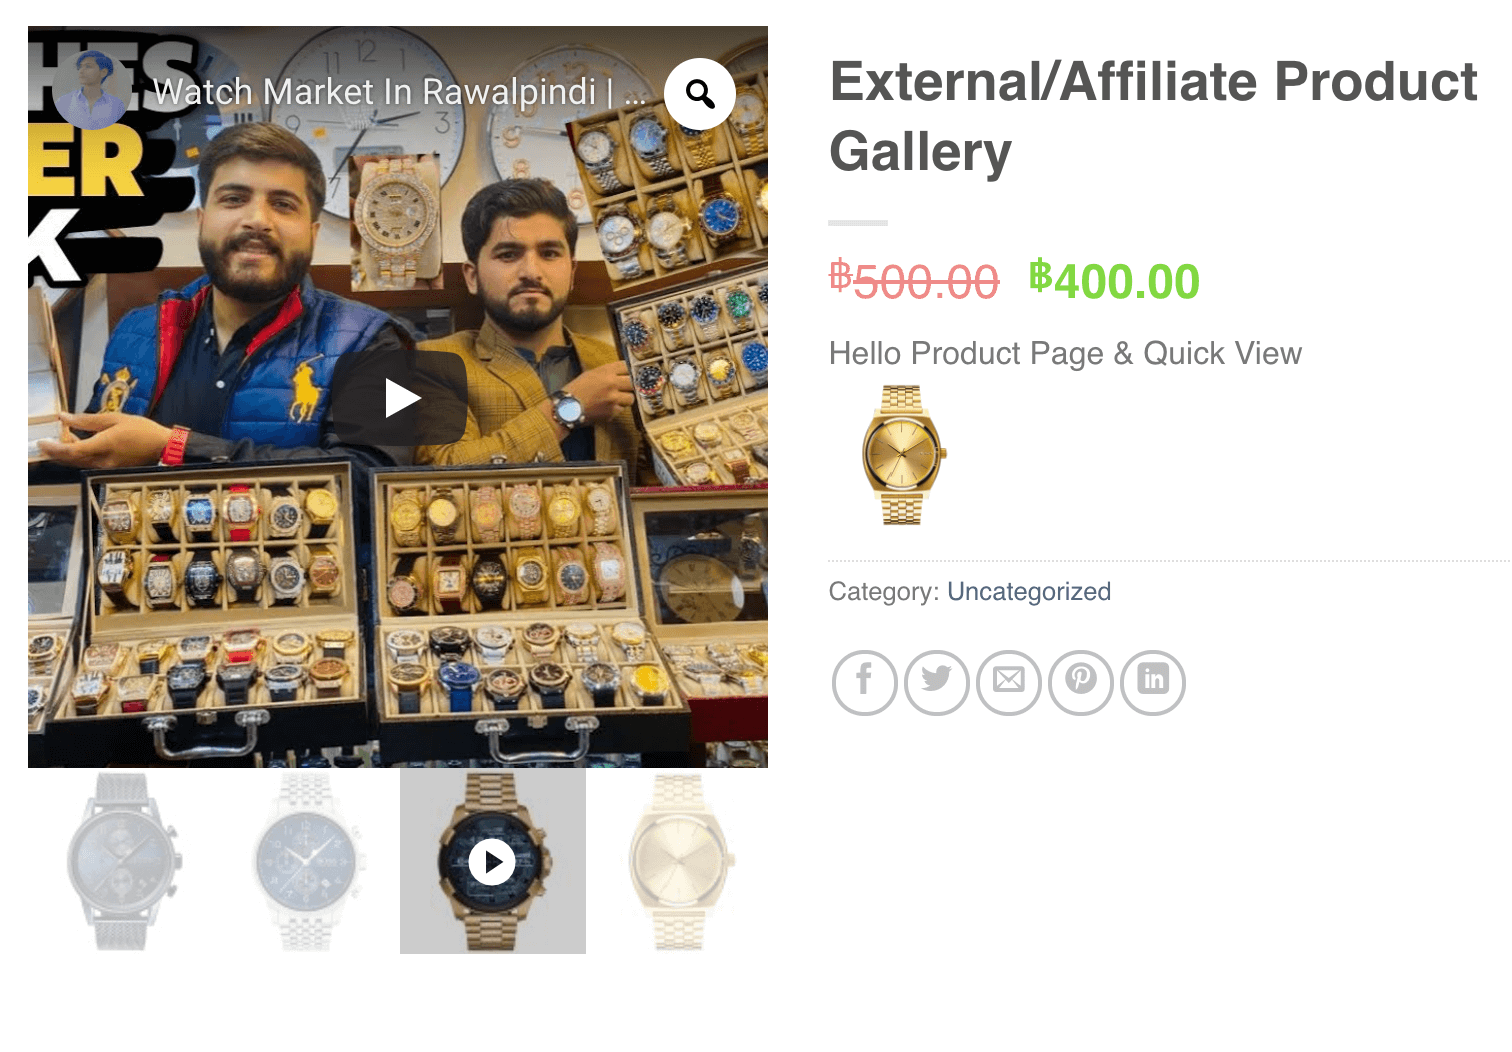
How To add YouTube Video in External/Affiliate Product Featured Image
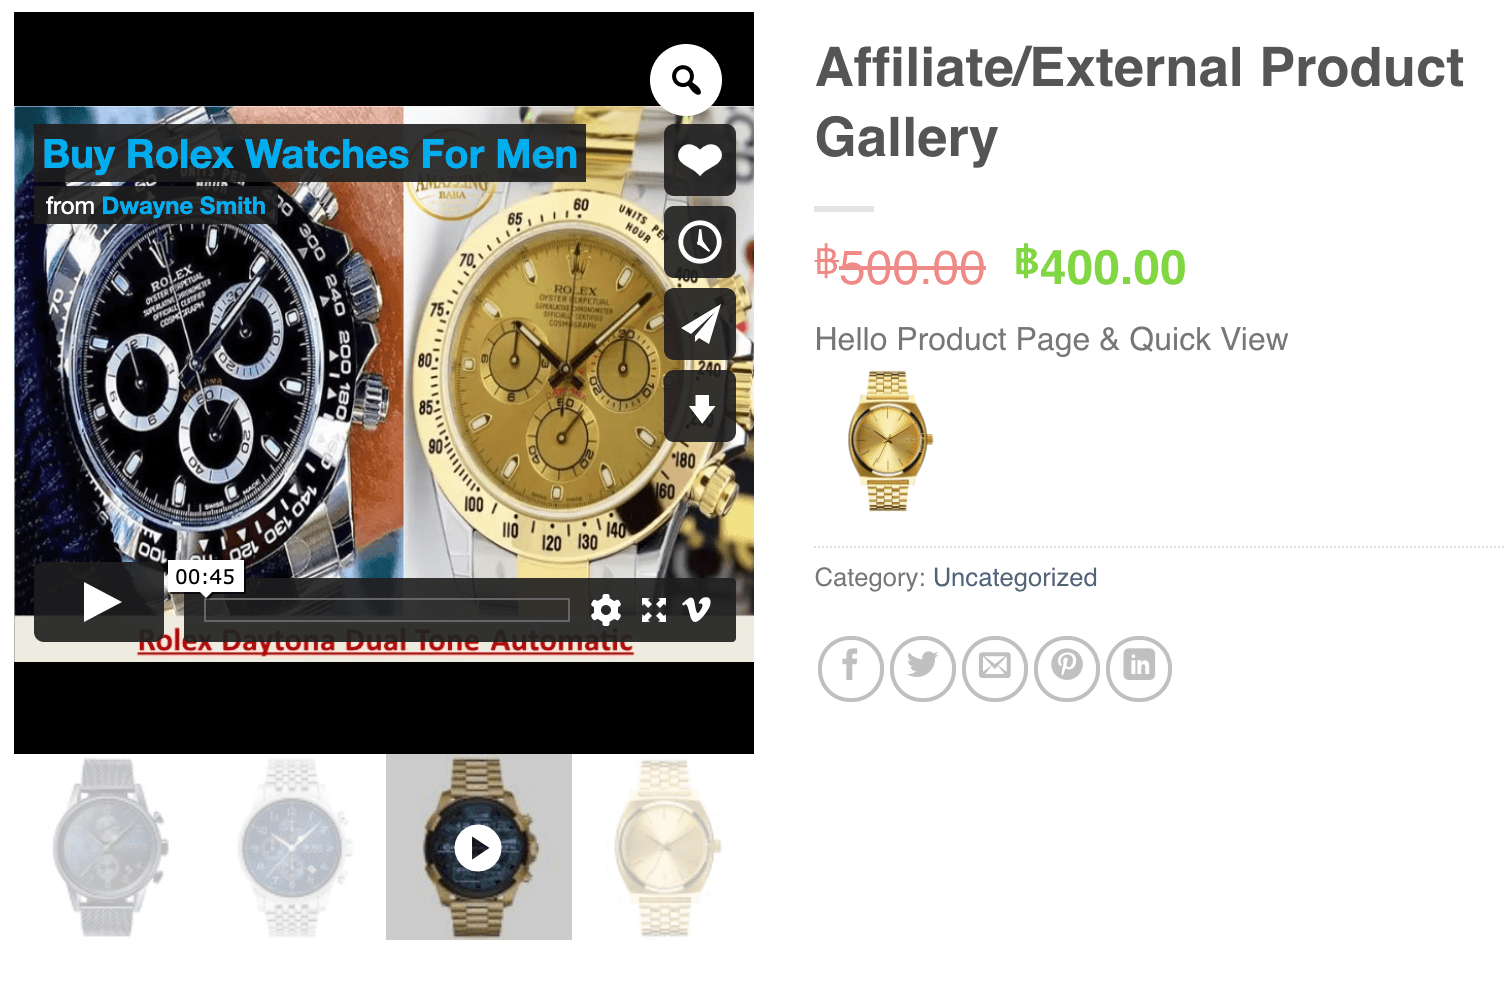
How To add Vimeo Video in External / Affiliate Product Featured Image
Enable Product Featured Image Popup
Always Reset Gallery After Variation Select
Enable/Disable Slider For WooCommerce Product Images Gallery
Product Feature Image Auto slider & Set Speed
Image Fade for Product Image & Set Fade Speed
How to Enable Fade for Product Featured Image
How to Set Image Fade Speed
Define Thumbnail Item Number & Gaps
How To Adjust the Thumbnail Item
How To Adjust the Thumbnail Item Gap
Variation Image Sorting
Set Gallery Preloader & Preloader Style
How to Enable/Disable Preloader for the Gallery
How to Select Preloader Style
Hide Gallery Featured Image
Disable Product Gallery For Selected Product Type
Upload Videos In Simple Product Image Gallery
Using the Additional Variation Image Gallery plugin, you can add YouTube, Vimeo, or self-hosted videos to a simple product.
Upload YouTube Video In The Product Simple Gallery
1. Go to Products → All Products and open the simple product where you want to add a video.
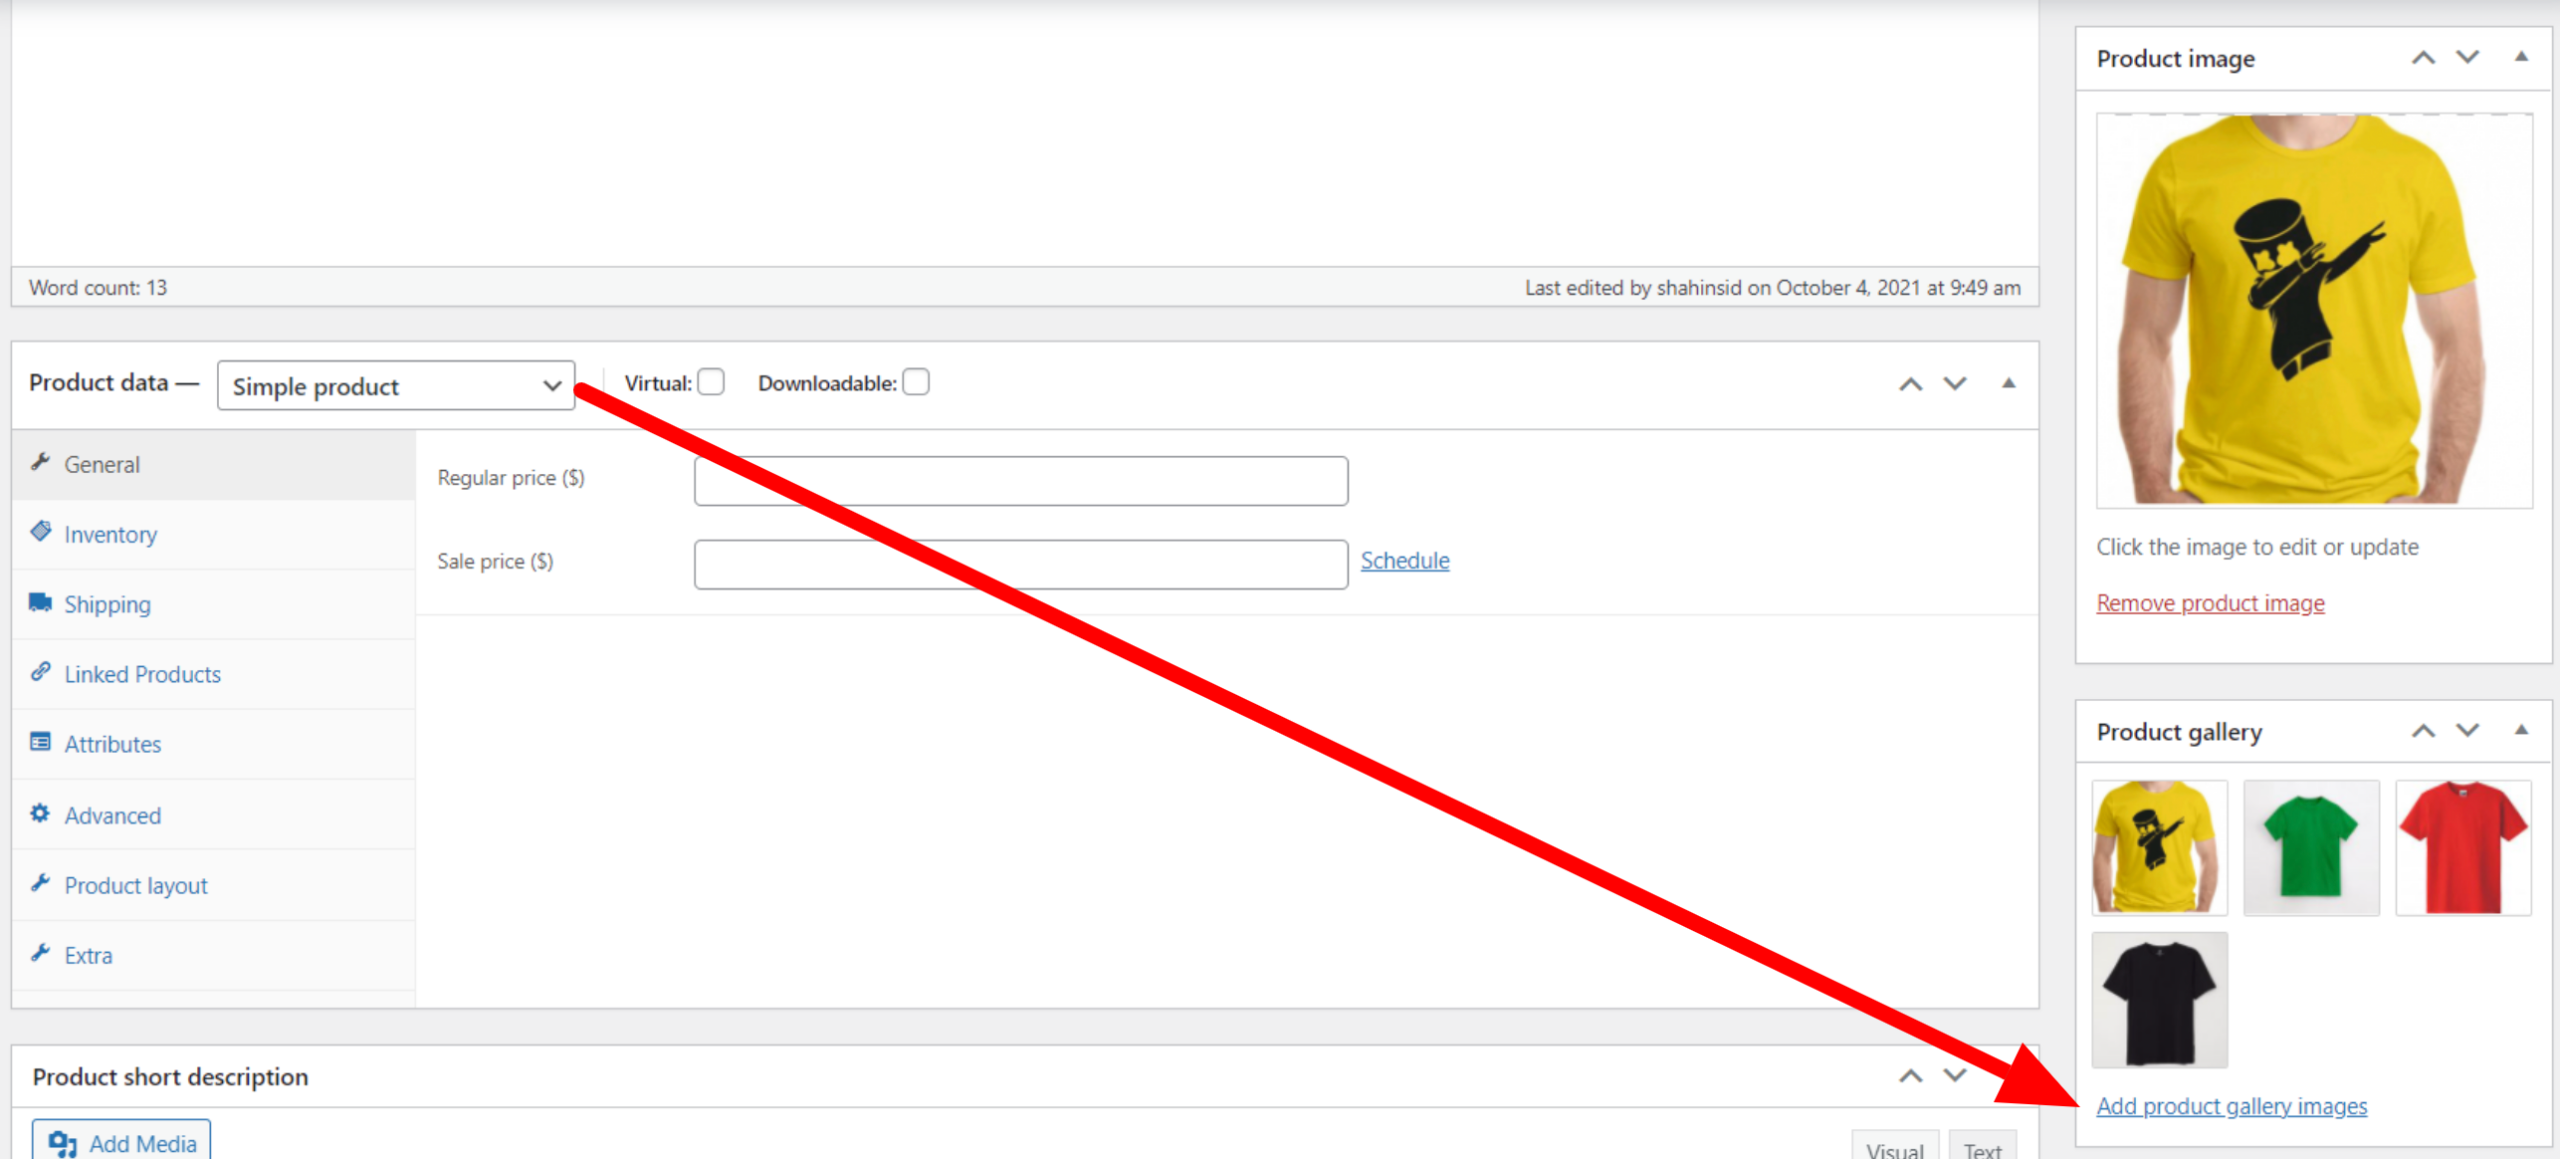
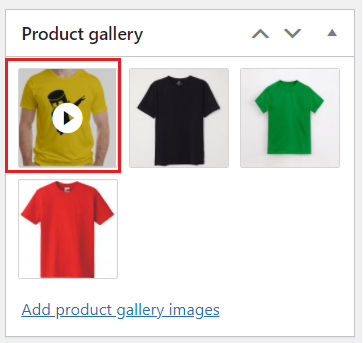
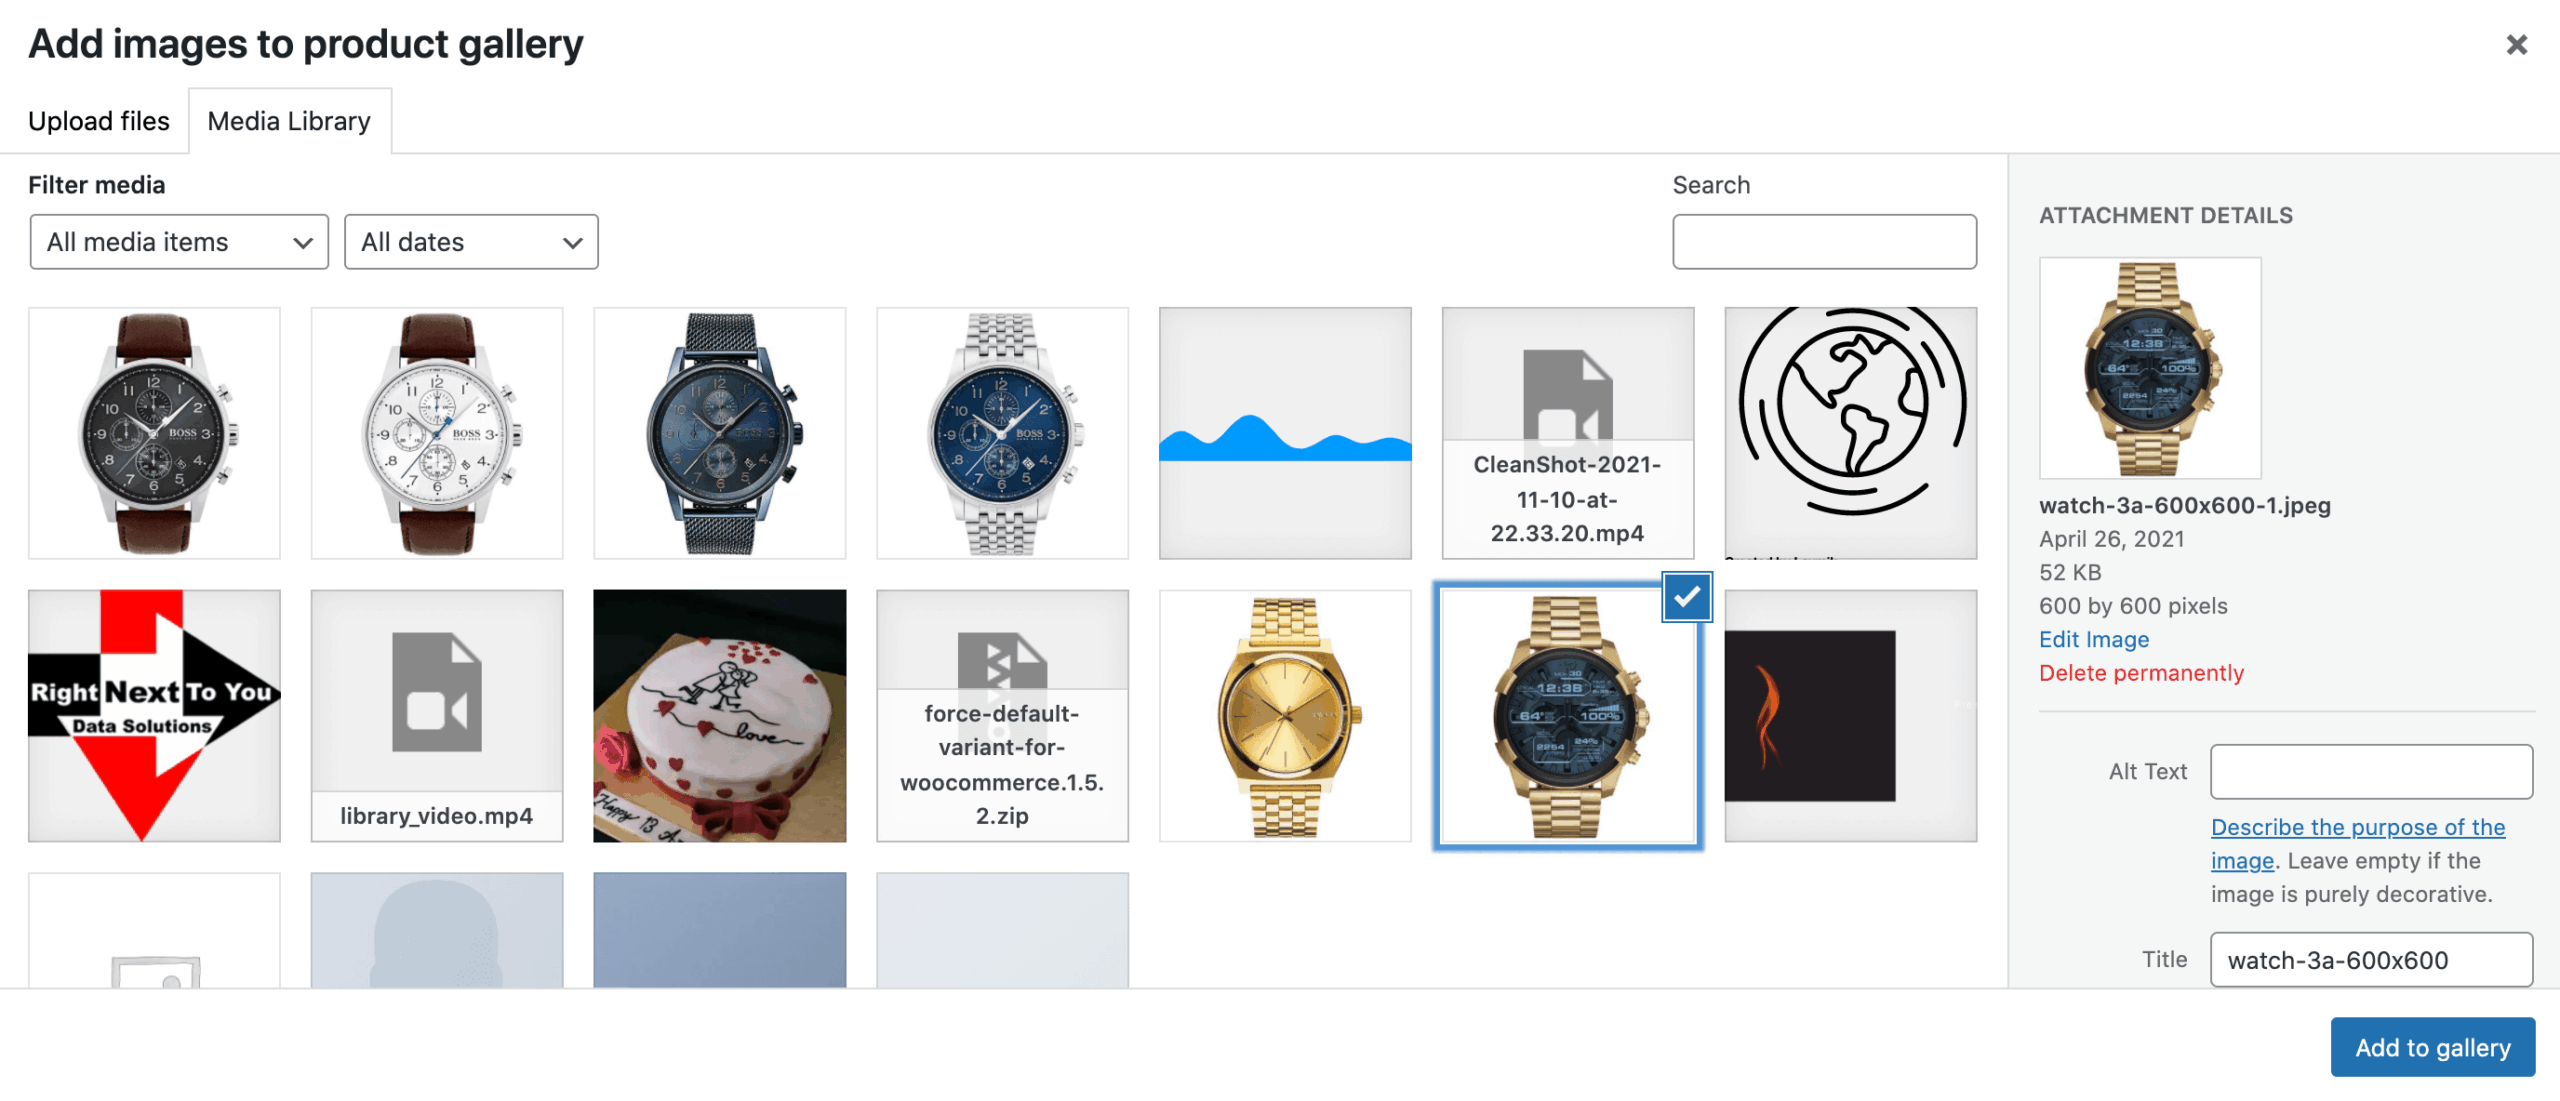
2. Scroll down to the Product Gallery section and click Add product gallery images.
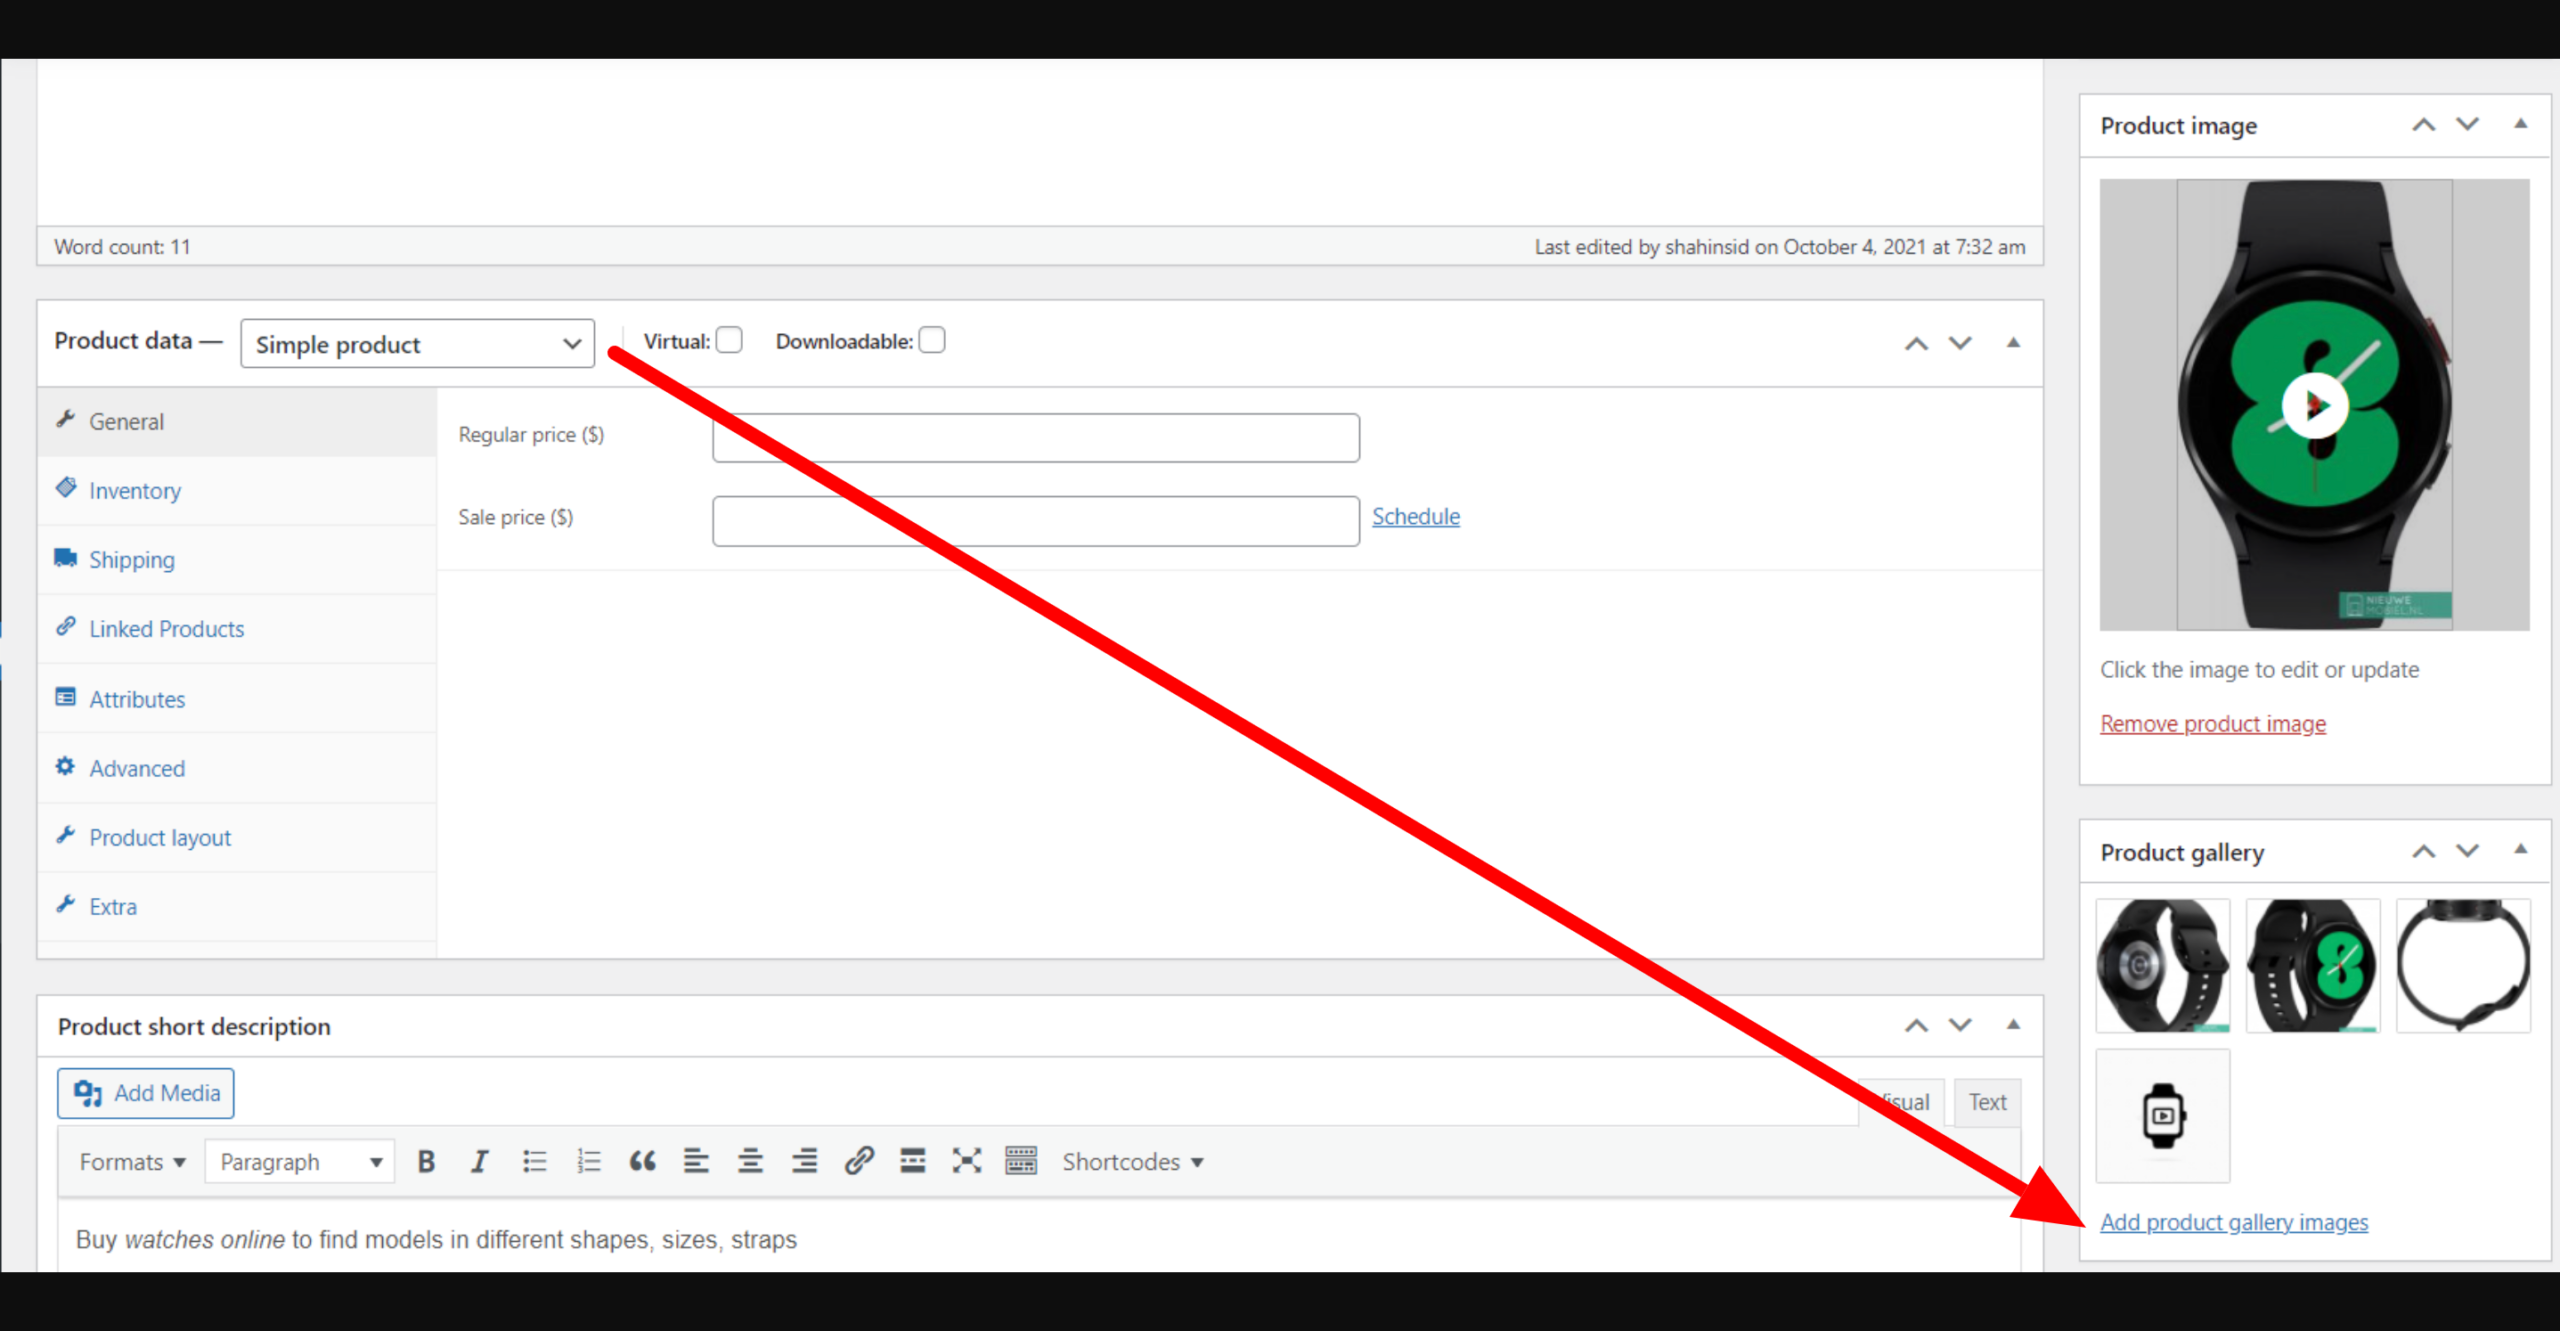
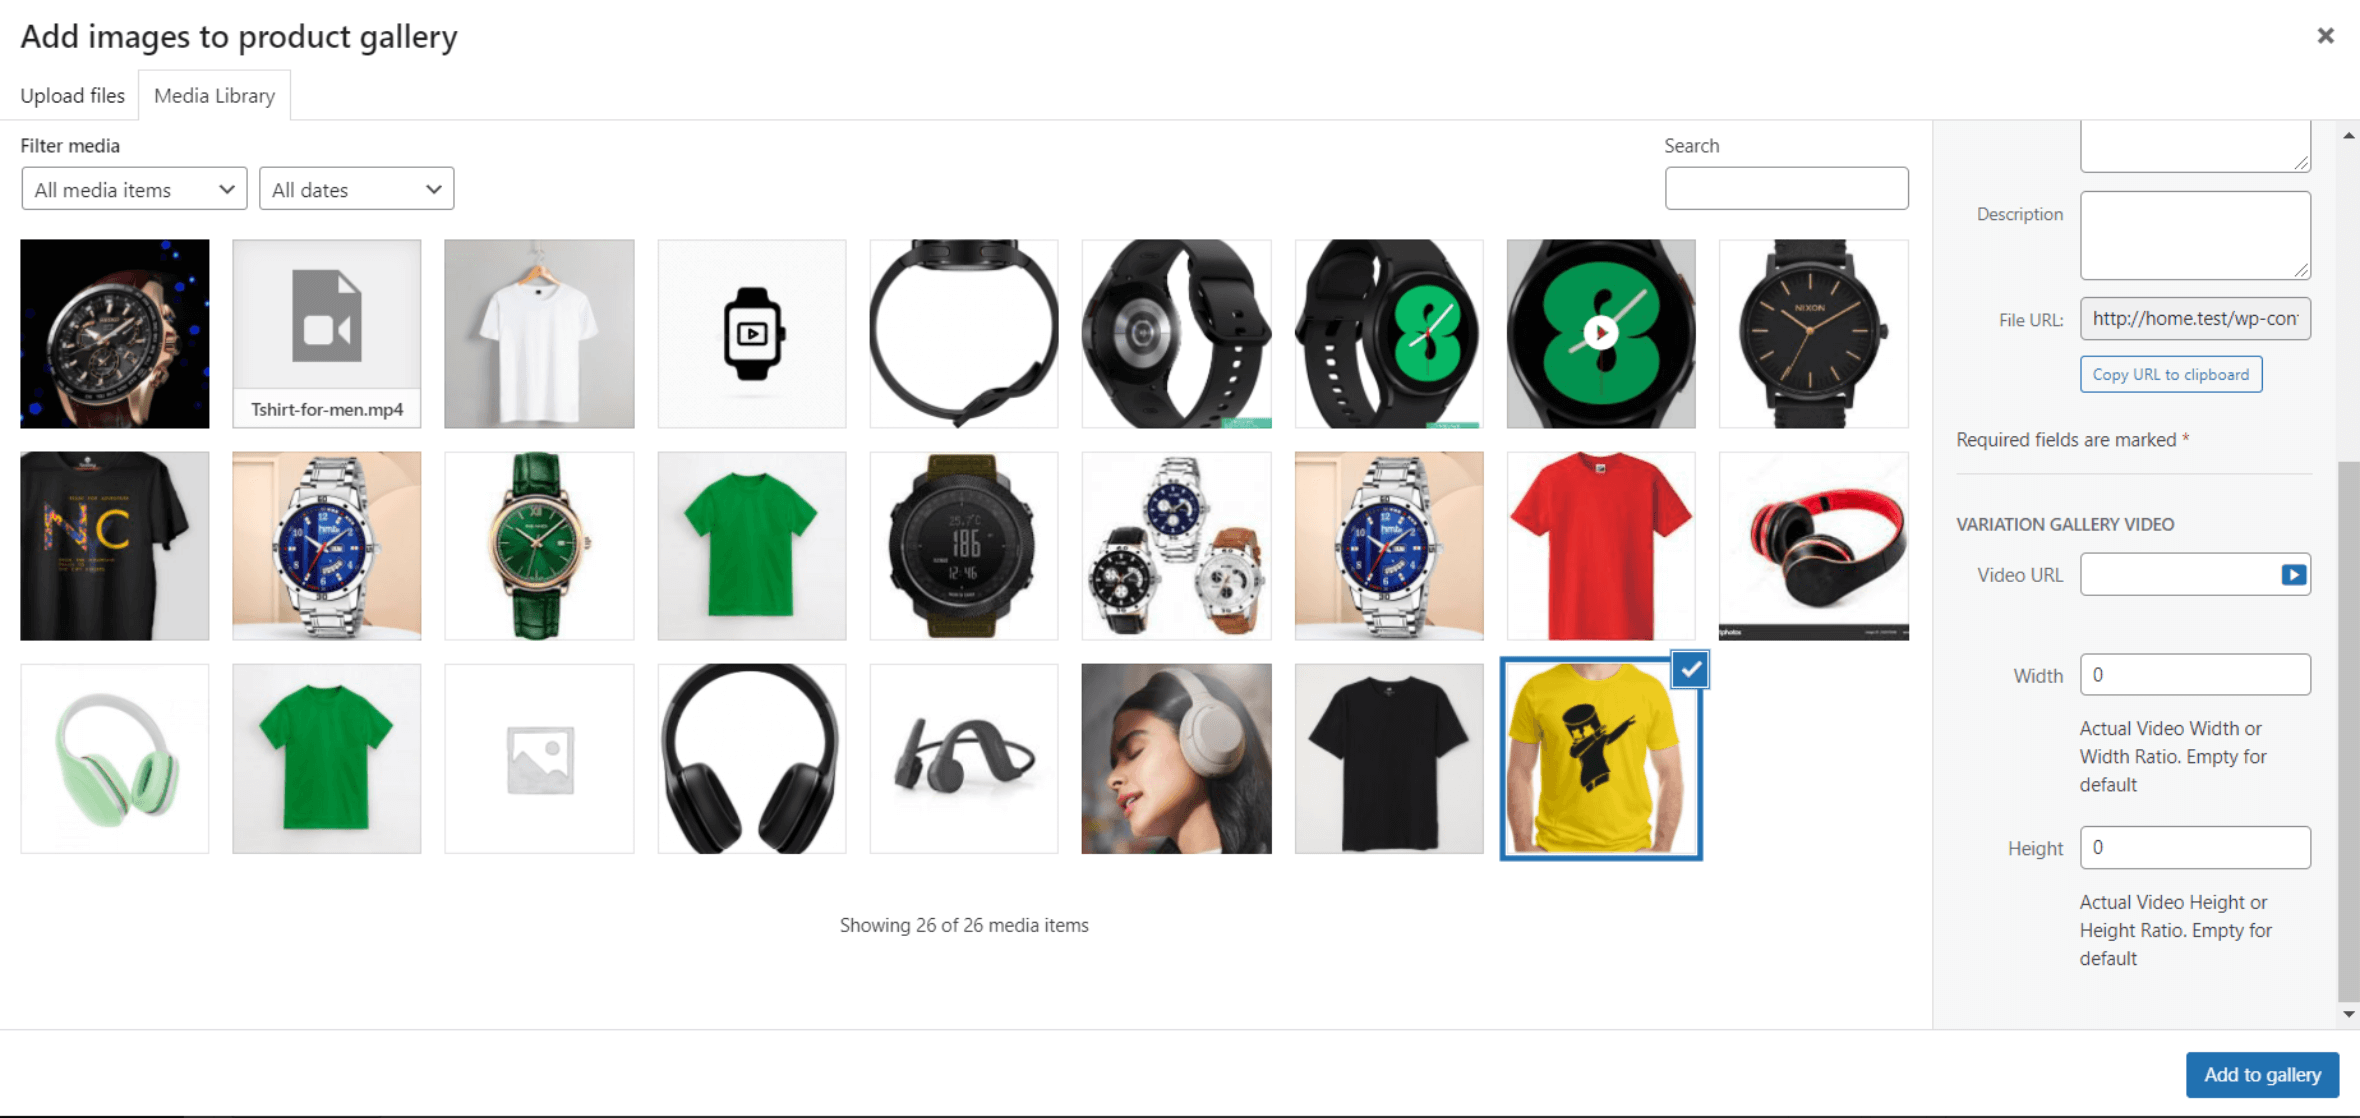
3. Now, select a thumbnail image for the video to use as the featured image.
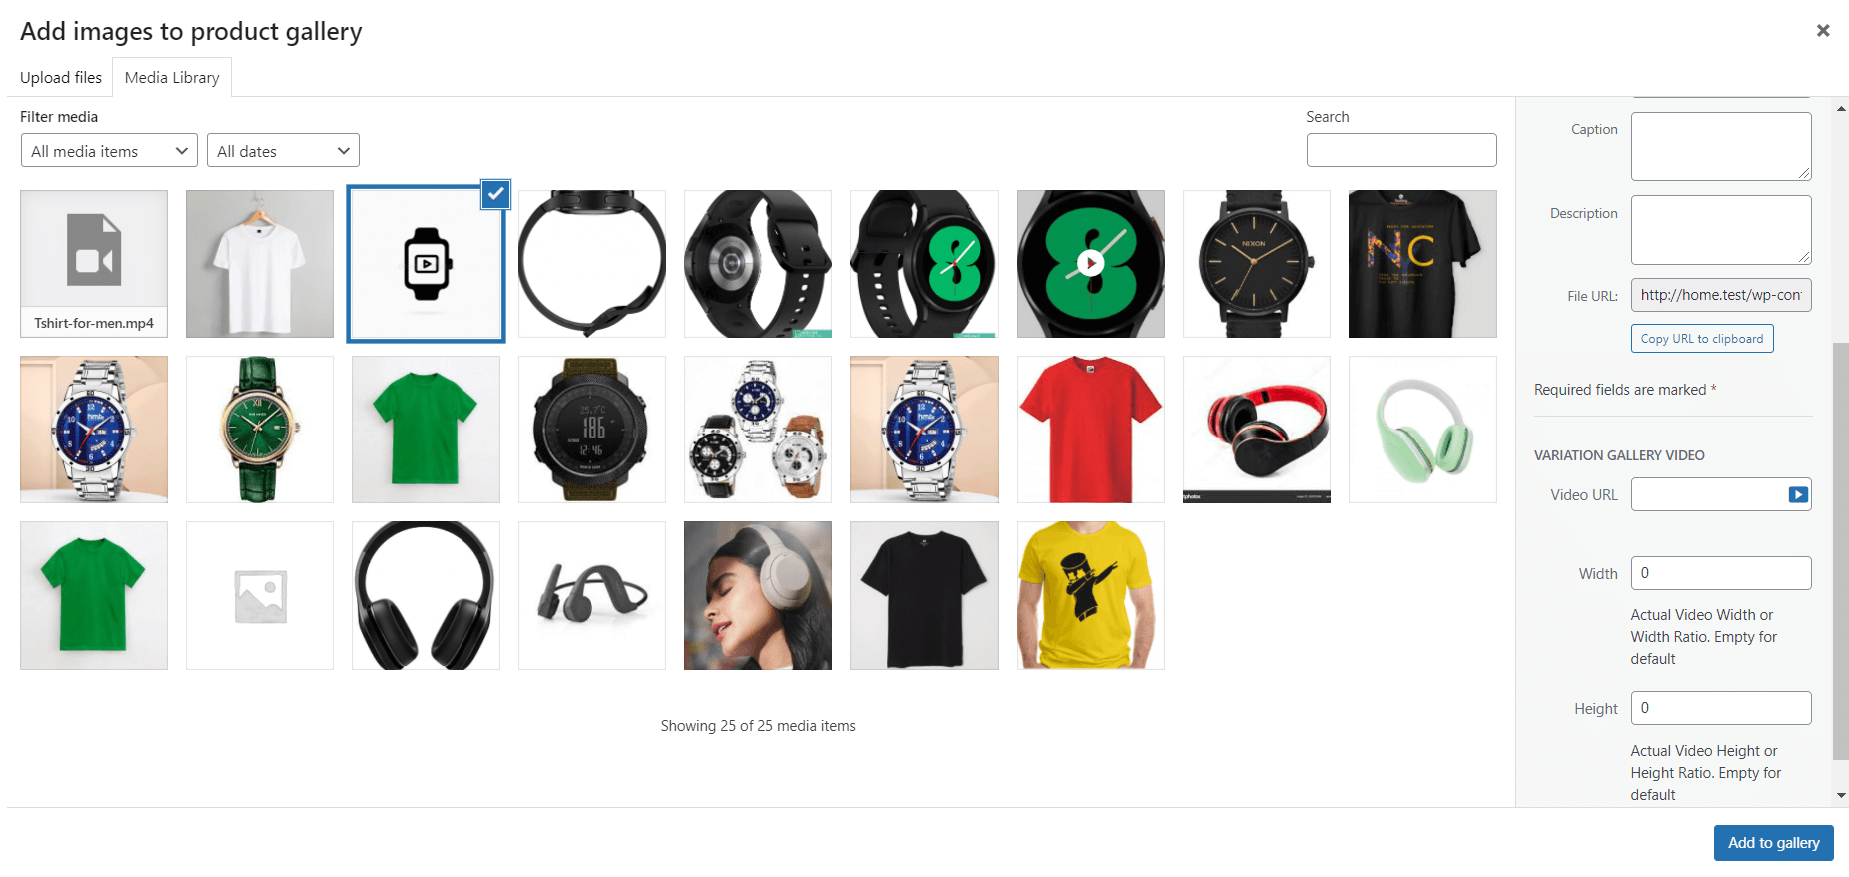
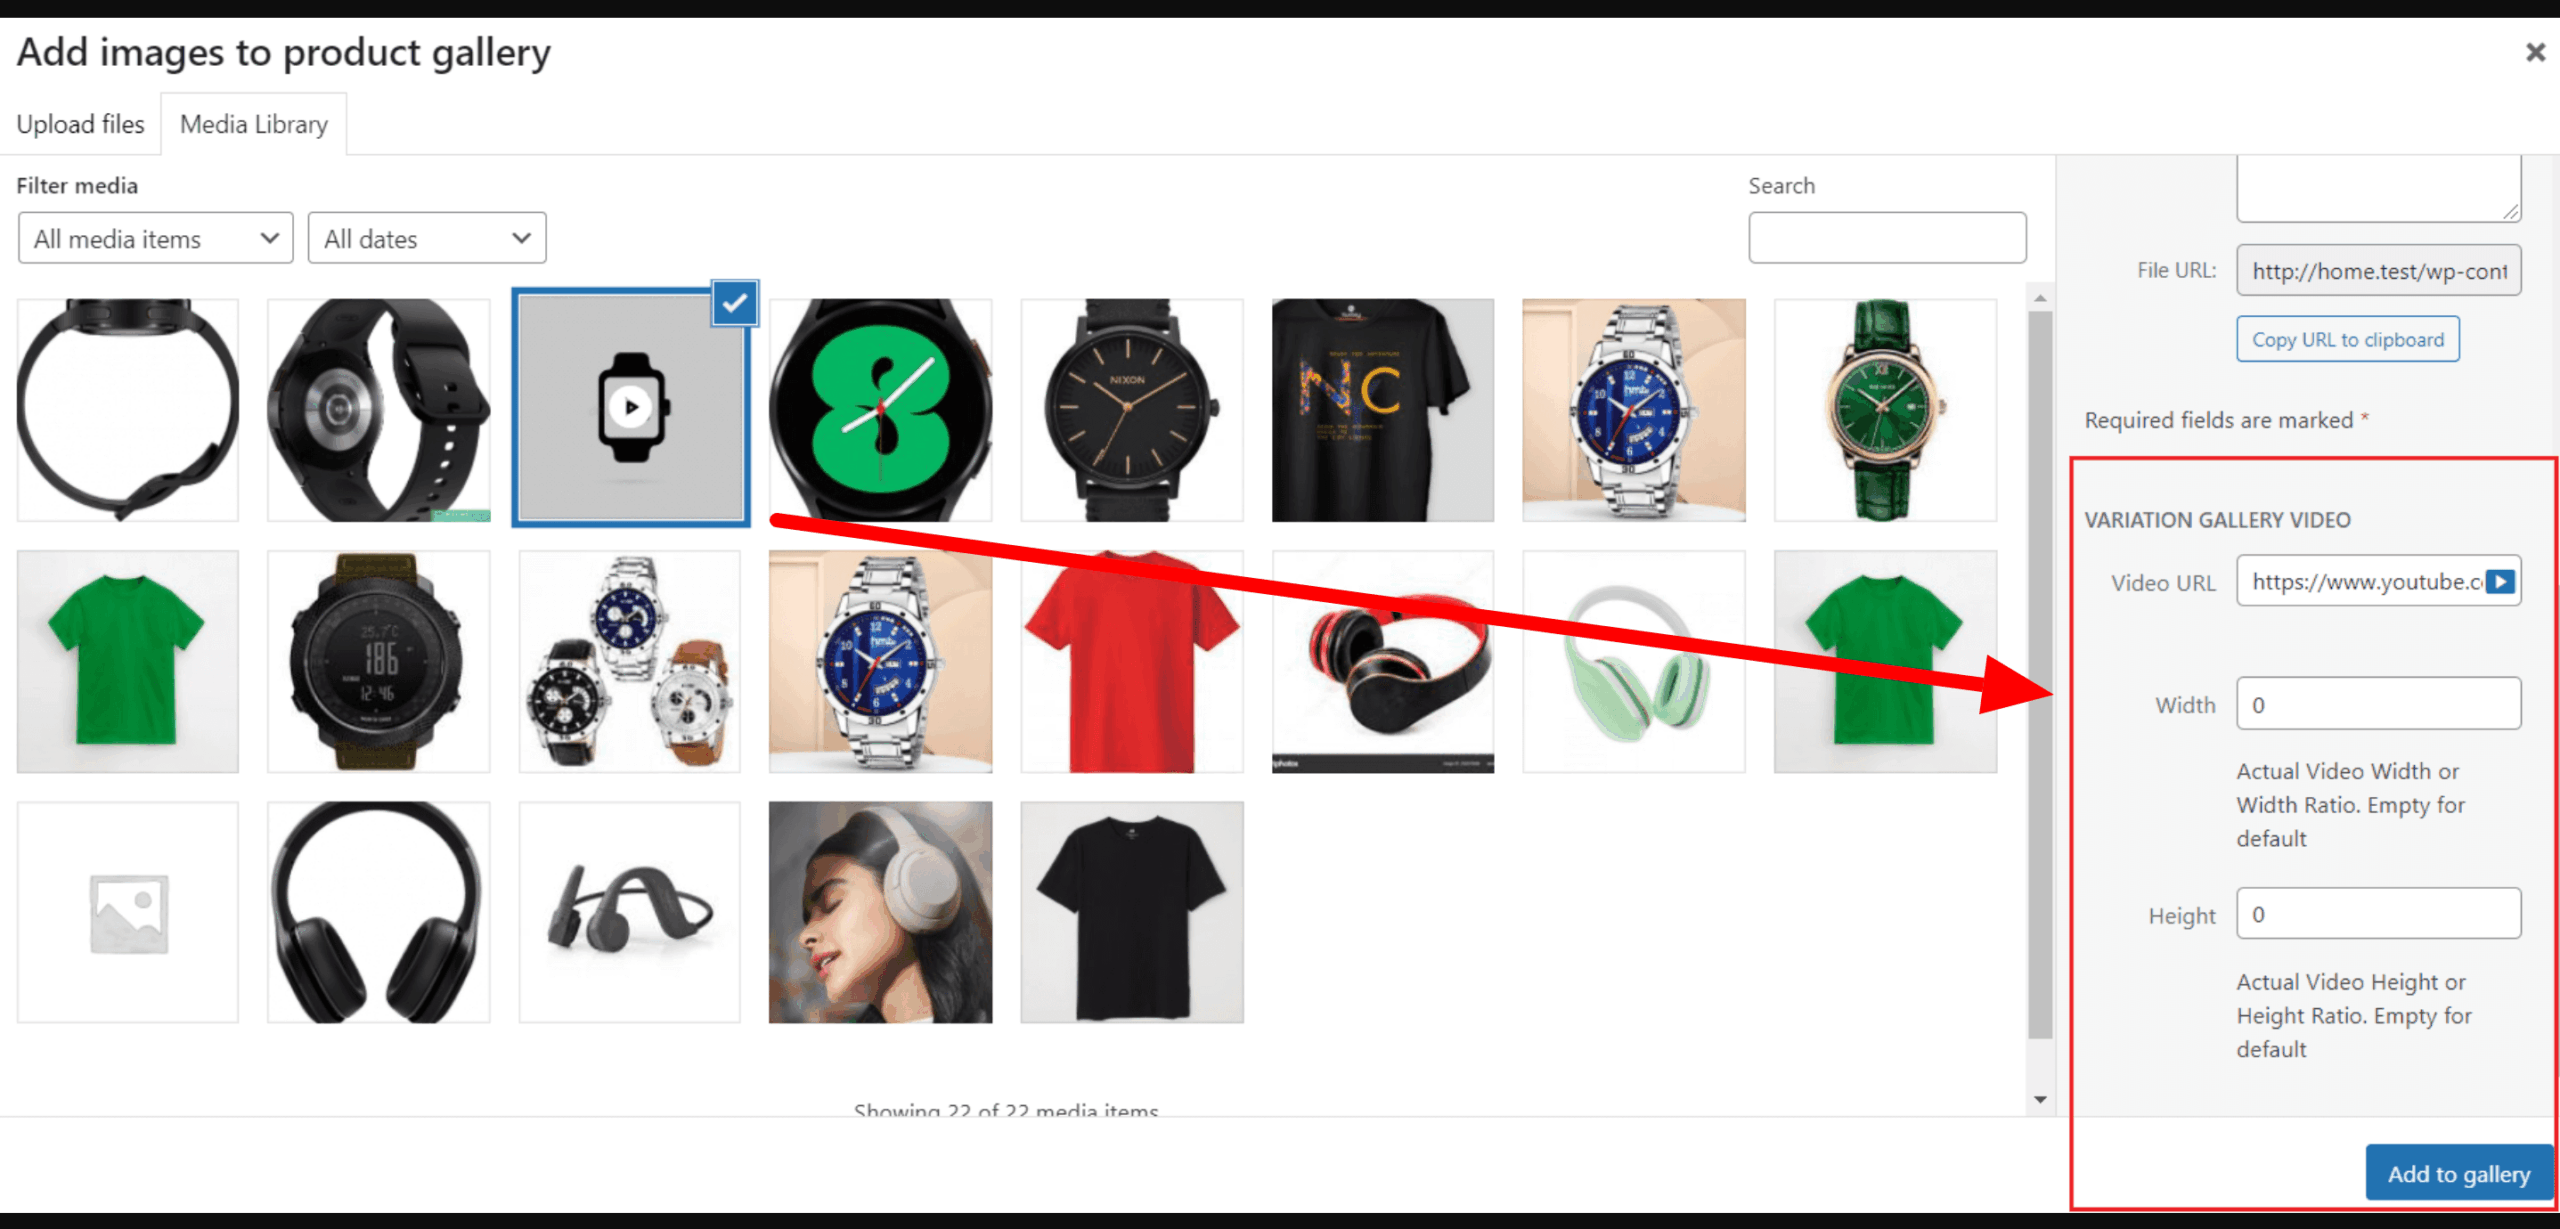
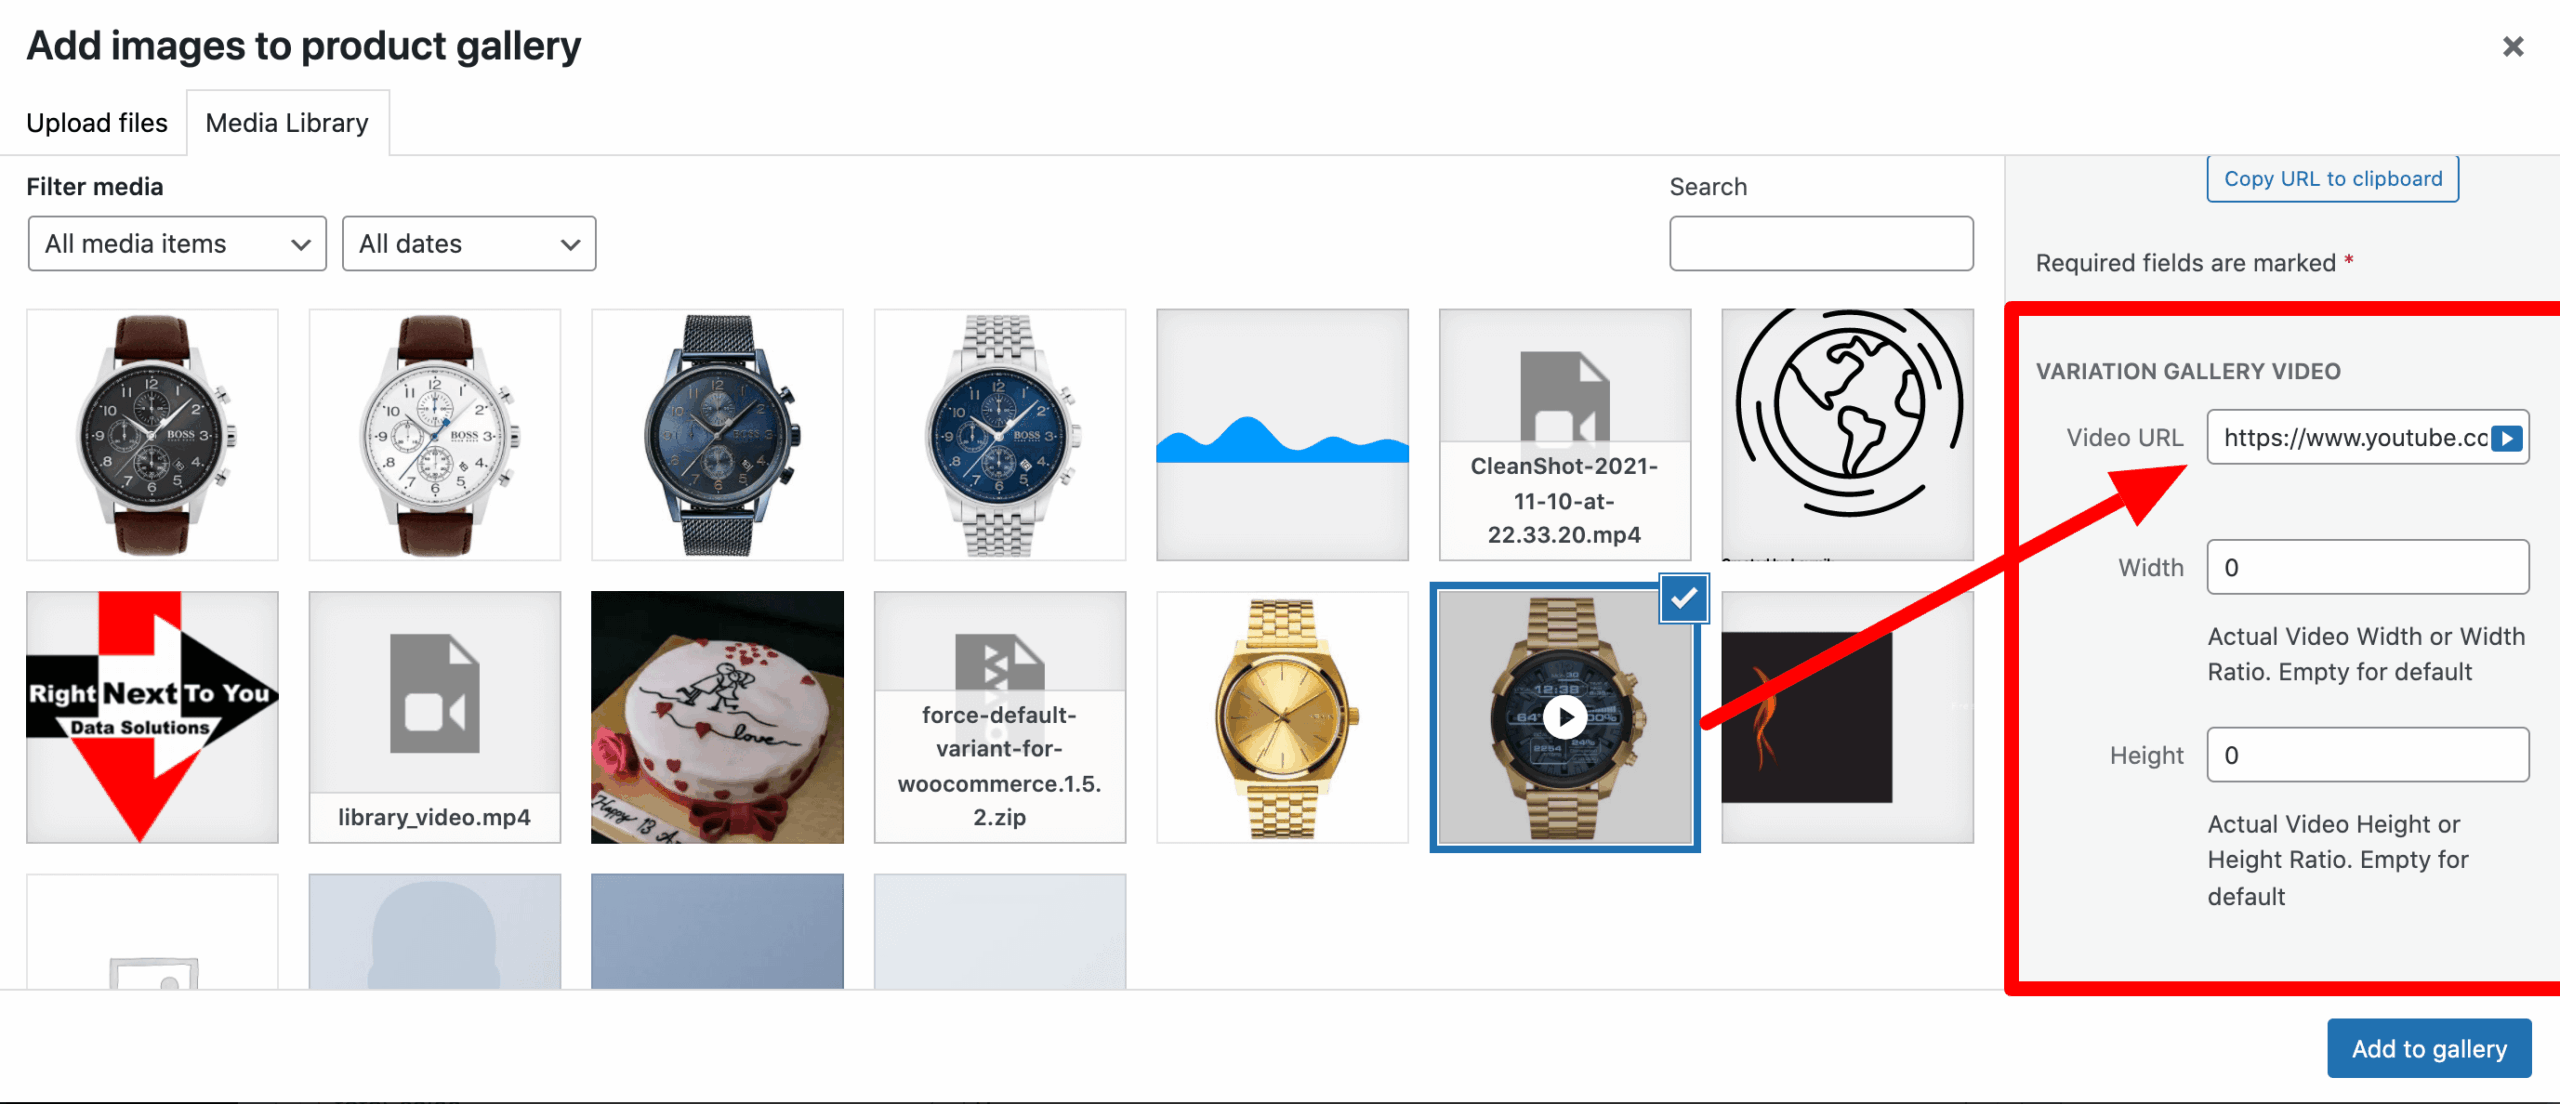
4. Enter your YouTube video URL in the Variation Gallery Video section. You can also adjust the video height and width as needed. The YouTube video link should follow this format:
https://www.youtube.com/watch?v=wopbjNkJNEc
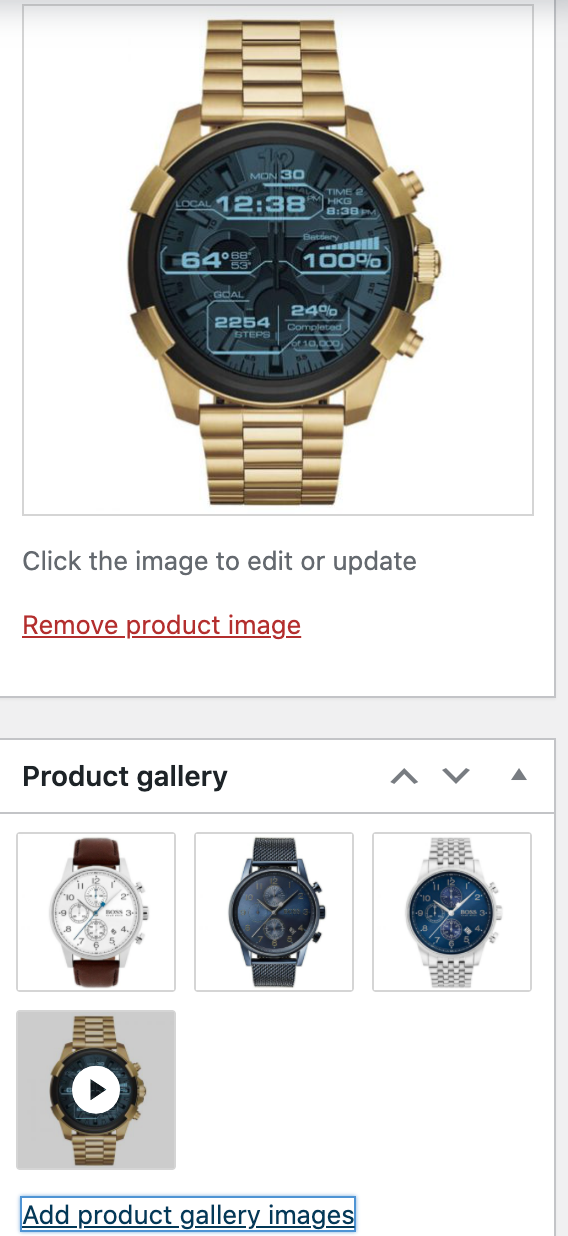
Please note: after adding the video link the gallery area looks like the following screenshot.
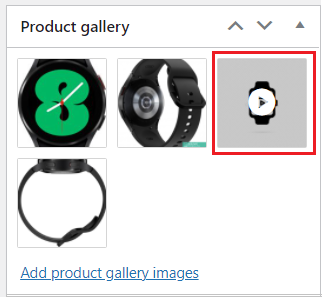
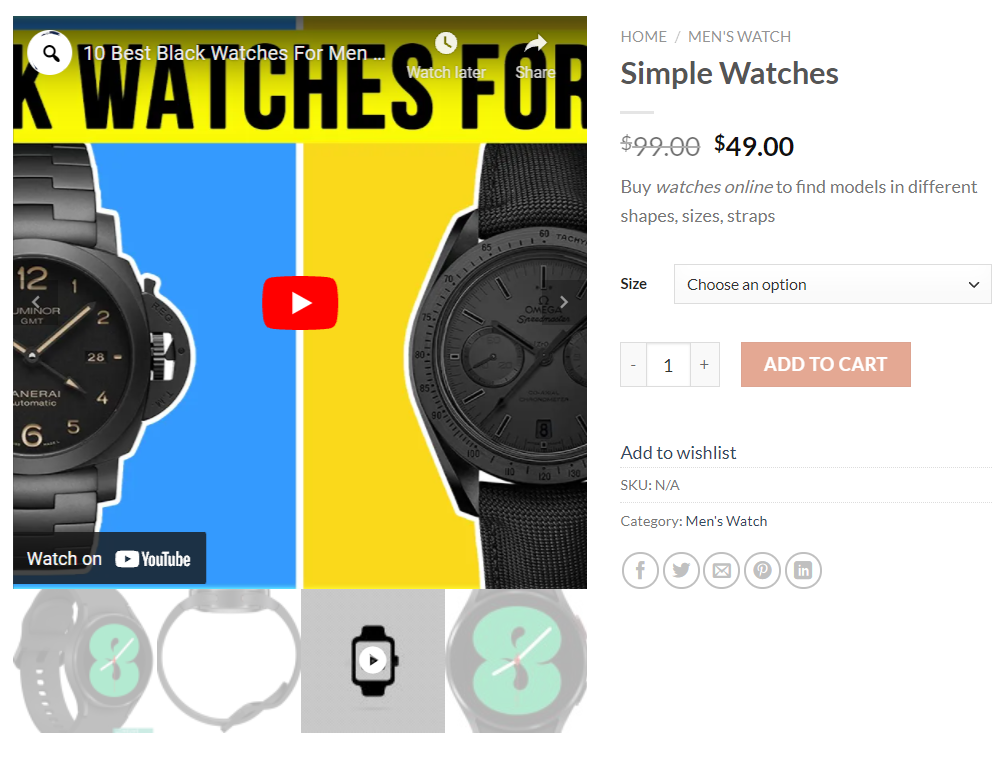
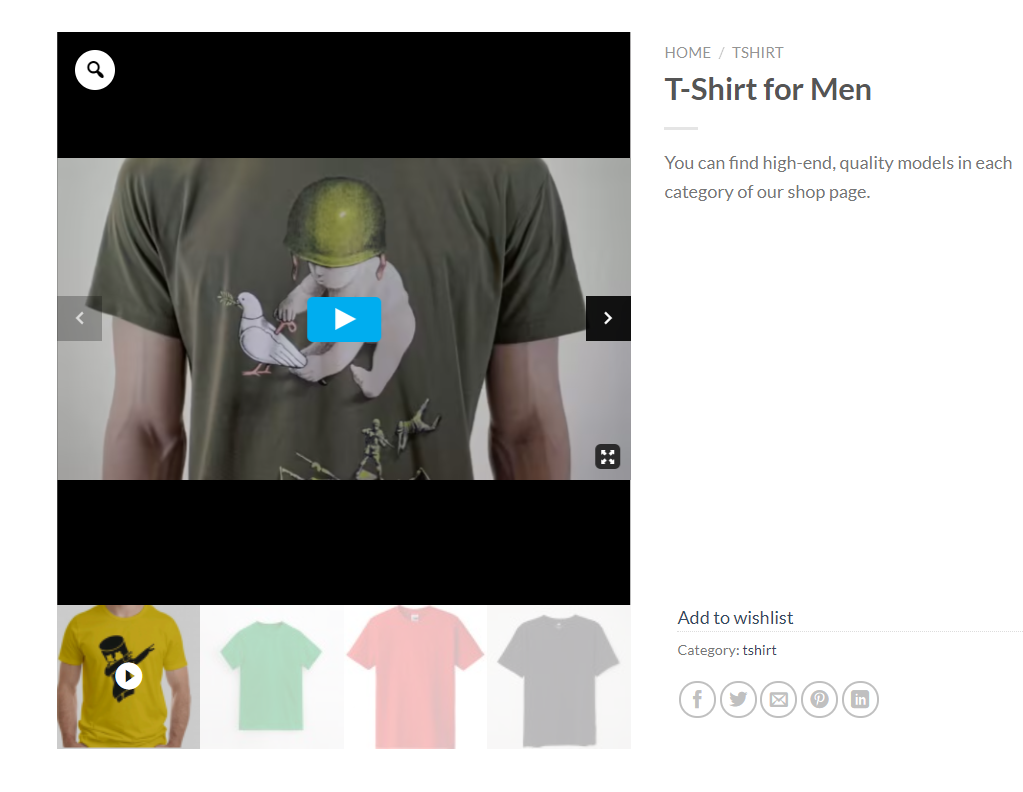
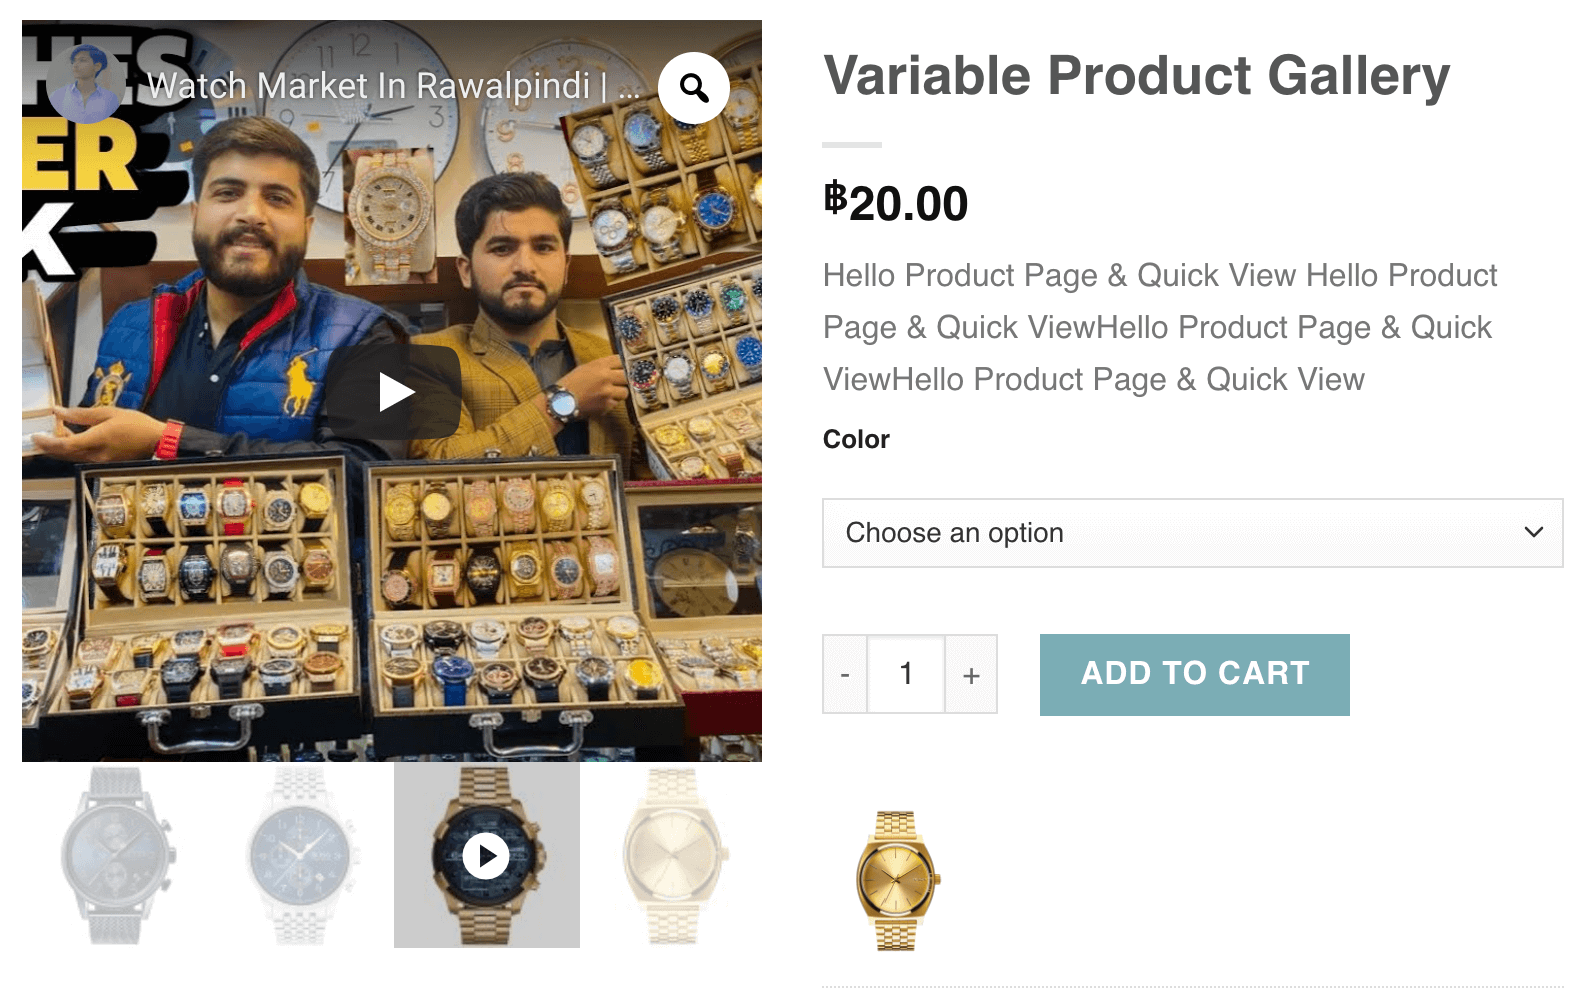
And the frontend looks like the following screenshot.
Upload Vimeo Video In The Product Simple Gallery
1. Navigate to Products → All Products and open the simple product where you want to add videos.
2. Scroll down to the Product Gallery section and click Add product gallery images.
3. Now, select the thumbnail image you want to use as the featured image for the Vimeo video.
4. Add your Vimeo video URL to the Variation Gallery Video section.
5. You have the option to change the height and width of the video.
6. Enter your Vimeo video URL in the Variation Gallery Video section.
7. Then, click the Add to gallery button.
8. Scroll to the top of the page and click the Update button.
Upload Videos In Variable Product Image Gallery
Using the Additional Variation Image Gallery plugin, you can add YouTube, Vimeo, and self-hosted videos to simple products.
Upload YouTube Video In The Variable Product Image Gallery
1. Go to Products → All Products and open the variable product where you want to add a video.
2. Scroll down to the Product Gallery section and click Add product gallery images.
3. Next, choose a thumbnail image from your video to use as the featured image.
4. Enter your YouTube video URL in the Variation Gallery Video section. You can adjust the video’s height and width as needed. Make sure the YouTube link follows this format:
https://www.youtube.com/watch?v=wopbjNkJNEc
Please note: after adding the video link the gallery area looks like the following screenshot.
And the frontend looks like the following screenshot.
Upload Vimeo Video In The Variable Product Image Gallery
1. Go to Products → All Products and choose the Variable product where you want to add a video.
2. Scroll to the Product Gallery section and click on Add product gallery images.
3. Next, choose a thumbnail from your video to display as the featured image.
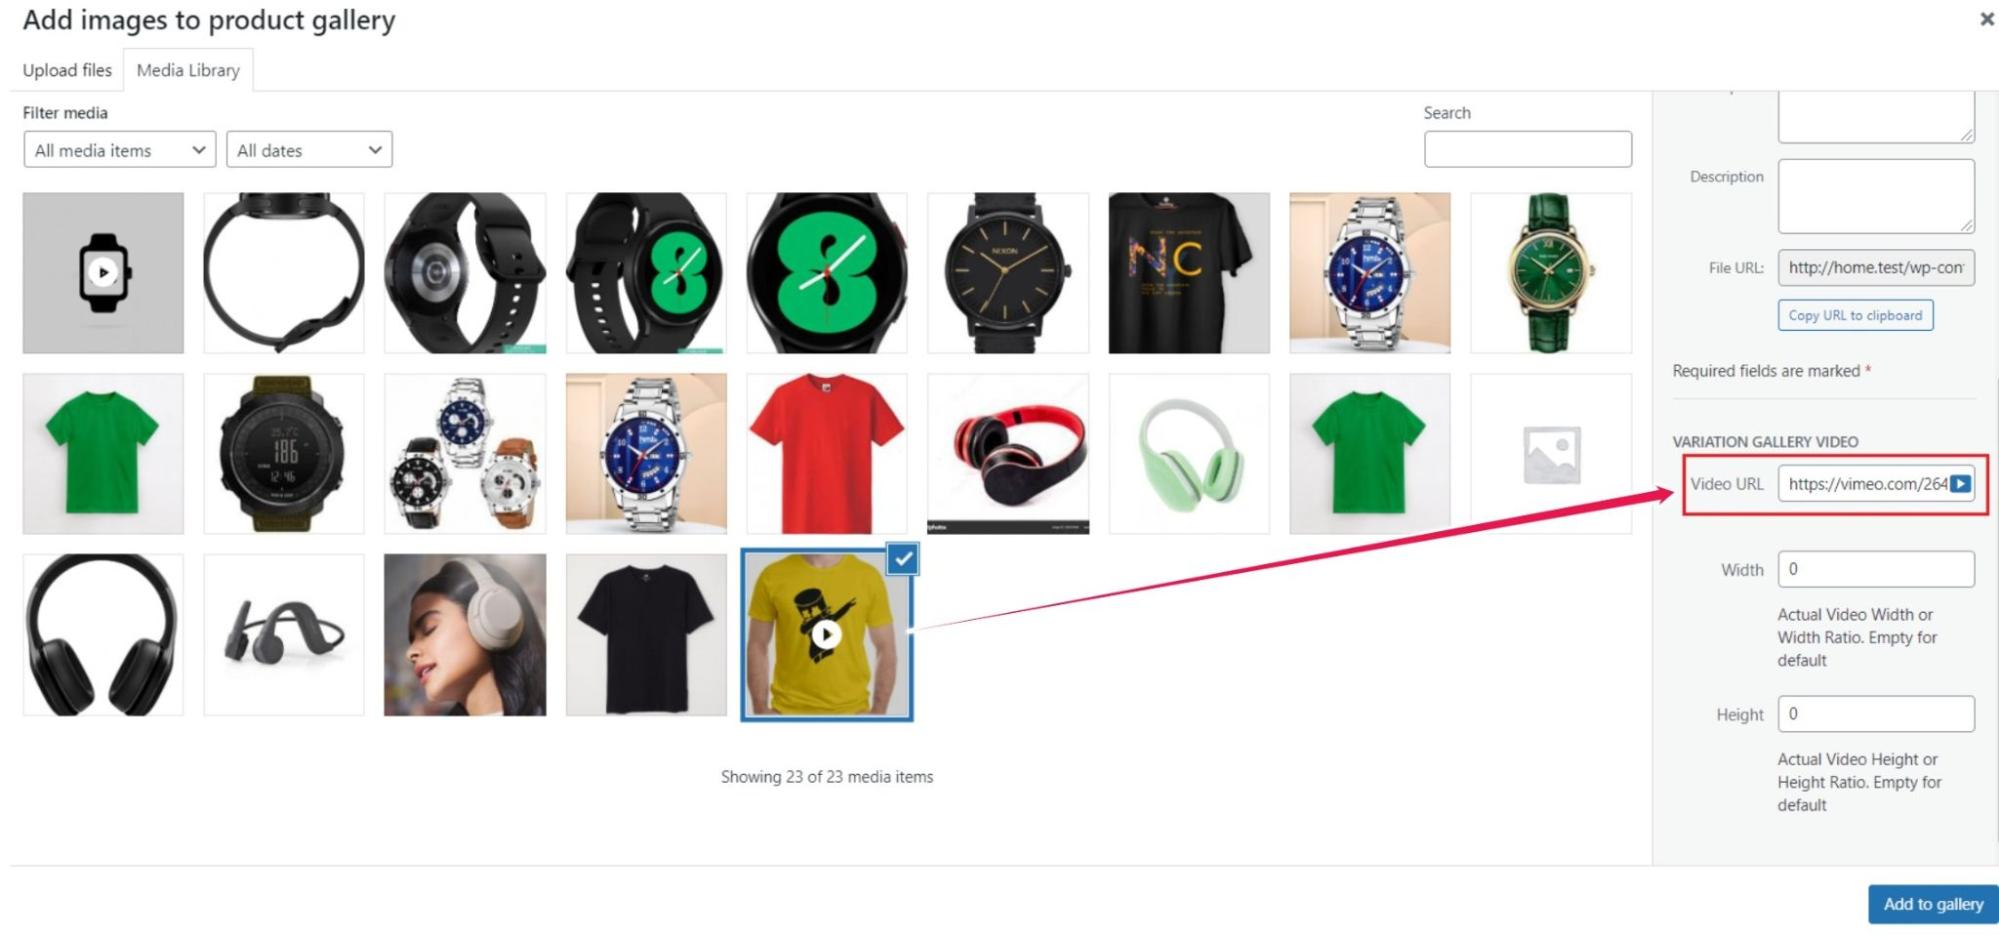
4. Paste your Vimeo video URL in the Variation Gallery Video section. You can customize its height and width. Use this format for the Vimeo link: https://vimeo.com/291909148
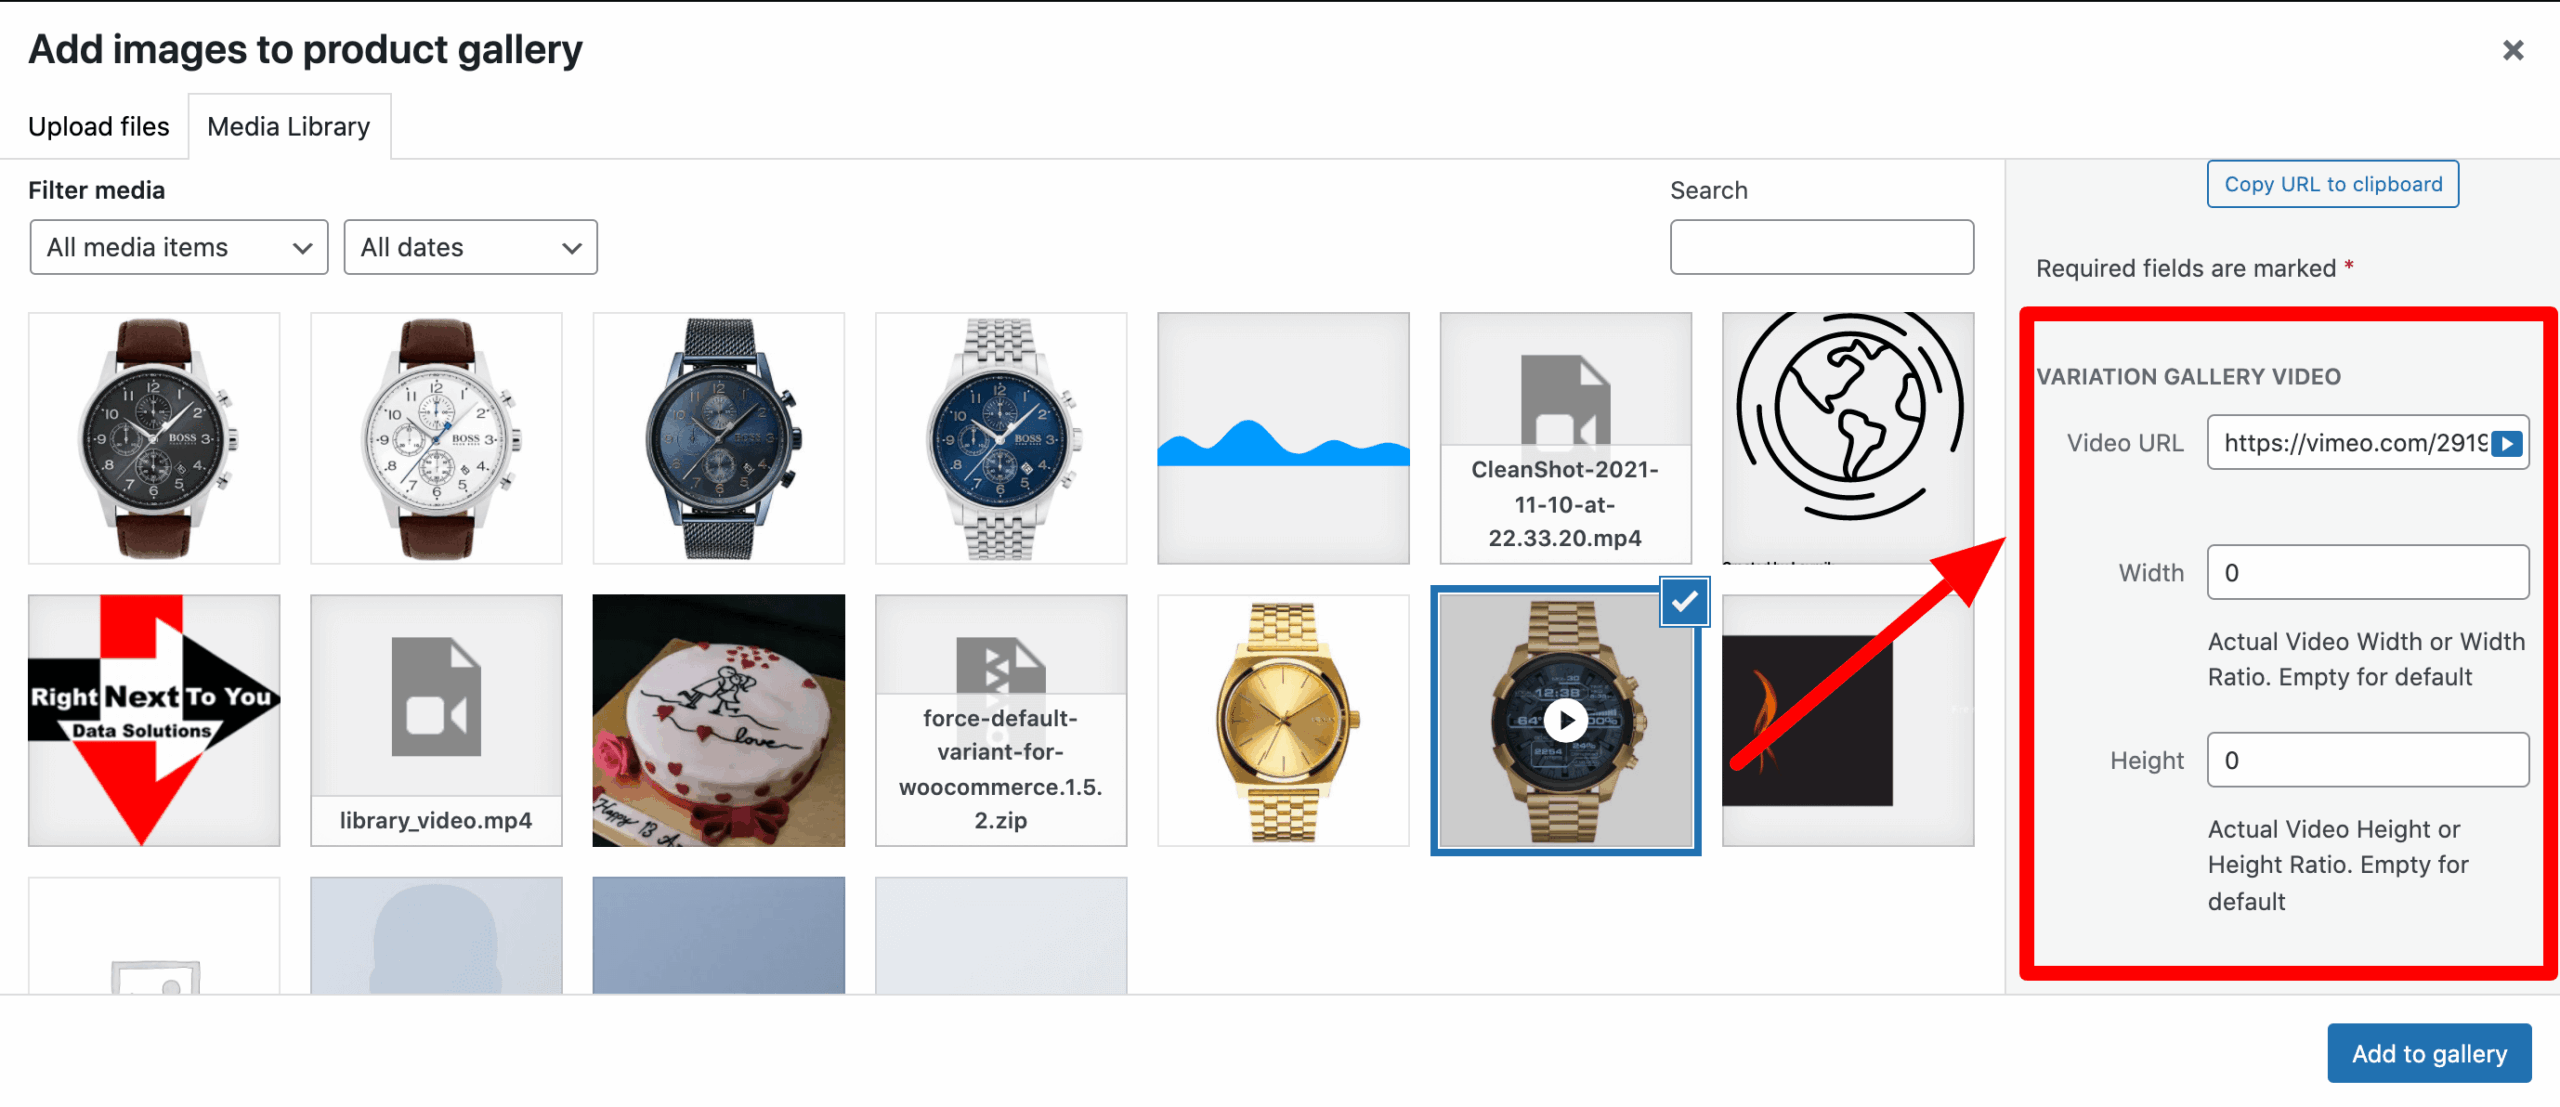
Note: Once the video link is added, the gallery section will display like the screenshot below.
And the frontend looks like the following screenshot.
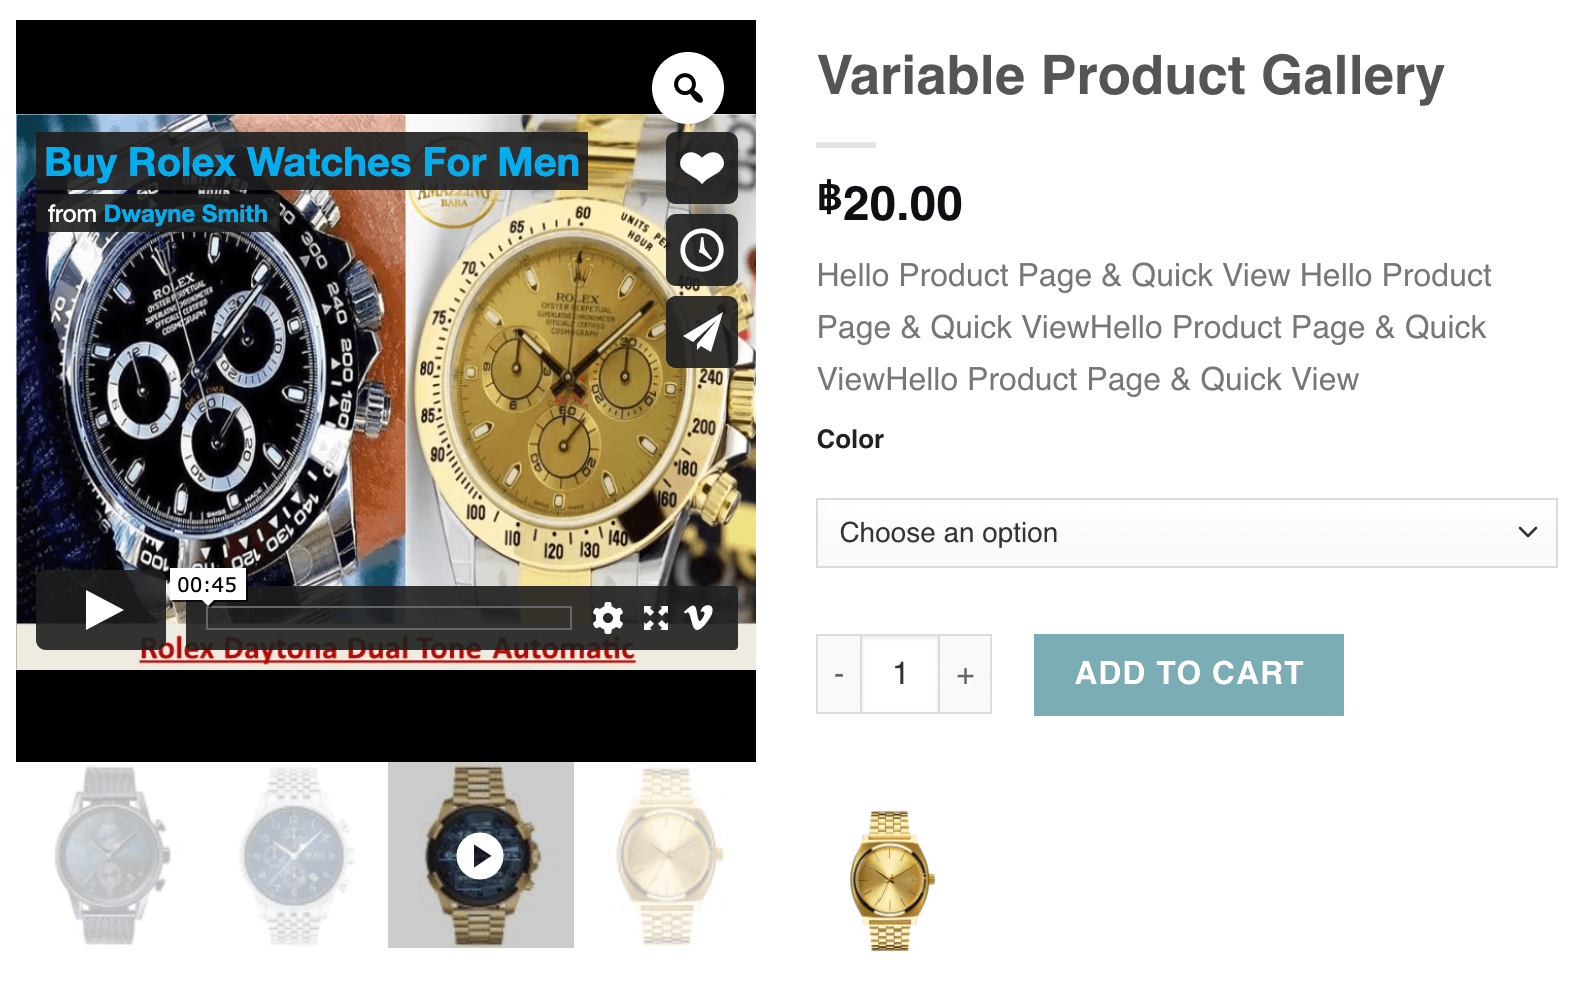
Upload Self-hosted Video In The Variable Product Image Gallery
- Go to Products → All Products and open the variable product where you want to add a video.
- Scroll down to the Product Gallery section and click Add product gallery images.
3. Next, choose a thumbnail from your video to display as the featured image.
4. Upload your self-hosted video in the Variation Gallery Video section. You can customize its height and width by clicking the Play button icon.
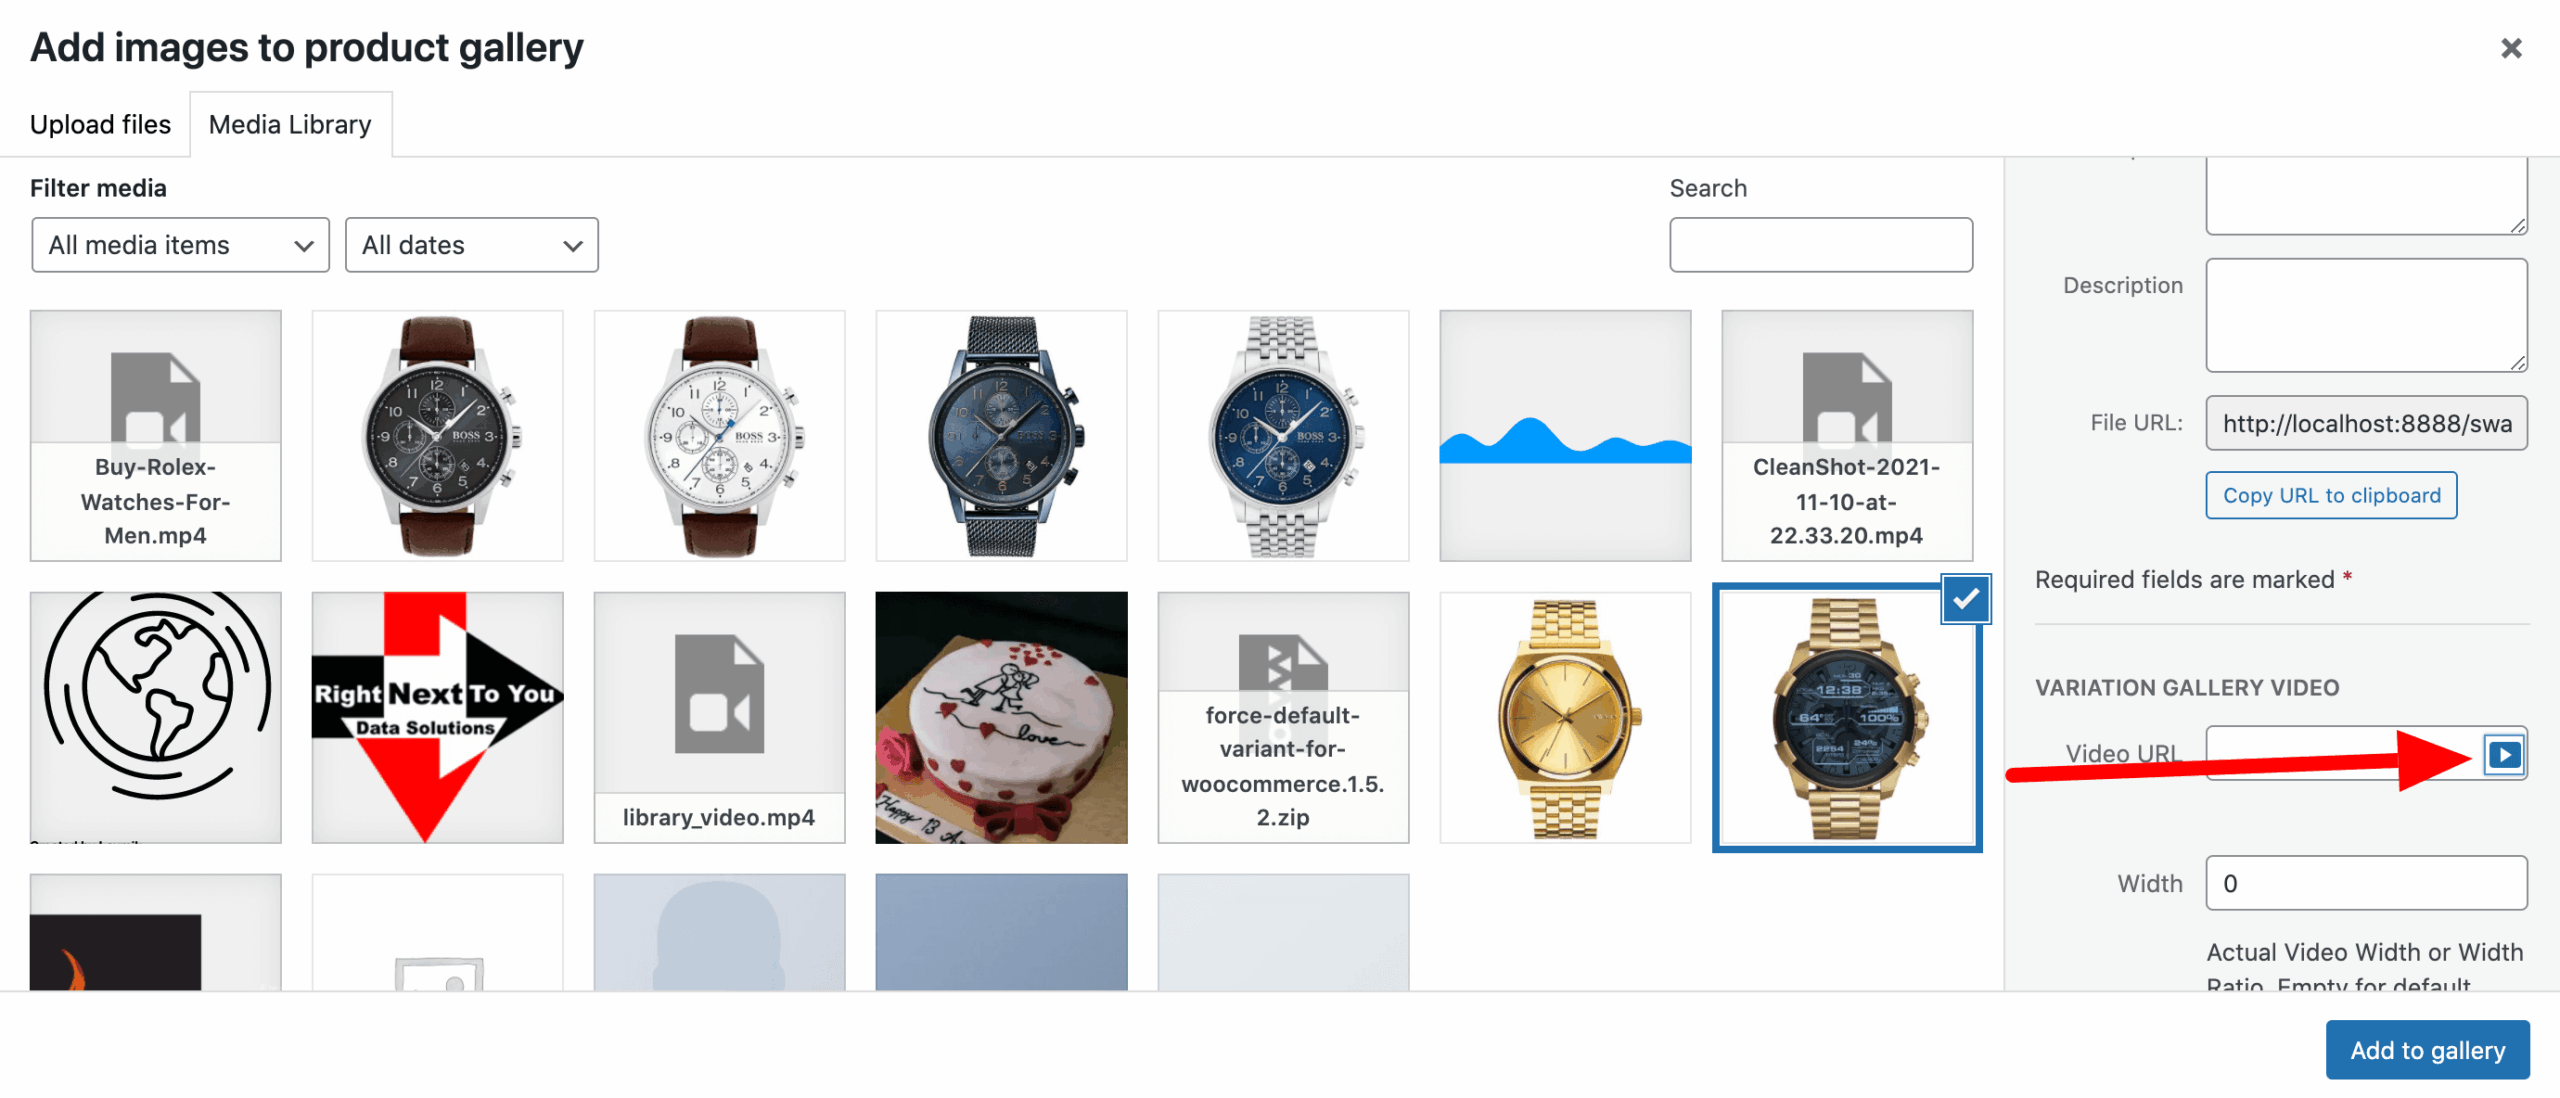
And then select your desired video from the panel. Press Add Video button.
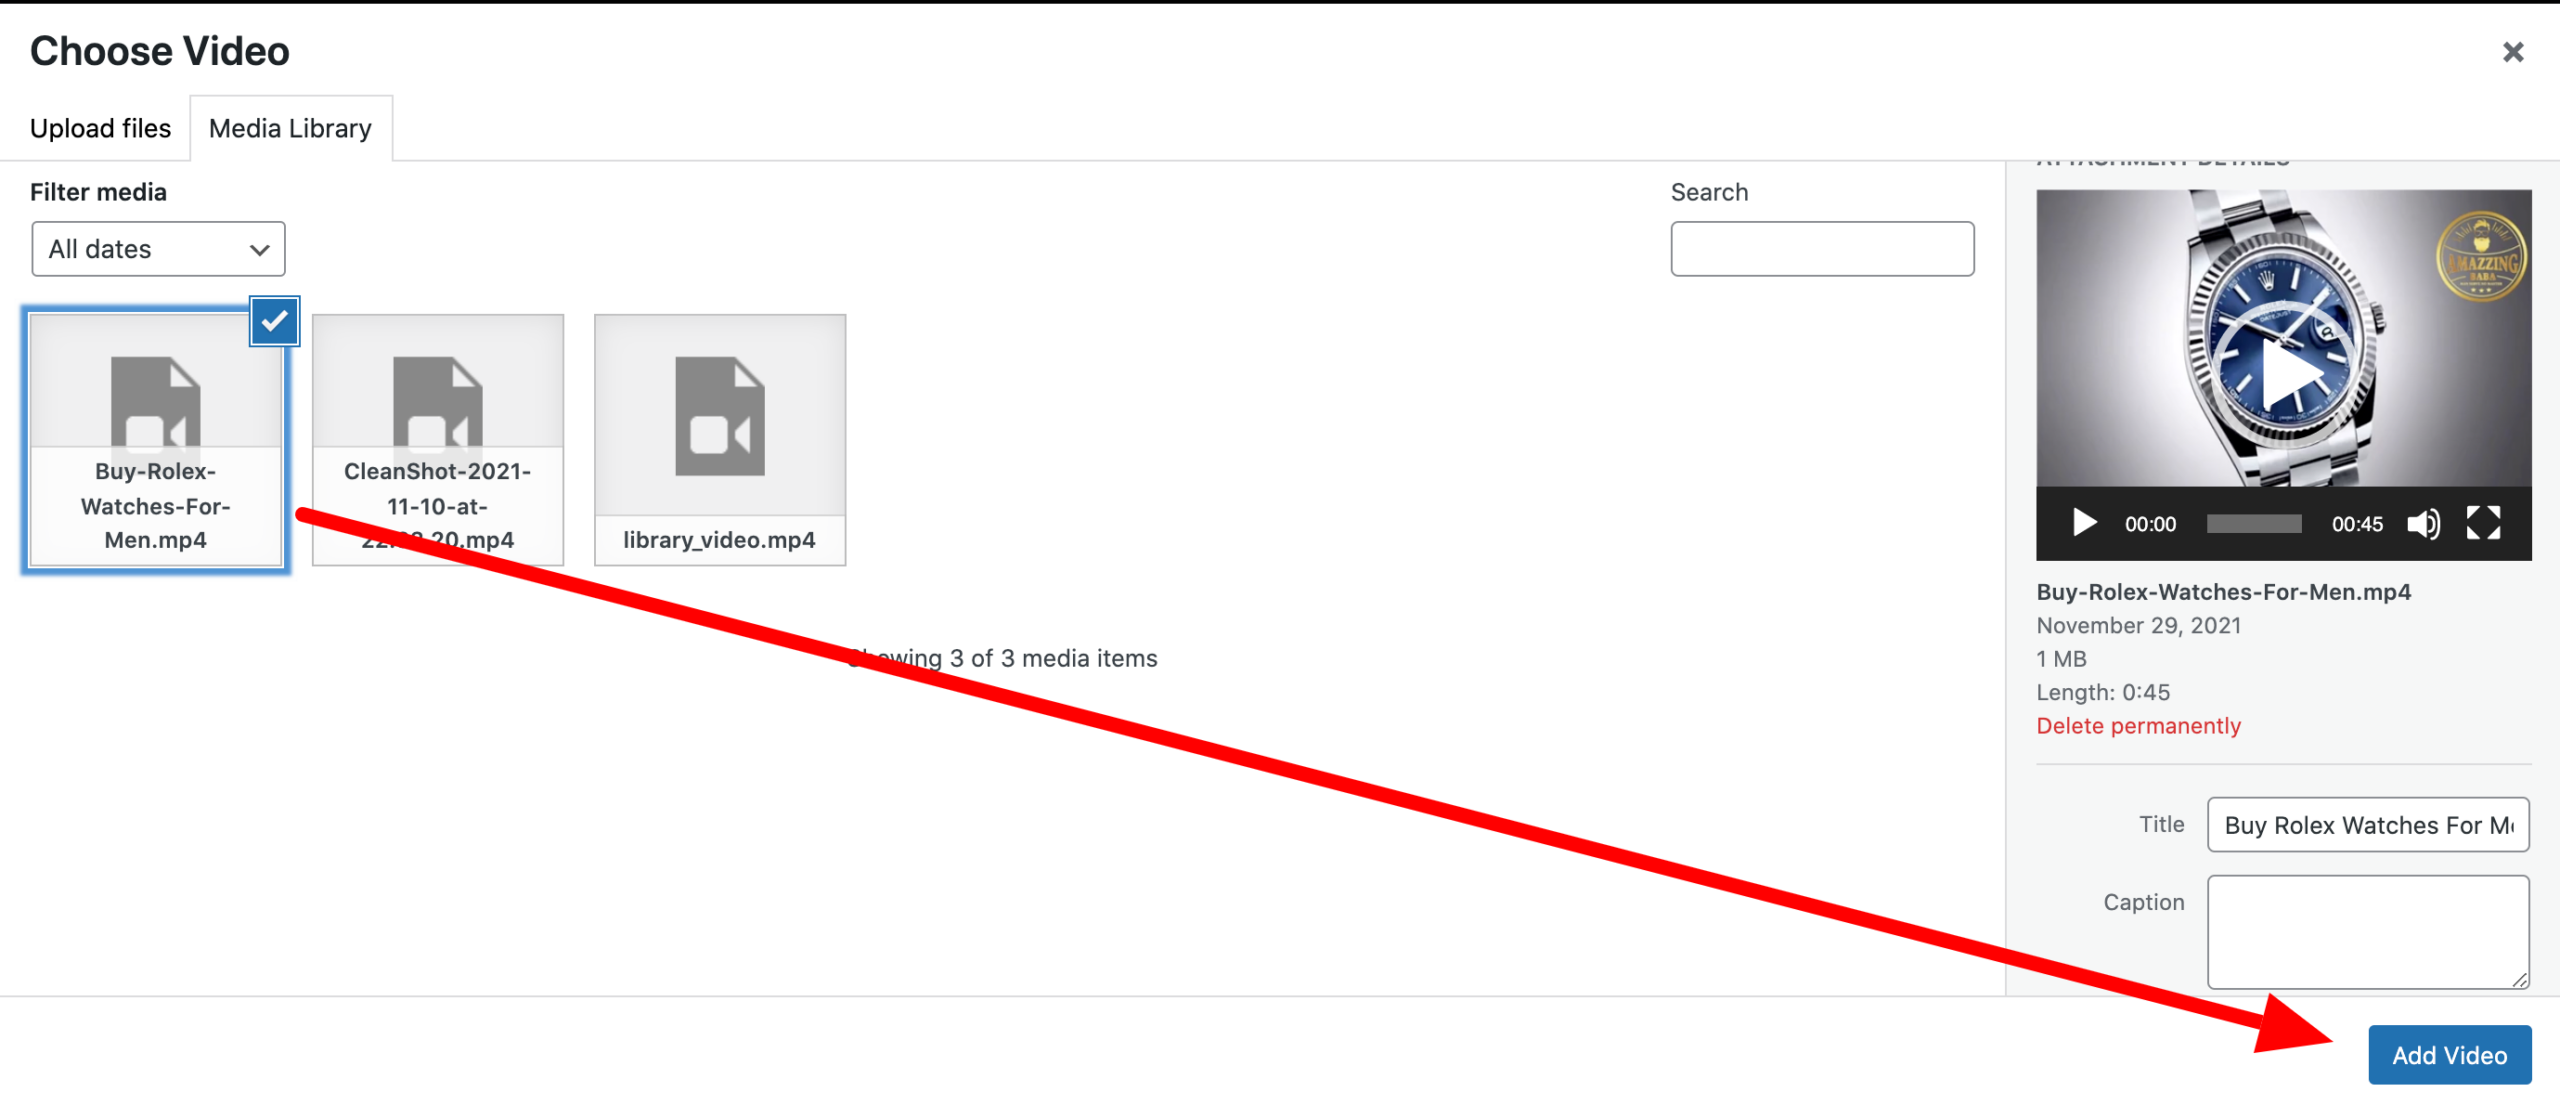
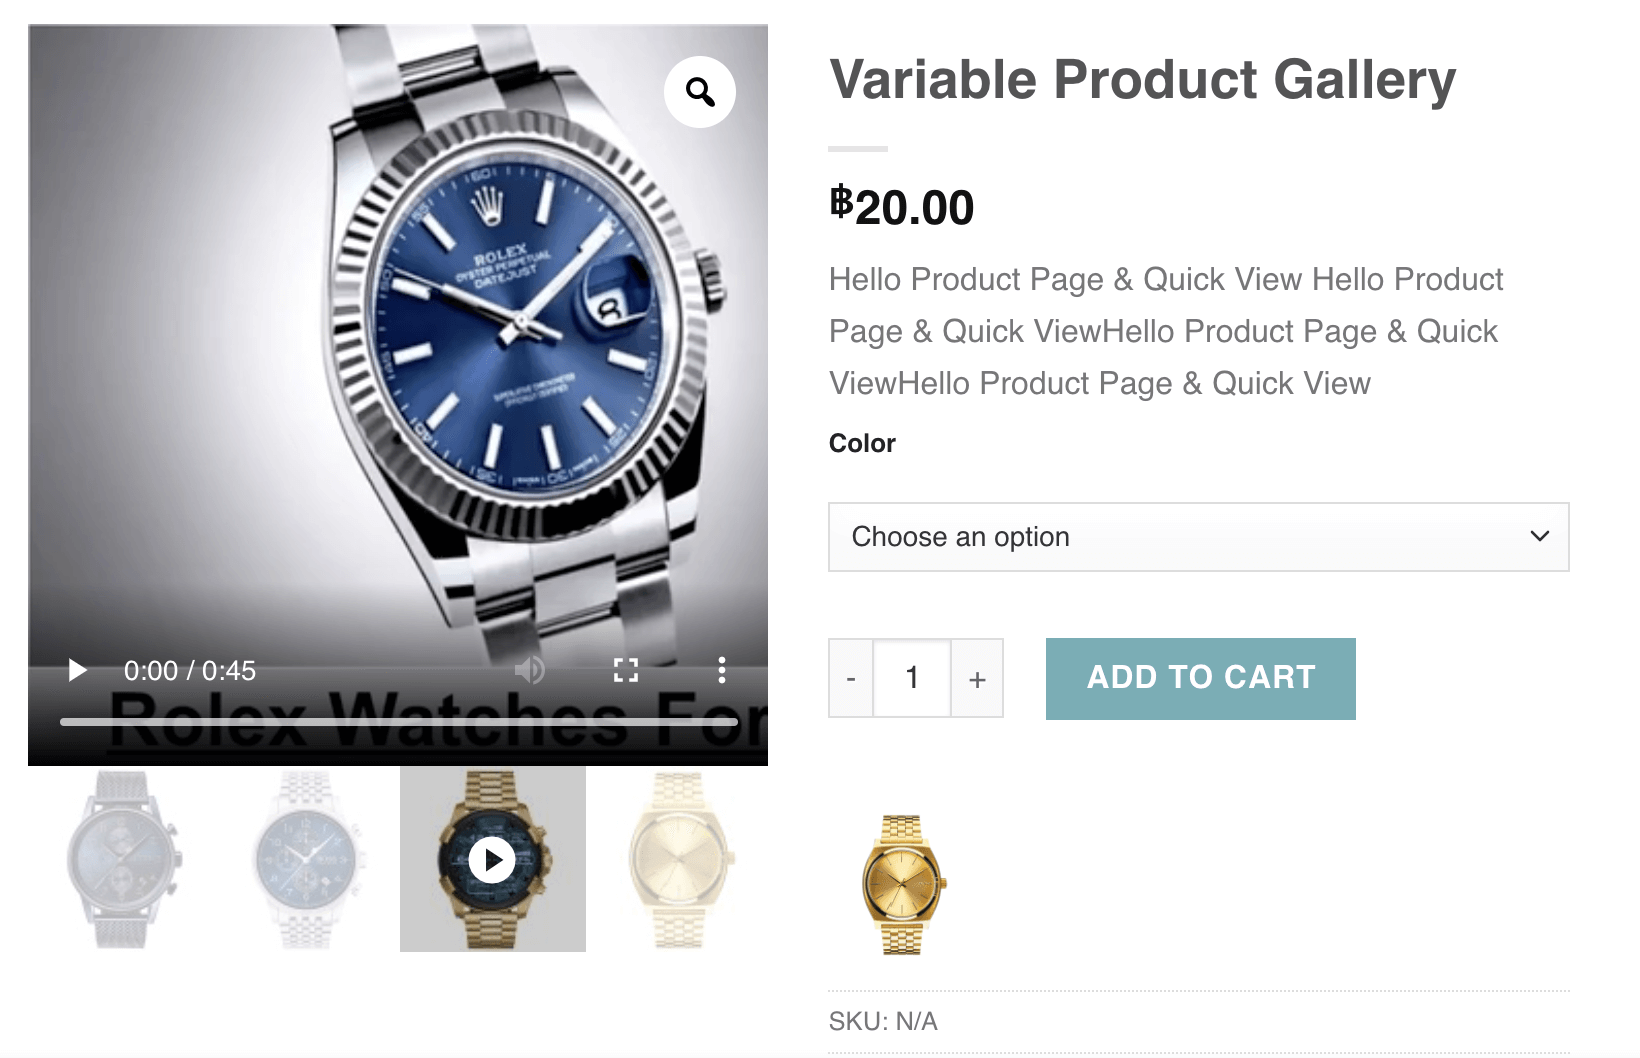
Note: Once the video link is added, the gallery section will display like the screenshot below.
And the frontend looks like the following screenshot.
Upload Videos In Grouped Product Image Gallery
Using the Additional Variation Image Gallery plugin, you can add YouTube, Vimeo, and self-hosted videos to Grouped Product.
Upload YouTube Video In The Grouped Product Image Gallery
1. Navigate to Products → All Products and open the grouped product where you want to add a video.
2. Scroll down to the Product Gallery section and click Add product gallery images.
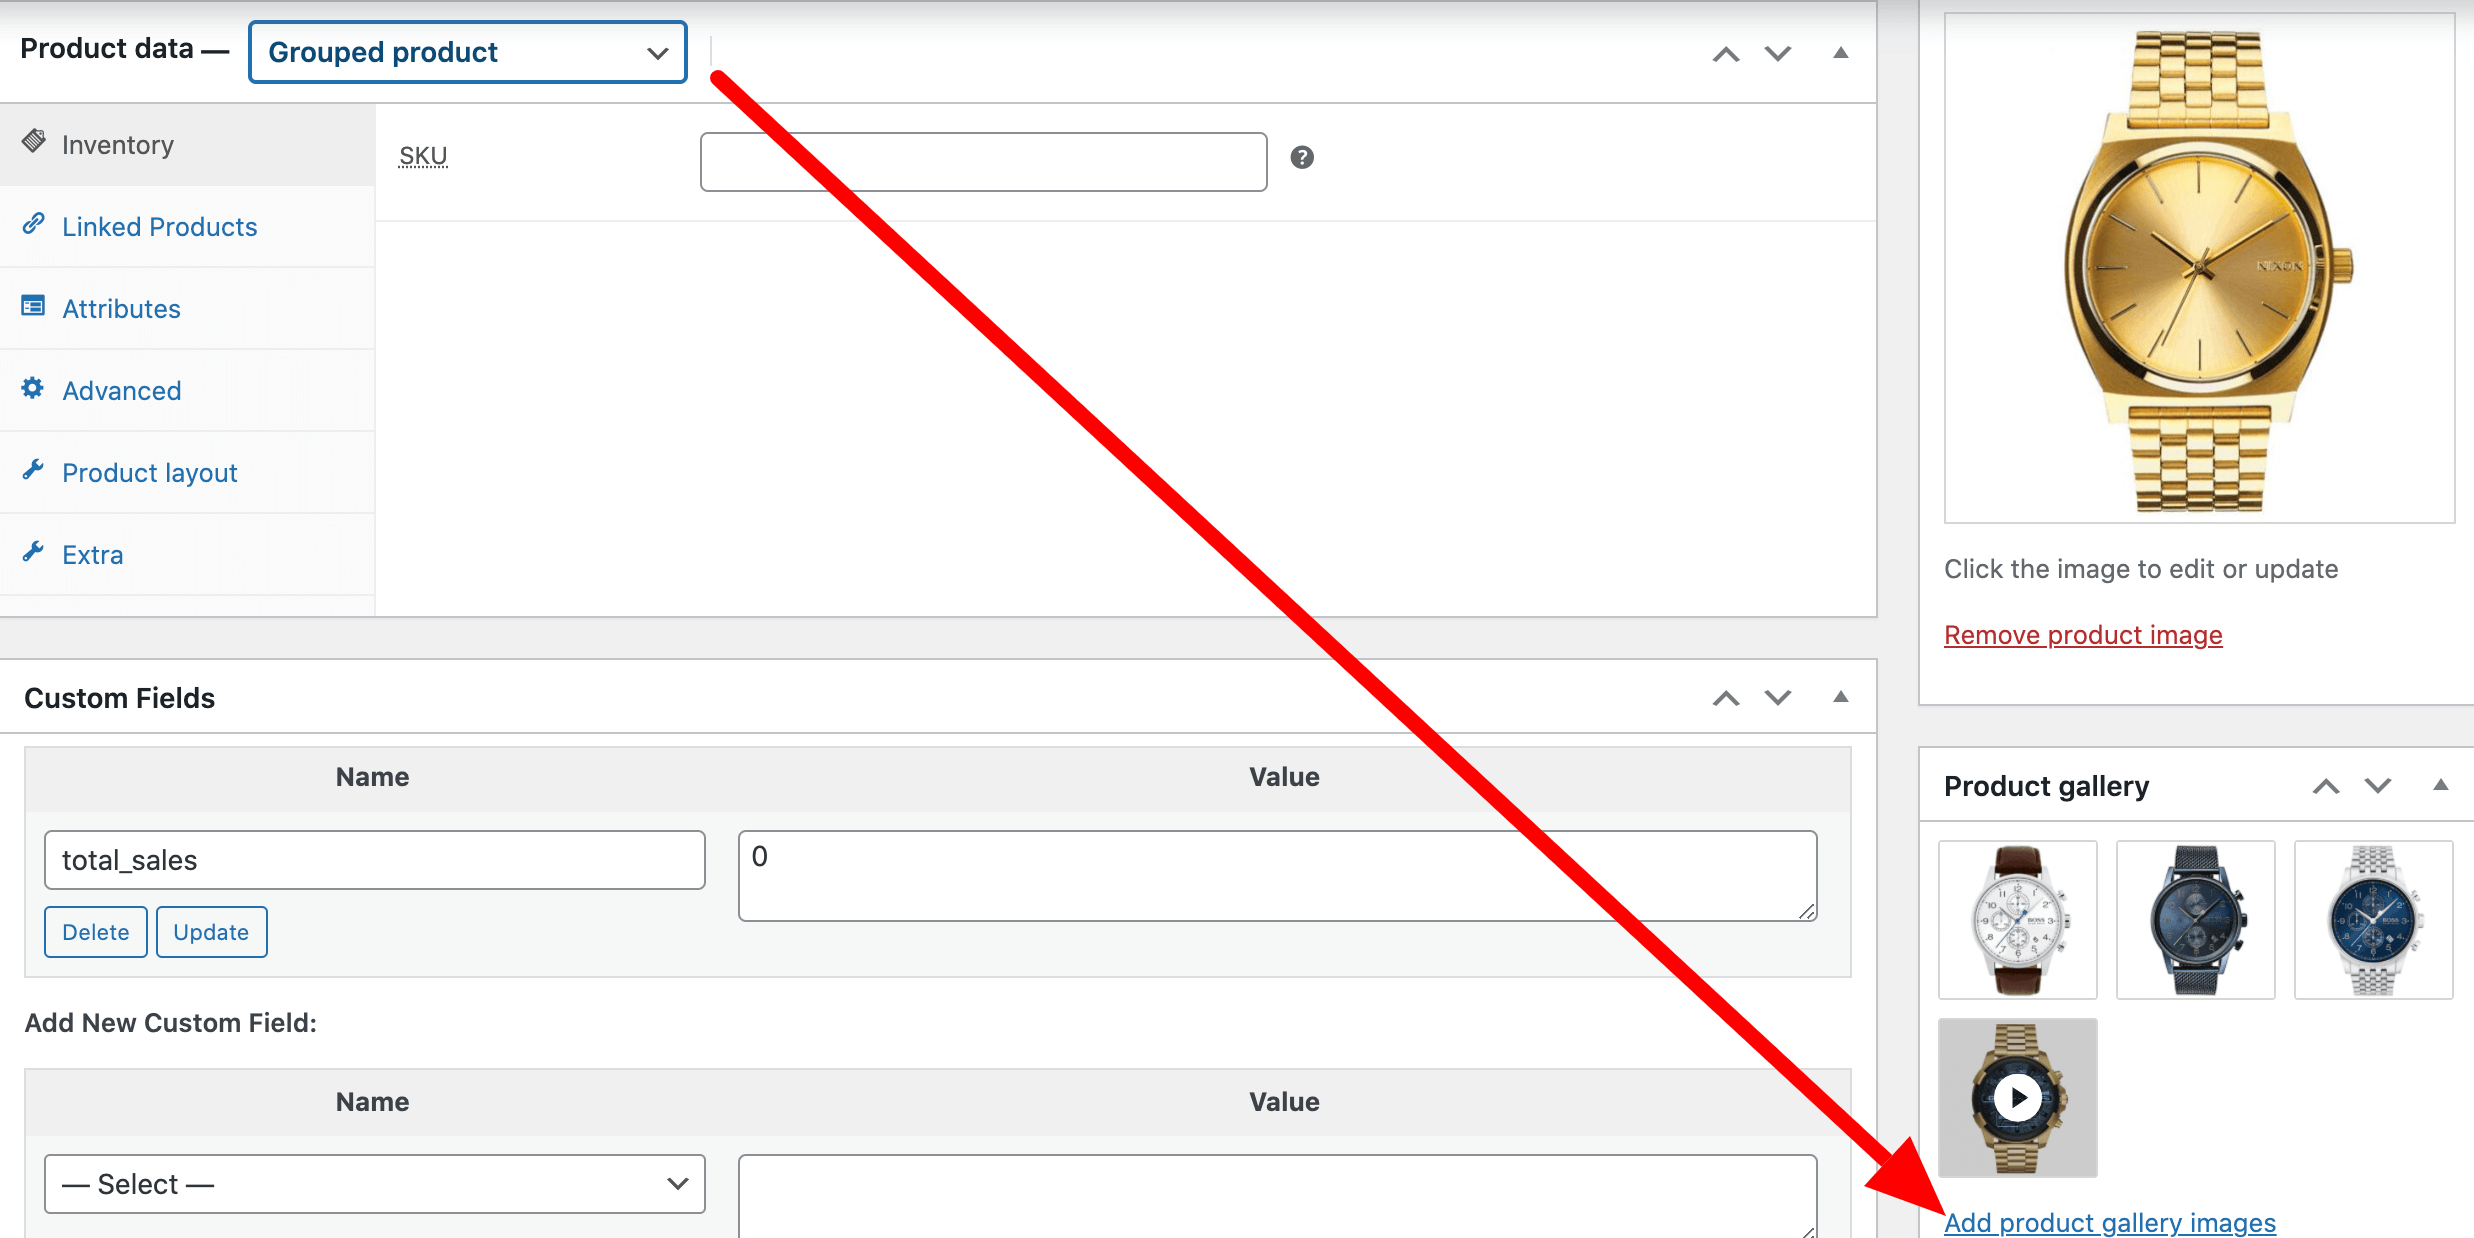
3. Select a thumbnail image for the video to use as the featured image.
4. Enter your YouTube video URL in the Grouped Product Video section. You can also adjust the video height and width as needed. The YouTube video link should follow this format: https://www.youtube.com/watch?v=wopbjNkJNEc
Please note: after adding the video link the gallery area looks like the following screenshot.
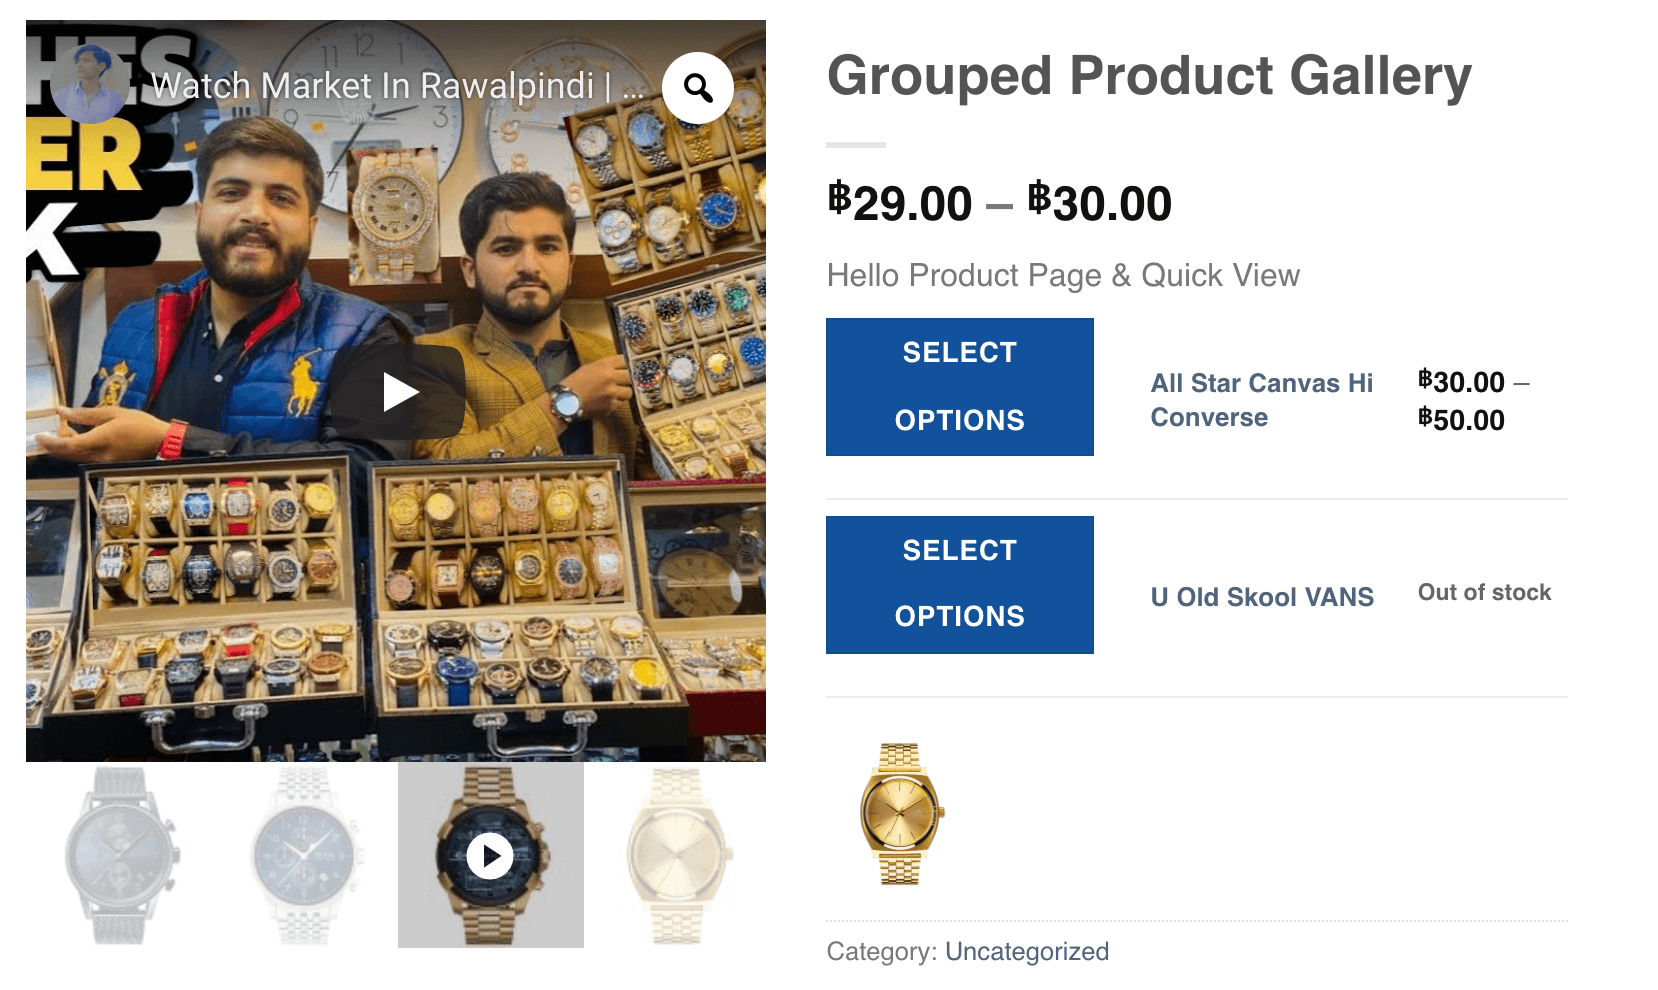
And the frontend looks like the following screenshot.
Upload Self-hosted Video In The Grouped Product Image Gallery
1. Navigate to Products → All Products and open the grouped product where you want to add a video.
2. Scroll down to the Product Gallery section and click Add product gallery images.
3. Now, you’ll need to select a thumbnail image of the video where you want to show as a featured image.
4. Add your self-hosted video to the Variation Gallery Video section. You have the option to change the height and width of the video. To upload the video, press the Play button icon.
And then select your desired video from the panel. Press Add Video button.
Please note that after adding the video link, the gallery area will appear as shown in the screenshot below.
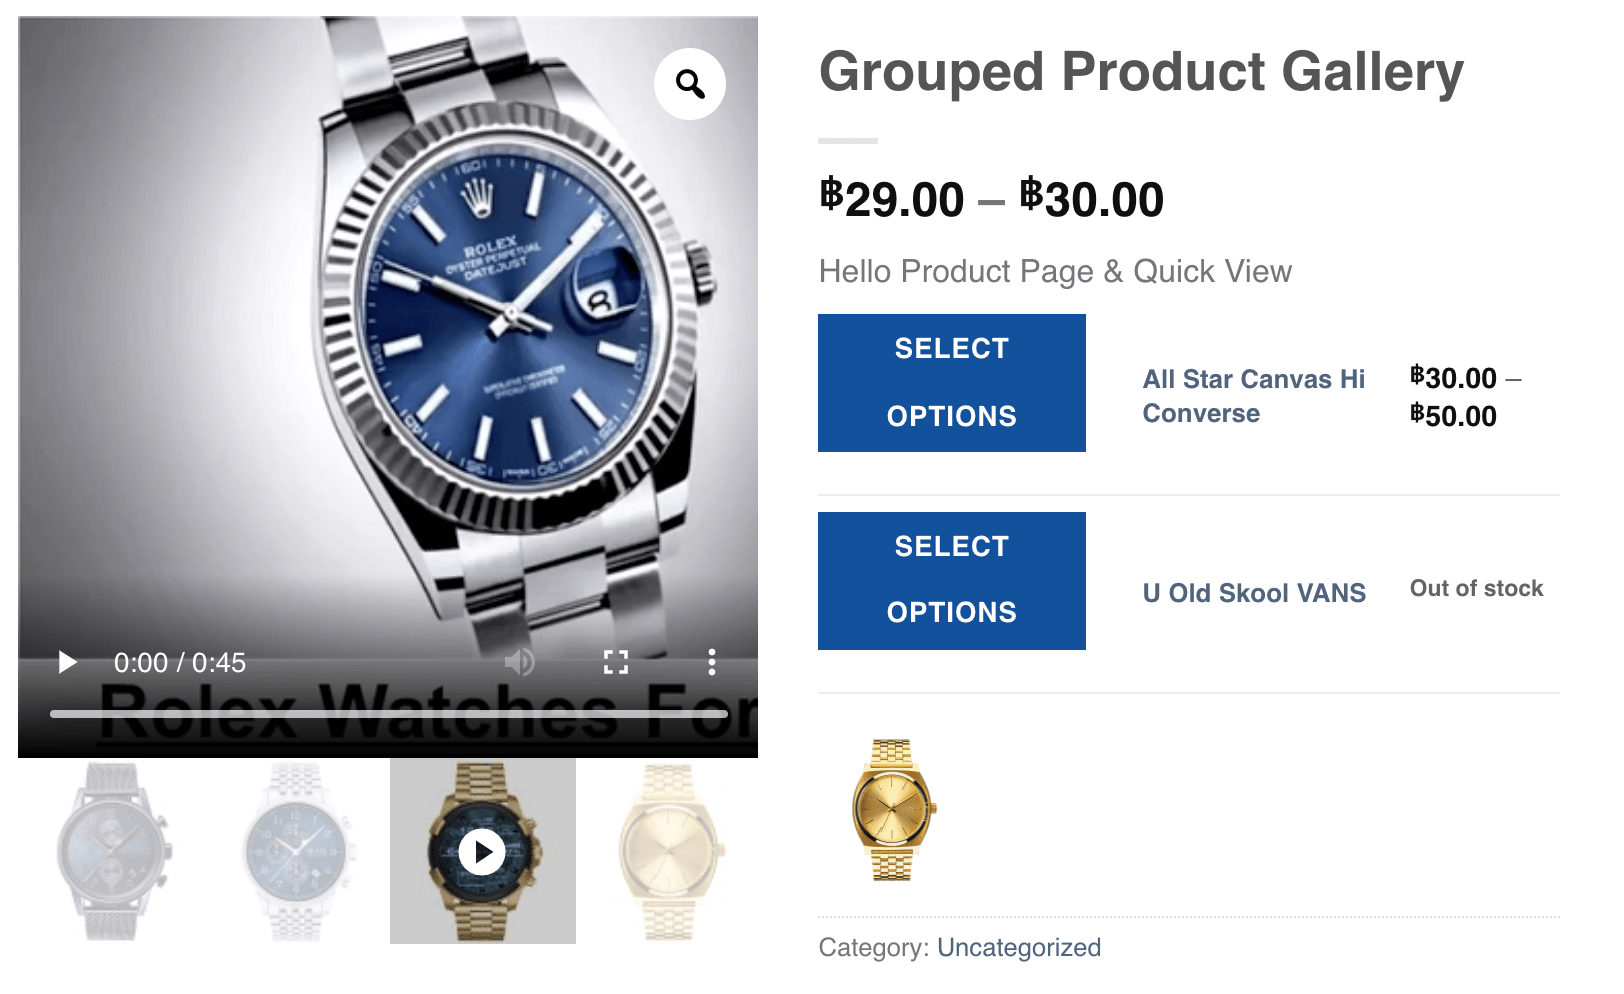
And the frontend looks like the following screenshot.
Upload Videos In External/Affiliate Product Image Gallery
With the help of this Additional Variation Image Gallery plugin, you can insert YouTube, Vimeo, and self-host in the Simple Product.
Upload YouTube Video In The External/Affiliate Product Image Gallery
1. Navigate to Products → All Products and open the External/Affiliate product where you want to add a video.
2. Scroll down to the Product Gallery section and click Add product gallery images.
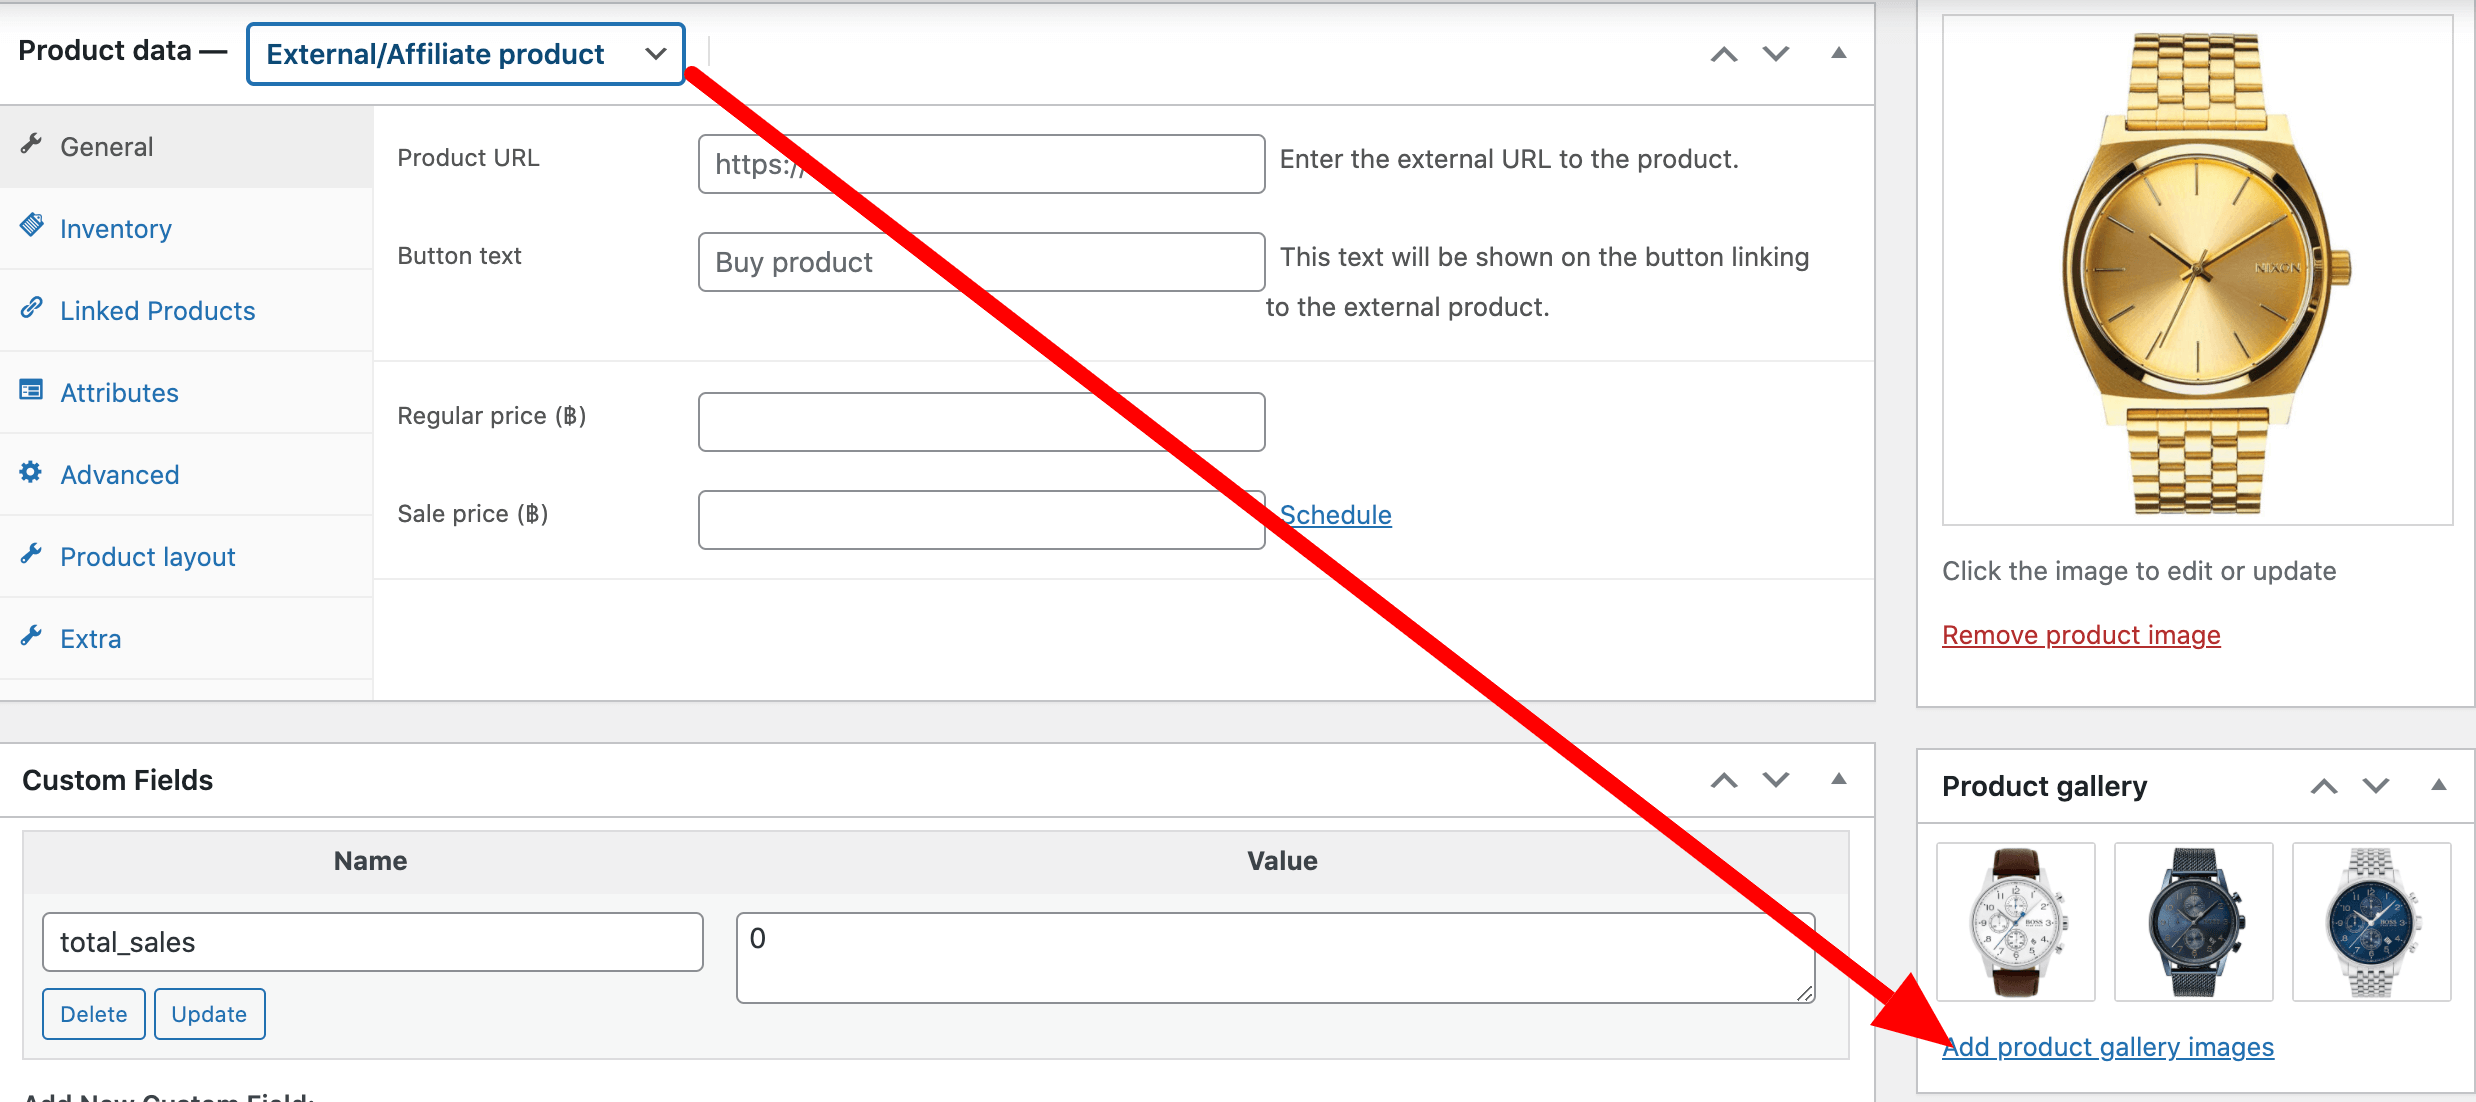
3. Now, select a thumbnail image for the video to use as the featured image.
4. Add your YouTube video URL to the Variation Gallery Video section. You have the option to change the height and width of the video. The YouTube Video Link format should be like this: https://www.youtube.com/watch?v=wopbjNkJNEc
Please note: after adding the video link the gallery area looks like the following screenshot.
And the frontend looks like the following screenshot.
Upload Vimeo Video In The External / Affiliate Product Image Gallery
1. Navigate to Products → All Products and open the External/Affiliate product where you want to add a video.
2. Scroll down to the Product Gallery section and click Add product gallery images.
3. Now, select a thumbnail image for the video to use as the featured image.
4. Add your Vimeo video URL to the Variation Gallery Video section. You can also adjust the video height and width as needed. The Vimeo video link should follow this format: https://vimeo.com/291909148
Please note: after adding the video link the gallery area looks like the following screenshot.
And the frontend looks like the following screenshot.
Upload Self Hosted Video In The External / Affiliate Product Image Gallery
1. Navigate to Products → All Products and open the External/Affiliate product where you want to add a video.
2. Scroll down to the Product Gallery section and click Add product gallery images.
3. Now, select a thumbnail image for the video to use as the featured image.
4. Add your self-hosted video to the Variation Gallery Video section. You have the option to change the height and width of the video. To upload the video, press the Play button icon.
Then, select your desired video from the panel and click the Add Video button.
Please note: after adding the video link the gallery area looks like the following screenshot.
And the frontend looks like the following screenshot.
Reorder Additional Variation Images
After adding your additional images, you can drag and drop them to change their order.
Remove Additional Variation Images
Simply click the cross icon to remove any variation image.
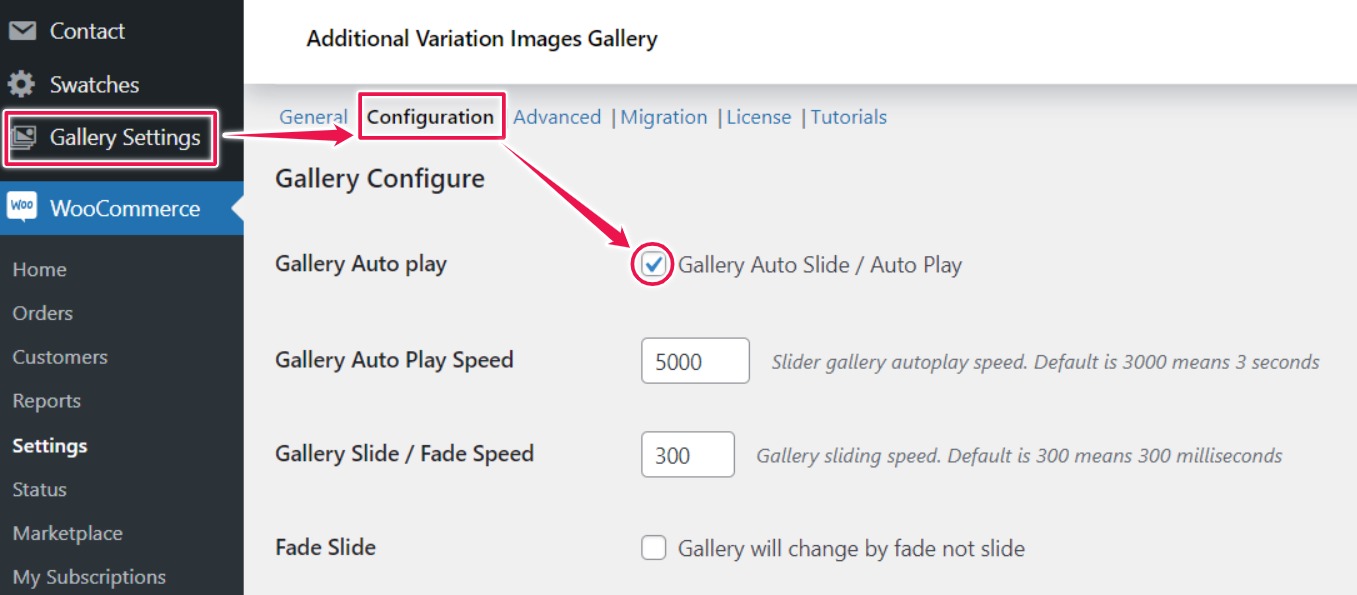
Enable Auto Slide For Product Gallery
To view additional gallery images without manually switching:
1. Go to Gallery Settings → Configuration
2. From here, you can enable autoplay for the gallery and adjust the slide and fade speeds.
Variation Video Width Adjustment
Gallery Slider & Thumbnail Arrow Control
The plugin offers options to enable or disable the gallery slider arrows. You can control both the main gallery slider arrow and the thumbnail arrow.
Steps:
1. Go to Gallery Settings → Configuration
2. Enable or disable the Gallery Slider Arrow and Thumbnail Arrow
How To Hide Product Feature Image Slider Arrow
How To Hide Product Gallery Slider Arrow
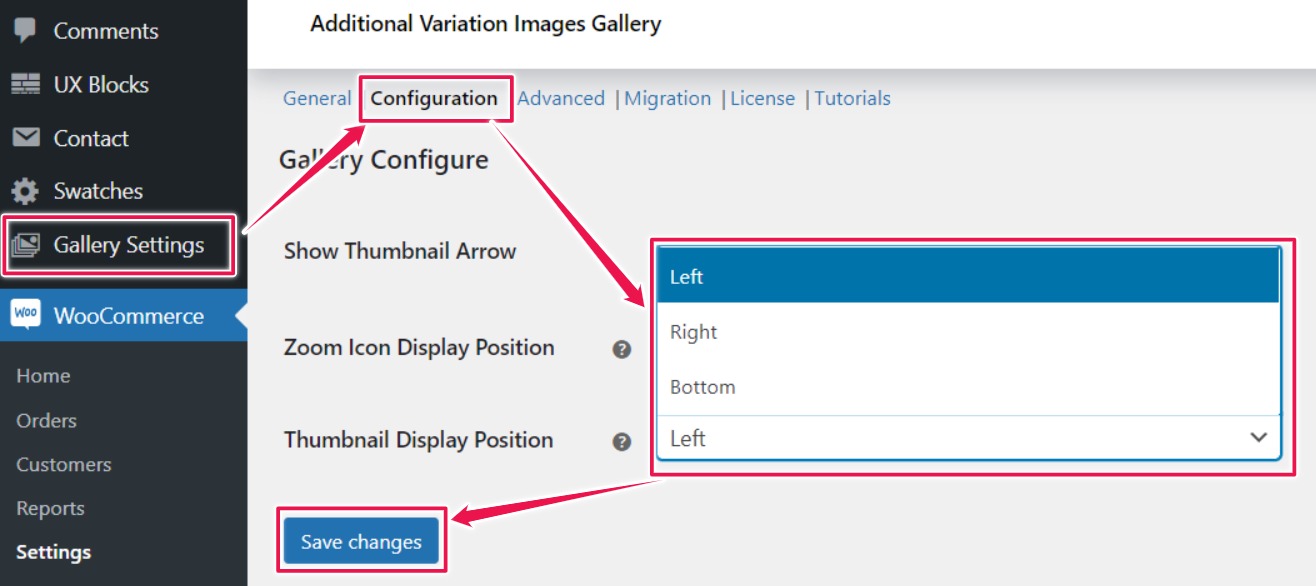
Left, Right, Bottom Gallery Thumbnail Position
How to Set Position For Product Gallery on Desktop & Tablet
How To Change Product Image Gallery Position on Mobile
To set the position of gallery thumbnails (right, left, or top):
1. Go to Gallery Settings → Configuration
2. Choose your preferred thumbnail position from the dropdown menu.
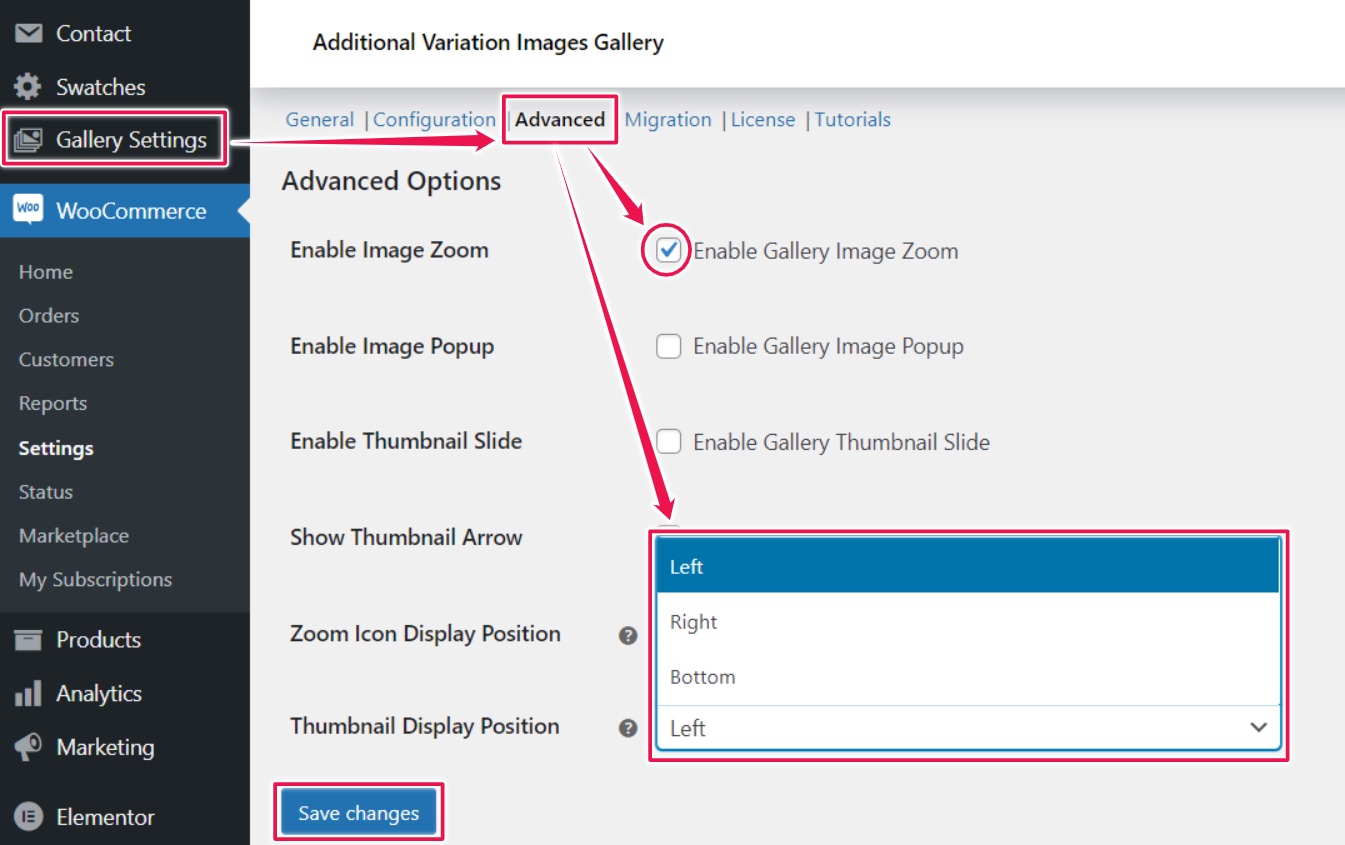
Product Image Zoom & Display Position
To enable zoom for product variation images:
1. Go to Gallery Settings → Configuration
2. Check the box to activate the gallery image zoom
3. Choose your preferred zoom display position from the dropdown.
How To Select Zoom For Product Featured Image
How To Set Image Zoom Position
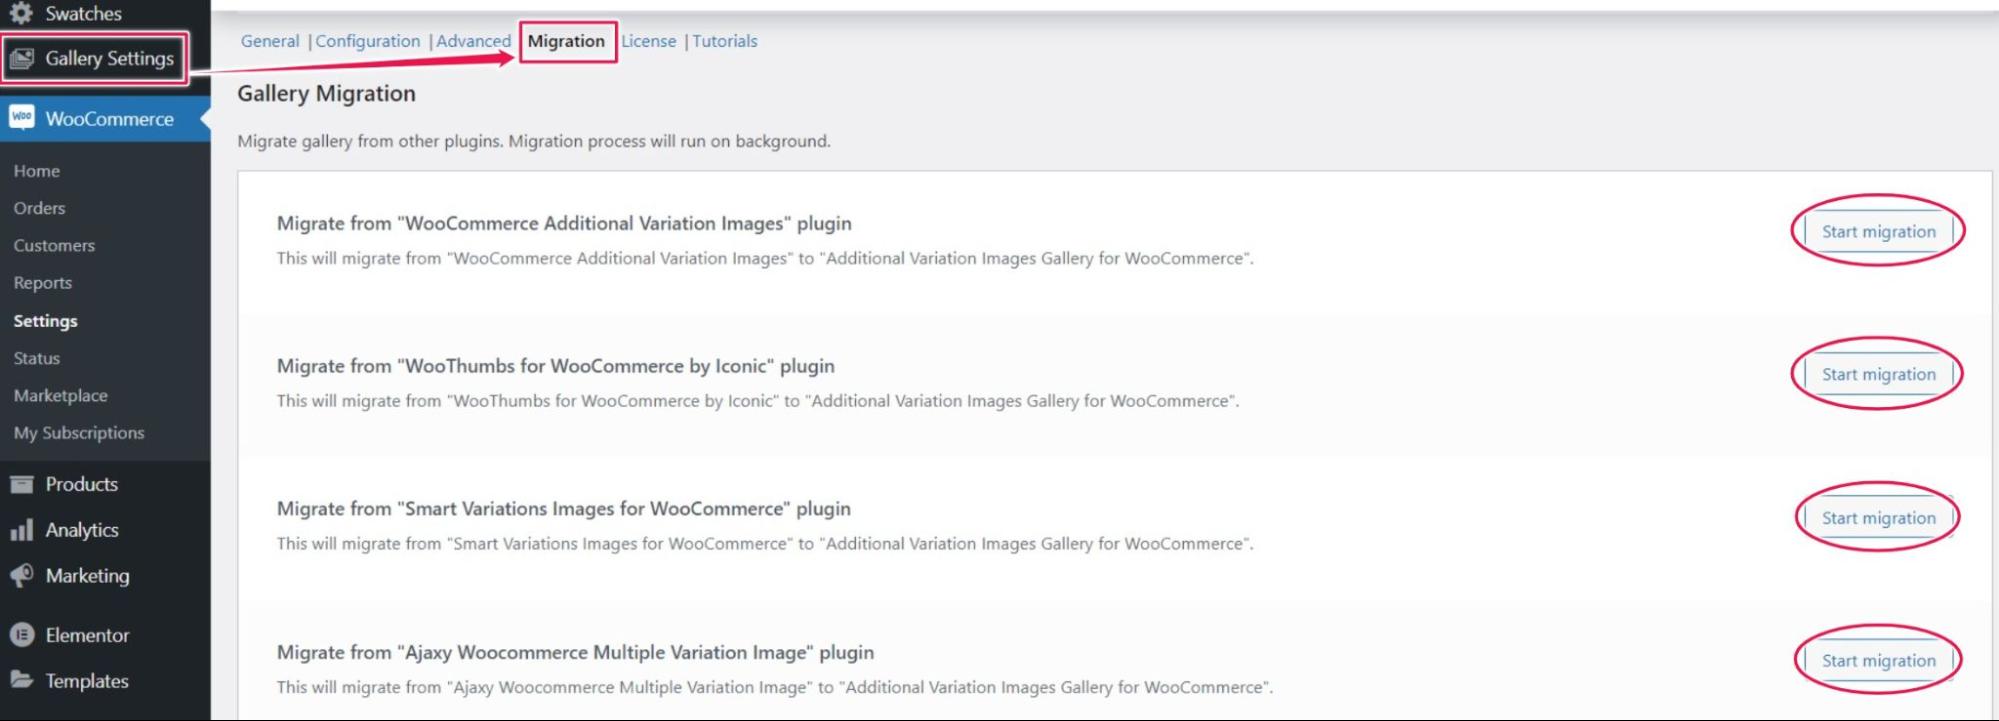
Migrate from other WooCommerce Additional Variation Image Plugins
Migrating from another Additional Variation Image Gallery plugin to our plugin is simple:
1. Go to Gallery Settings → Migration
2. Click the ‘Start Migration’ button next to the plugin you want to migrate from.
Fix Product Image Gallery Blurry and Pixelated Issue
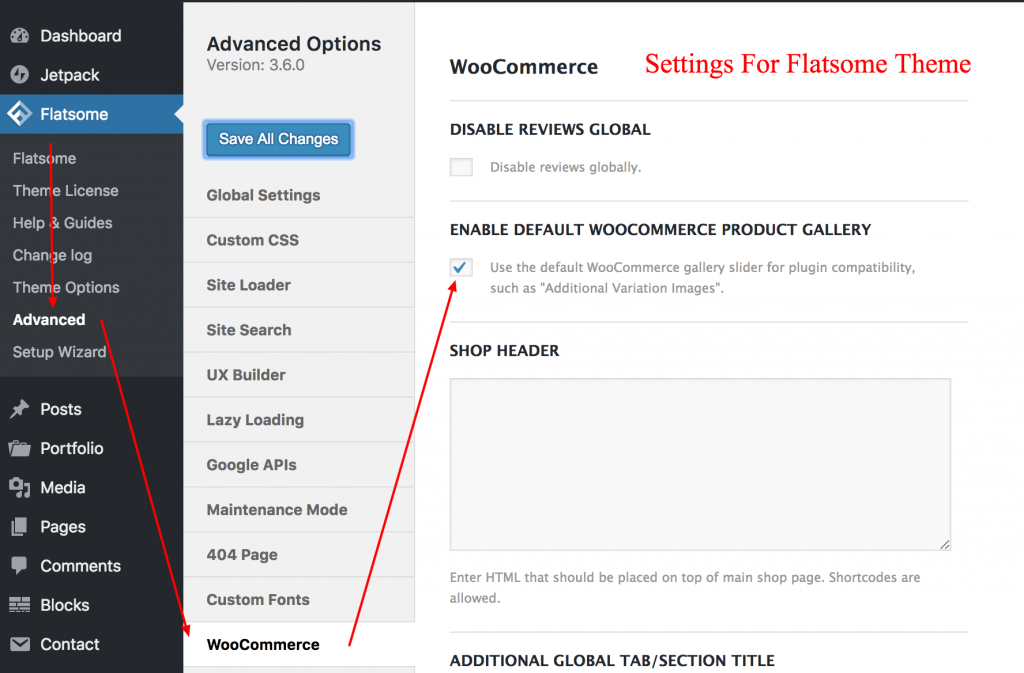
Flatsome Theme Settings
When using this plugin with the Flatsome theme, ensure the following settings are enabled.