Your WooCommerce shop page is the heart of your online store—it’s where customers browse your products, make purchase decisions, and engage with your brand. But the default WooCommerce shop layout might not always align with your business goals or provide the best user experience. That’s where customization comes in!
In this ultimate guide, we’ll walk you through everything you need to know to tailor your WooCommerce shop page to match your brand’s style, improve functionality, and boost conversions. Whether you want to tweak the layout, add custom elements, or enhance navigation, we’ve got you covered with actionable tips and step-by-step instructions. Let’s dive in and make your WooCommerce shop page truly stand out!
What Is a Shop Page of a WooCommerce Website?
Your shop page is essentially the home for all your products—it’s where everything comes together in one place. Think of it as a product directory for your WooCommerce store, making it easy for customers to browse and explore everything you have to offer.
Why Should You Customize Your WooCommerce Shop Page?
Your WooCommerce shop page is the first thing customers see when browsing your products, so why settle for a generic layout? Customizing it allows you to create a unique shopping experience that aligns with your brand, improves navigation, and ultimately boosts conversions.
A well-optimized shop page not only enhances user experience but also helps with SEO, making it easier for search engines to understand and rank your products.
How Difficult Is It to Customize the WooCommerce Shop Page?
Customizing your WooCommerce shop page might sound technical, but don’t worry—it’s actually a straightforward, code-free process that anyone can do. In this guide, we’ll walk you through how to customize your WooCommerce shop page without relying on third-party page builders.
If you’re using Elementor and prefer a builder-based approach, check out our tutorial on how to customize your WooCommerce shop page using Elementor. Otherwise, let’s dive in and start customizing—no extra plugins required!
How to Customize WooCommerce Shop Page
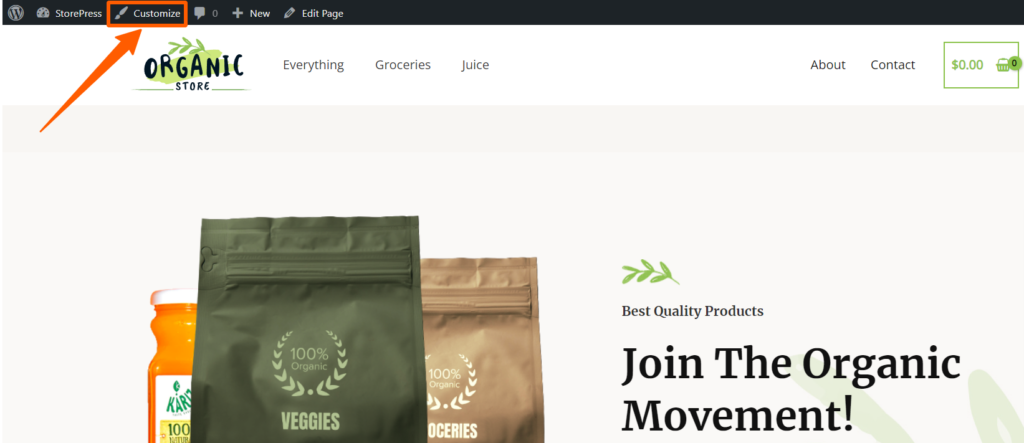
Step 1: Navigate to your website and click on the Customizer option located at the top of the page. This will open the WordPress Customizer, where you can make changes to your WooCommerce shop page in real-time.
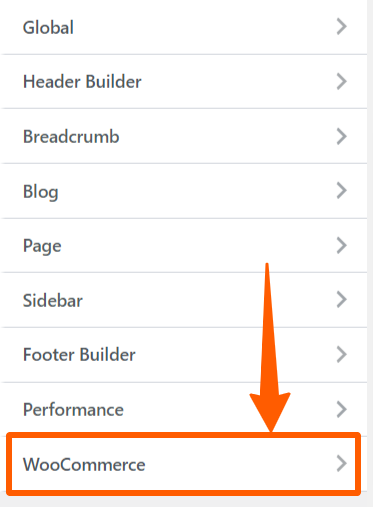
Step 2: Once the Customizer opens on the left side of your screen, scroll down until you find the WooCommerce section. Click on it to access customization options specifically for your WooCommerce shop page.
Step 3: In the WooCommerce customization section, you’ll see various options to tweak your store’s design and layout. Feel free to explore them, but for now, click on Product Catalog to start customizing how your products are displayed on the shop page.

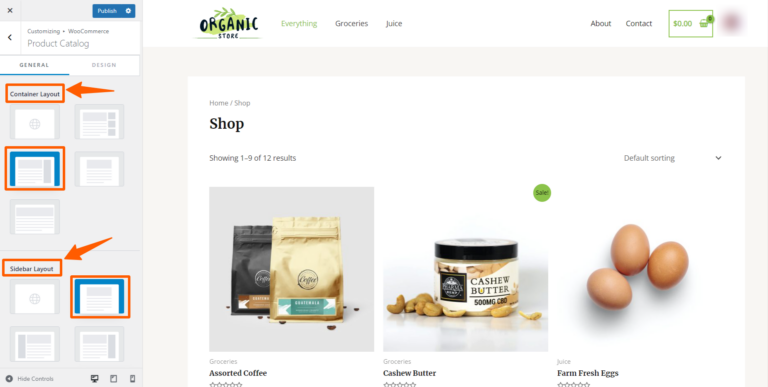
Step 4: Choose a Container Layout that fits your store’s design. There are multiple options available, so pick the one that suits your needs best. Additionally, you can decide on the Sidebar Layout—whether you want a sidebar or a full-width display. For this tutorial, we’re going with a sidebarless layout to keep things clean and minimal.
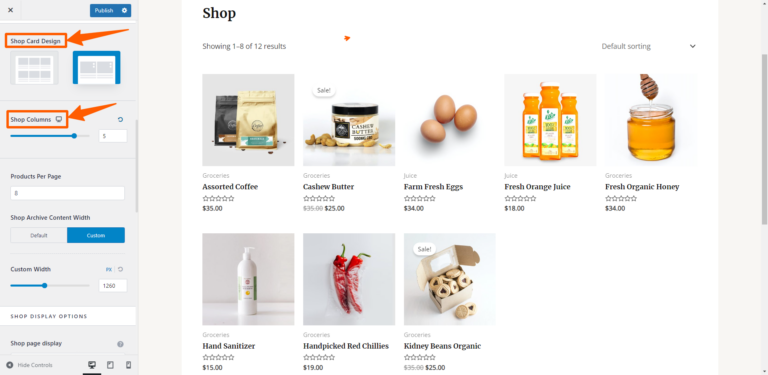
Step 5: Scroll down to explore more customization options for your shop page. Here, you can set the number of columns to display your products in and decide how many products should appear per page. Adjust these settings based on your store’s layout and user experience preferences to create a seamless shopping experience for your customers.
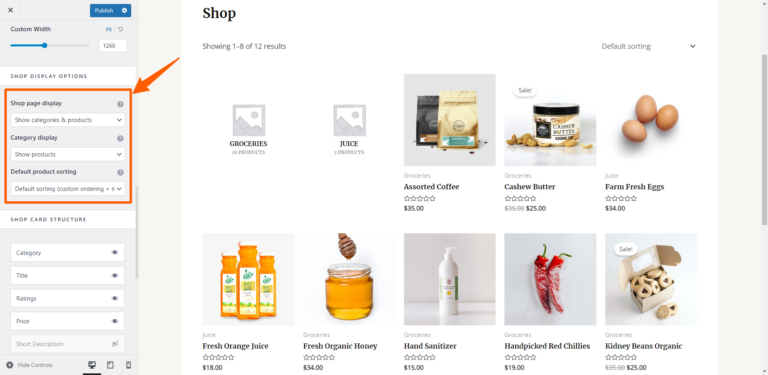
Step 6: Scroll further to find additional customization options. In this section, we’ve chosen to display both categories and products together on the shop page. This setup allows customers to easily navigate through different product categories while browsing your offerings, creating a more organized and user-friendly experience.
Step 7: Once you’ve made all the customizations, it’s time to publish your changes. Simply click the Publish button at the top left to make your updated shop page live!
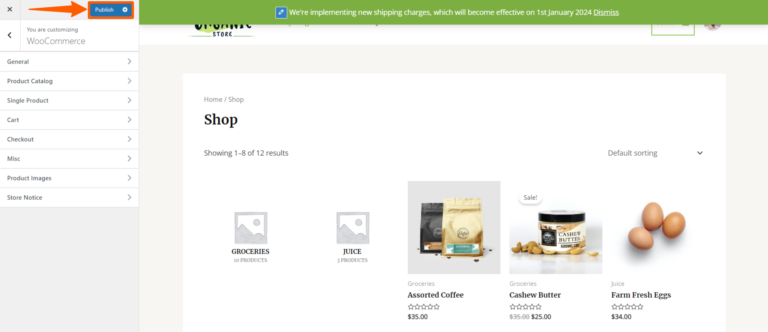
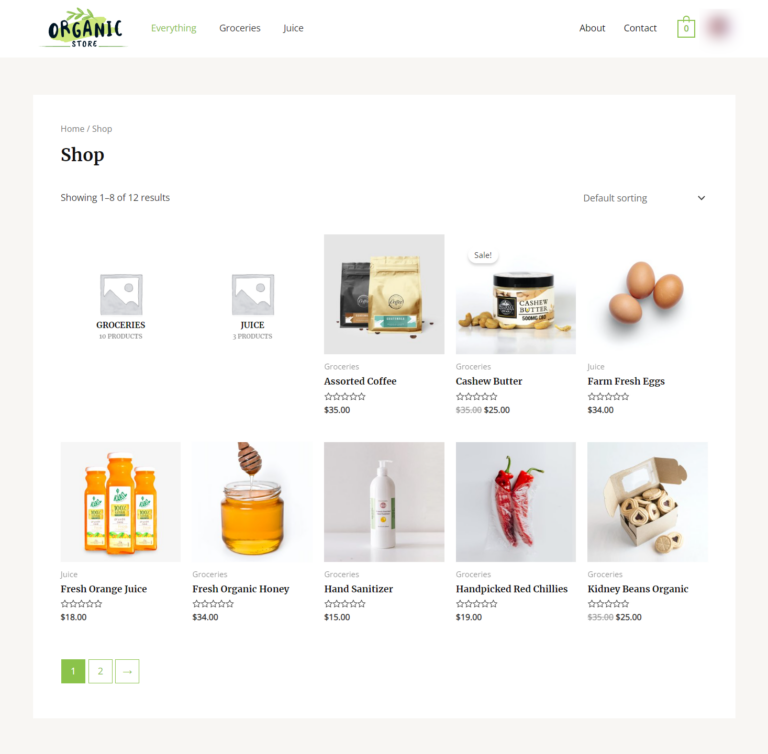
Preview
This is the new customized look of our WooCommerce Shop page. We’ve customized it according to our choice, and the customers’ intent. We recommend you customize your Shop according to yours.
How to Add Store Notice in the WooCommerce Store
Step 1: Visit your website and click on the Customizer option at the top of the page to start customizing your shop.

Step 2: The customizer will appear on the left side of the page. Scroll down, find, and click on the WooCommerce section to access your shop settings.

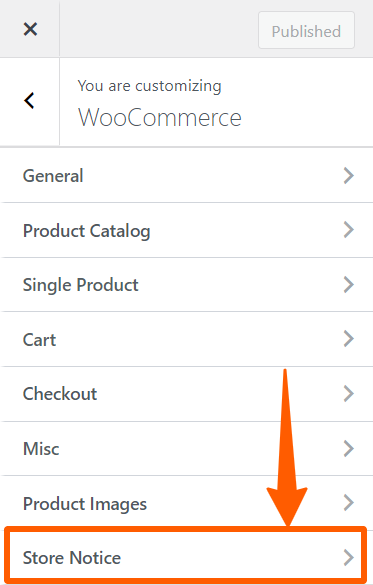
Step 3: First, let’s add a store notice for demonstration purposes. Scroll down, find the Store Notice section, and click on it to customize the message.
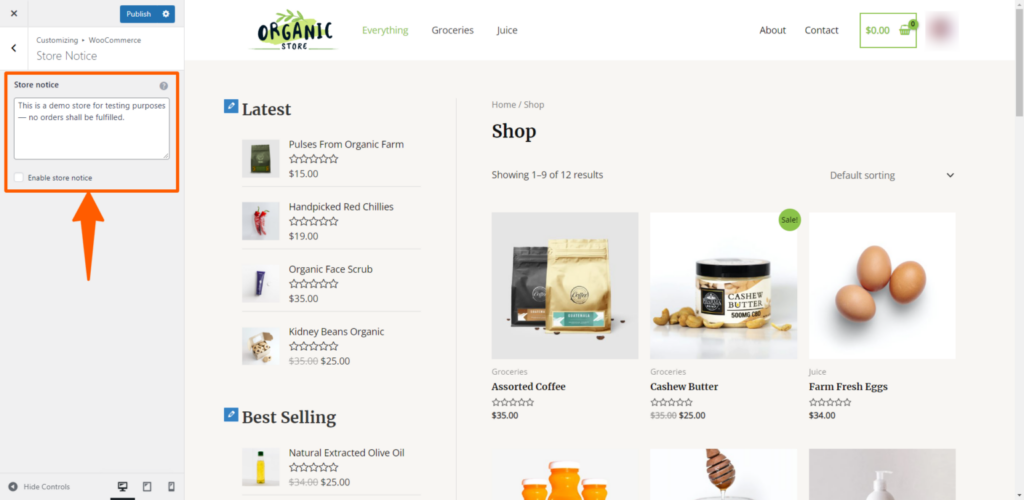
Step 4: Next, enable the store notice by clicking the checkbox. You can now customize the notice text that will appear at the top of your shop page to grab your visitors’ attention quickly.
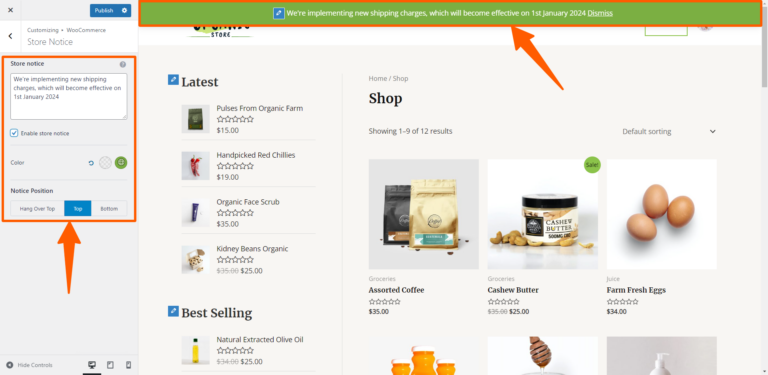
Step 5: Once you’ve added your store notice, it will appear as shown. You can also customize the text and background colors to match your branding. After finalizing your changes, click the Publish button at the top right to make your updates live.
Conclusion
You might notice some variations depending on the theme you’re using. While we’ve demonstrated using a popular theme, you can apply these steps to any theme you choose. However, we recommend trying Beetan, a multipurpose WooCommerce-ready theme designed specifically for eCommerce. Don’t worry, the process is similar across most themes.
We hope you’ve successfully customized your WooCommerce shop page! Since each page is unique, feel free to share yours with us. If you run into any challenges along the way, just drop a comment or reach out to us, and we’ll be happy to assist you.